Twisting wires is prohibited by the pros!
Not long ago, at one site in Minsk, I saw electricians who were twisting wires and smearing them into the walls. To my remark, they made excuses that they do everything that way. It turned out that the guys came from the region, and for them this method of connection is common practice - cheap and fast. For such “masters” I would like to remind you that twisting wires and leaving them like that is... IT IS FORBIDDEN!
According to technical standards in Belarus, regular Twisting in electrical wiring is prohibited :
Indeed, the PUE does not allow the use of twisting to connect wires. However, copper twist, if made professional craftsman, can easily hold a load of 16 A, without any negative consequences. If the load is greater, the contact will deteriorate and burn out over time.
There is another interesting paradox: despite the fact that twisting is strongly criticized, all the burned twists that I have seen were performed not professional. Most of them were aluminum. Aluminum is generally a very capricious conductor; it behaves poorly in any connection and requires special attention. But even such twists can cope with everyday loads in apartments.
However, despite this, twists are evil. Why?
Firstly, they have a high contact resistance and secondly, they are very sensitive to pulse currents. In addition, not everyone knows how to do twists correctly.
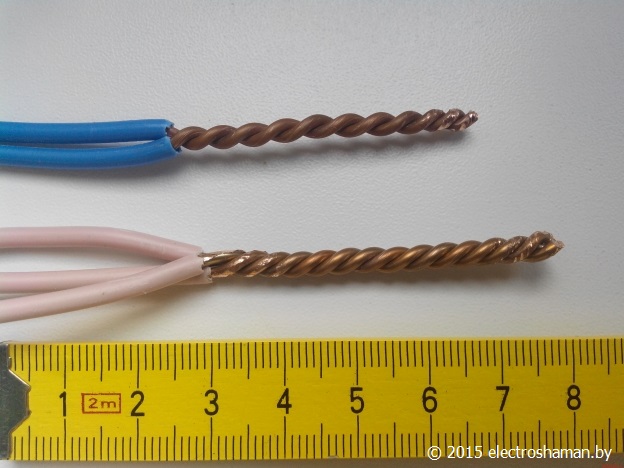
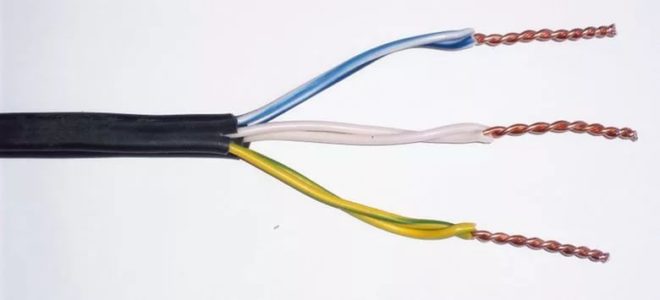
What should the twist be? The correct twist should be 3-5 cm long (depending on the cross-section and number of strands - the thicker and larger, the longer), twisted tightly but “without wings”.
Typical mistakes when twisting:
In the photo I tried to imitate the incorrect wire connections that I encountered in apartment wiring:
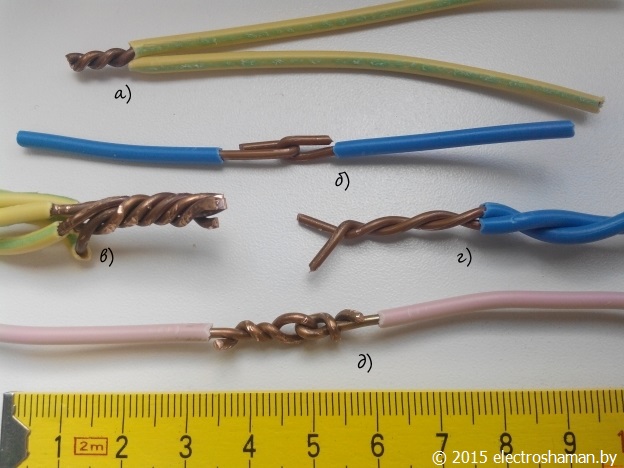
- Option A)- insufficient twist length.
- Options b) And d)- these are not twists at all, but one of the most favorite connections of homemade “crazy people”.
- Options V) And G)- untwisted and poorly twisted twists.
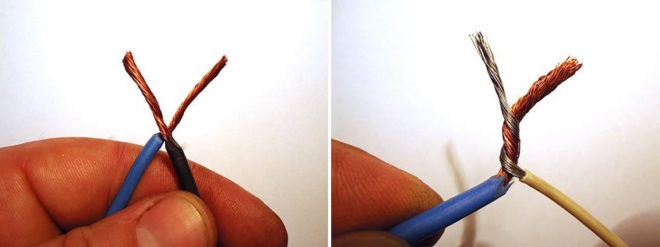
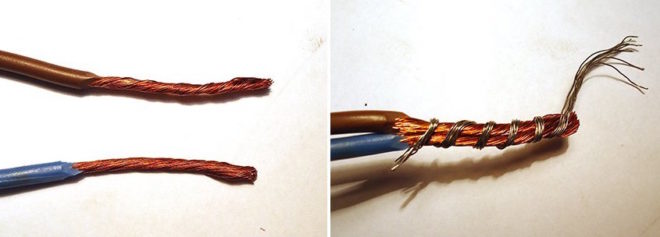
Another of the most common types of connections is twisting an aluminum core with a copper one:
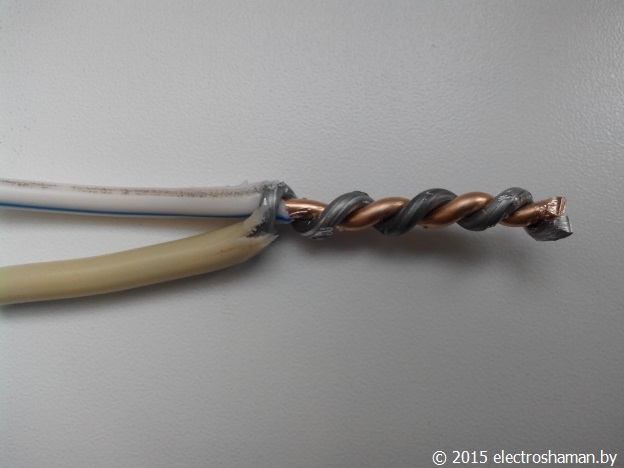
and connection of a mono core and a stranded wire:

All this is an example bad connections. Use such connections in electrical wiring - IT IS FORBIDDEN!
Where can you use TWISTING WIRES?
I use regular wire twisting only as a temporary connection or as a preparatory operation for other types of connections (for example, welding or soldering).
Resume: Twisting is bad! Use reliable types of connections: welding, crimping, 3M clamps.
This article has a somewhat provocative title. I am sure that there will immediately be people who will write instructively, saying that twisting is illegal and according to the PUE, twisting of wires is prohibited.
Nobody argues with this. If it were not for the fact that, despite everything that is written in the PUE, the vast majority of wire connections in the territory of the former large Soviet country are still made using twisted cables.
I won't say that it's very good twist of wires- this is the most reliable and quality way connections of wires, although they are constantly trying to prove this to me. It seems that someone even took a measurement and compared the voltage drop on the twist and on the whole piece of wire, so it turned out to be less on the twist. Perhaps this is something from the realm of mythology among electricians. We will simply proceed from the point that good twisting can be called one of the stages and very important element methods of connecting wires, such as soldering or welding.
Before discussing further about correct twisting, let's dwell on what will happen if the wires are connected just like that, without technology, “as it happens.” In this case, it occurs at the point of contact of the two wires. There are two reasons for this - a decrease in the cross-sectional area of the wire at the point of contact (mainly due to microprotrusions during connection) and the presence of an oxide film on the wire cores.
 Oxide film- the result of the interaction of the atoms of the metal that makes up the core with oxygen in the air. This oxide film has a very decent resistivity. The oxide film is absent only in noble metals - gold, platinum, etc. (that’s why they are “noble” because they do not react with anyone). In silver, the resistivity of the oxide film is the same as that of the metal itself, therefore silver is actively used in contacts of various electrical devices.
When the wire is heated by a current passing through it, the transition contact resistance increases even more, because The heat generated is not completely dissipated into environment, and also heats up the wire itself, including the twist.
As a result, all this can lead to an avalanche-like process, when the twisting area heats up more and more. Here you have one of the causes of fires due to so-called “faults in electrical wiring.”
I came across one case where an aluminum strand at a neighbor’s dacha lasted only one day. The reason for this is not only the presence of poor-quality twisting, but also the material of the conductive core of the wire itself. It was already written on the site.
The most interesting thing about this is that no circuit breakers or fuses in the electrical panel will help in any way in this case, because they respond to an increase in current in the circuit. In our case, the current does not change, it simply heats up the contact point of the two wires more and more.
Based on this, we can conclude that good twisting of wires is necessary, first of all, so that the transient contact resistance always remains stable and does not change over time.
So, what do you need to make a good wire twist?
First, you need to remove the insulation without damaging the wire cores. We clean the exposed area of the core from dirt with a clean rag soaked in acetone or white spirit. Then we clean the wires with a wire brush or sandpaper until they have a metallic shine.
Next, we twist the stripped wires with two pliers. To do this, we bend the ends of the cores at an angle of 90° at a distance equal to 7-10 core diameters from the insulation cut, and bring them behind each other. Using pliers we wind 5-7 turns of one core onto another.
We wind 5-7 turns of another core and seal the connection with pliers, i.e. Using two pliers, we tighten the turns of the cores in opposite directions. Then we bend the ends of the wires tightly.
In order to make a branch, it is necessary to wind 10-15 turns of the branch core around the main core. Seal the branch with two pliers, tightening the turns of the core by moving them in opposite directions. Then bend the end of the branch strand tightly. After all these operations, the twisting will be mechanically strong and reliable.
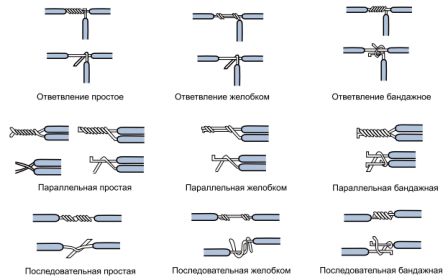
There are many other ways to connect wires by twisting. All these methods are even given characteristic names.
For example, here are the methods shown in one famous book for young electricians:
The option that I described in this article, using two pliers, has been tested in practice and has never failed me.
After creating a high-quality twist, the wires can be soldered (little used due to labor intensity), welded (in one of the articles on the site it was once proven that).
Good twisting is needed, for example, for a more modern and less time-consuming method of connecting wires - when using heat shrink tube, which is a good alternative to electrical tape.
By appearance it is similar to a regular cambric, which is put on the twist with a margin in both directions. Then the heat-shrink tube heats up (you can use a regular lighter for this, but it is better to use an electric hair dryer), tightly wraps around the cable and reliably insulates it.
Do the twists right!
If you have your favorite options for connecting wires, share and tell us about it in the comments to the article!
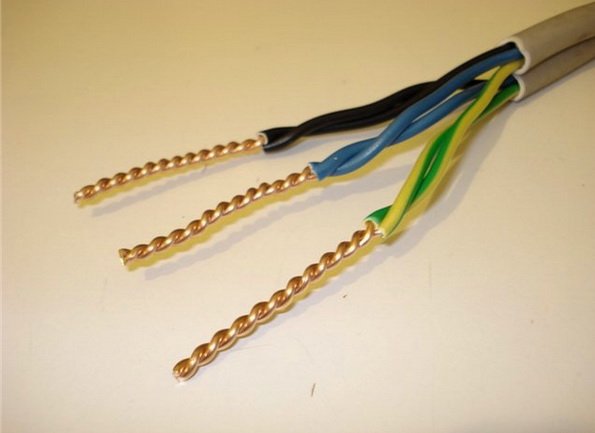
It is impossible to imagine electrical installation work without making connections of wires and cables. But you don’t always come across conductors of the same type. Sometimes it is necessary to connect flexible wire nick with hard. Connecting wires of equal flexibility usually does not cause problems, but not everyone knows how to properly connect a stranded wire to a single-core wire.
Flexible conductors consist of a bundle of thin wires, the main advantage of which is to withstand repeated deformation without damage. In addition, they bend more easily than mono-core wires. These properties allow them to be used in the following devices or units:
- extension cords and portable lights;
- terminals of electrical devices for connecting them to the network (electric motors, sensors, lamps);
- connecting control buttons, light bulbs, measuring instruments located on the doors of control panels or cabinets.
For installation complex devices control and automation systems use flexible conductors, placing them in perforated cable channels. Such a bundle of wires is more compact and easier to fit into any cavity, in contrast to rigid wires that resist bending.
Electrical wiring in apartments or private houses is carried out using cables with single-core conductors. When connecting devices with flexible leads to them, it is important to make the connection correctly in order to avoid heating and destruction in the future. There are several ways to connect single-core and stranded wires.
Solder connection
Correctly and efficiently performed soldering is one of the most reliable connections. But it requires a soldering iron, the ability to connect it, as well as solder, soldering oil or rosin. The use of fluxes based on acids and alkalis for soldering electrical products is prohibited, and rosin is given greater preference than solder fat. The latter leaves marks at the junction that are not so easy to remove.
Before soldering, the surfaces to be joined must be cleaned of dirt and oxides. On some wires due to their improper storage or old age, a plaque forms that prevents soldering. On a single-core wire it can be scraped off with a knife, but with multi-core wires the situation is more complicated. It will take longer to clean them, turning them under different angles and trying to clean it as shiny as possible lived longer. But most likely such a wire cannot be soldered with rosin; you will have to use soldering oil.
The connection can be made in two ways. The first, the most preferable: a stranded conductor is wound turn by turn onto a single-core one, and the edge of the latter is bent so that it captures the conductors wound on it. The resulting loop is crimped with pliers so as to press the turns without squeezing them. The future connection is wetted with heated rosin, applied with a soldering iron or by immersion in it with heat. Then solder is applied with a soldering iron until the wires to be connected are completely covered on all sides. There should be no excess solder left in the soldering area.
The connection turns out to be permanent; if necessary, the soldering will have to be cut out and done again, but the conductors will be shorter. To create a connection that can be disassembled later using the same soldering iron, use the second method.
Both conductors are tinned before connection: covered with a thin layer of solder using rosin or soldering fat. Before tinning, the strands of the flexible wire are twisted into a spiral as tightly as possible so that they do not splay out in the future. Then the wires are applied parallel to each other and soldered.
The soldering area then needs to be insulated. The most best results obtained by using heat-shrinkable tubes.
Using connection sleeves
This is another way to create a permanent connection. The connecting sleeve is a tinned tube into which wires are inserted on both sides. Then, using a special tool, the tube is crimped and secures the wires, creating a high-quality connection.
Sleeves are produced that are coated on the outside with insulating material and crimp not only the wires, but also their insulation, creating a completely safe connection.
This method is mainly used to connect stranded wires, single-core ones are not crimped into the sleeve as efficiently. In addition, for crimping you need to purchase special tool, sleeves. Conductors different sections It will not be possible to connect correctly this way.
The advantage of using this method is the speed of connection, which is much greater compared to soldering.
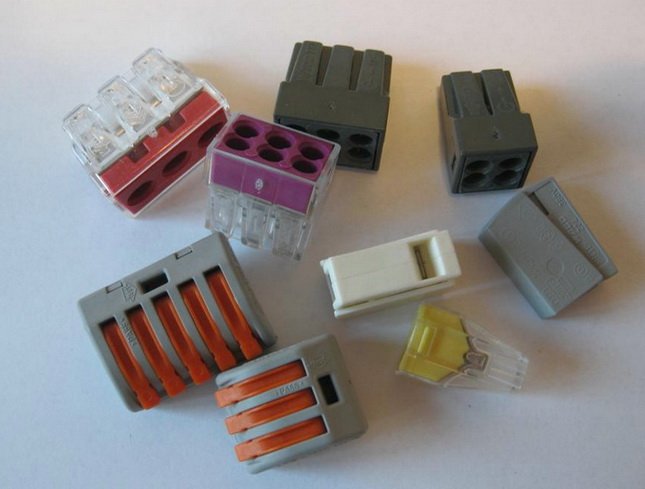
Using terminal connections
All the connections described above have one common drawback: they are permanent. But in the process of troubleshooting or troubleshooting electrical wiring, it becomes necessary to disconnect sections or specific consumers. One way to solve this problem is to use terminals.
The simplest, cheapest and most accessible terminal is a plastic block with a tube inside into which two screws are screwed in to secure the wires (ZVI, for example). But such a terminal has more disadvantages than advantages. The screws, due to their small diameter, can easily crush the wire if they are tightened too much. How else to reliably connect the wires if you don’t tighten the terminal? The use of such terminals for switching aluminum wires is not recommended. Before connecting, it is advisable to tin the flexible conductors or press tips onto them.
More acceptable results are obtained when using WAGO terminals. But even in this case, the flexible wires are tinned before connecting, otherwise they cannot be inserted into the terminal.
In some cases, it may be appropriate to use feed-through terminal blocks mounted on a DIN rail. This is possible if the connection is made in an electrical panel or plastic box if there is free space on the rail.
But you cannot connect a flexible wire to any of the terminals without tinning or crimping the tip.
Application of tips
For termination of flexible conductors are used various products. Their main task is to make the output monolithic, so that the cores do not spread out to the sides and are not pinched when connected. One of the tips suitable for this purpose is an insulated pin bushing (NSVI), similar to a connecting sleeve. There are a number of products that are pressed onto the end of the wire and contain elements for connection under a terminal, screw or detachable connection similar to a car terminal. Here short list products manufactured by KVT for these purposes:
| Tip type | Explanation of the designation | Conductor diameters, mm 2 | Appearance | Purpose |
| NSHVI | Insulated pin sleeve lug | 0,25-50,0 | 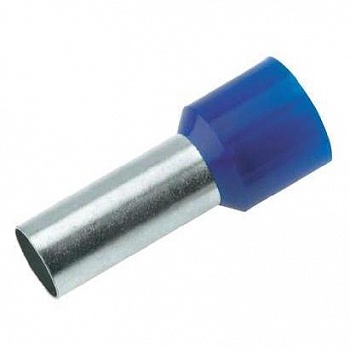 | Connecting wires to the terminals and terminals of electrical devices |
| NKI | Round insulated tip | 0,5-6,0 | 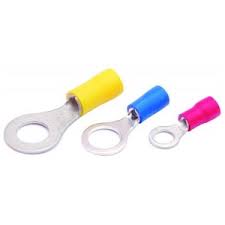 | Connecting wires with a screw |
| NVI | Insulated fork tip | 0,5-6,0 | 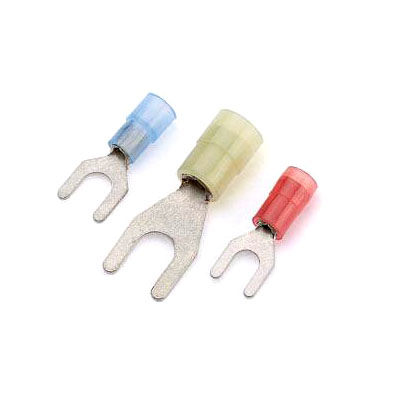 | Connection of wires with a screw with the possibility of quick disconnection |
| NSHKI | Pin lug round insulated | 0,5-6,0 |  | |
| NSHPI | Flat pin lug insulated | 0,5-6,0 | Connecting wires to electrical device terminals, busbars and terminals | |
| RpIp, RpIm, RppIm, RpIo, RshIp, RshIm | Isolated connectors | 0,5-6,0 | 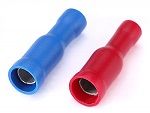 | Creation quick couplings various configurations |
The same products are produced by other manufacturers: IEK, DKC, Phoenix Contact.
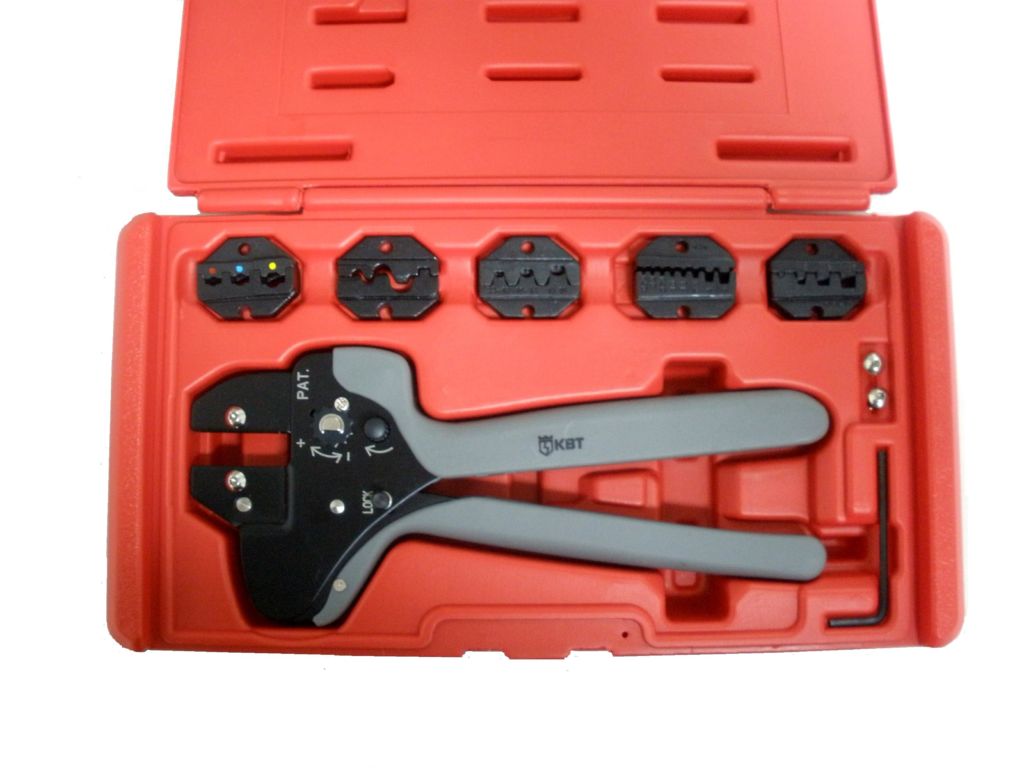
To install the tips, press jaws with replaceable attachments are used, for example, CTF from KVT.
We will not prove to you that twisting wires is good way connections. Yes, it can be done well and insulated. It is also perfect as a temporary option. But according to the rules of electrical installations (PUE) in order to connect a wire or cable, ordinary twists are not recommended. Nevertheless, we will talk about it, and in very detail. Firstly, because, contrary to the PUE, most connections are made using this ancient “old-fashioned” method. Secondly, because correct twisting is the main stage of the most reliable ways wire connections - welding and soldering.
Why do you need a good twist?
Imagine that the two wires being connected are twisted together just how. Those who are familiar with electrical engineering know that transition resistance occurs at the point of contact of two conductors. Its value depends on two factors:
- surface area at the point of contact;
- the presence of an oxide film on the conductors.
To perform twisting, the core is exposed, the metal interacts with oxygen in the air, as a result of which the surface of the conductor is covered with an oxide film, which has a decent resistivity value.

An example of poorly executed twisting: the twisting area heats up and the insulation melts
Accordingly, if the twisting is performed poorly, the contact resistance increases, which in turn, when passing electric current through the junction will cause heating. As a result, the twisted area may become so hot that the electrical wiring may catch fire. Surely everyone has heard the phrase in their life that a fire occurred due to a fault in the electrical network.
To prevent this from happening, contact connection wires must be as durable, reliable and safe as possible. That is, the twisting must be performed so well that the contact resistance is stable and does not change over time.
Preparing wires for twisting
Remember! Never twist under tension, even if you have a tool with insulated handles and dielectric gloves. First, turn off the power workplace by turning off the input machine for the apartment or house.
To get a good twist, you need to follow these steps exactly:
- Strip the connected conductors from insulation, while avoiding damage metal surfaces conductors.
- Soak a clean cloth in white spirit or acetone and wipe the exposed areas of the wires to remove any dirt.
- Now, using sandpaper, sand the wires to a metallic shine.
Stranded wires
Twisting of stranded electrical wires can be done in different ways.
Parallel twist
The simplest method is parallel twisting, when both stripped wires are placed crosswise on top of each other at the place where the insulation was stripped and twisted at the same time. Such a connection provides reliable contact, but it will poorly tolerate the applied tensile force and vibration.
This method is best used for copper wires, when one of them is monolithic and the other is multi-core. A monolithic wire needs to be stripped of insulation a little more than a stranded wire. After twisting, an additional bend is made from the remaining copper monolithic tail in the direction of twisting, due to this the connection is more reliable. This method is also suitable for twisting aluminum conductors with different cross-sections.
Another advantage of parallel twisting is that it can be used to connect more than two wires at the same time.
Serial twisting
With the sequential method, each connected wire is wound onto another. The reliability and contact of such a connection will be optimal, but this twist can only be used for two wires, no more.

Place the stripped wires crosswise on top of each other approximately in the middle of the exposed area and begin to twist. One wire goes around another wire, and wrap the second wire around the first in the same way.
Bandage twist
Stranded wires can be connected together using the bandage twist method. In this case, the connected conductors are stripped to the same length and applied parallel to each other. In this position, they are fixed with a third wire, which is tightly wound onto the bare surface of the connected conductors.
Please note that using such twisting you can connect hard stranded wires, but you must use a soft (flexible) wire as a fixing wire. The tighter you wind the fixing wire, the more reliable the contact connection will be.
More than two conductors can be connected using bandage twisting.
Solid wires
All of the methods discussed above for twisting multi-core wires can also be used for single-core wires. But it is best in this case to use a parallel connection.
Remember the most important thing, before connecting single-core wires, insulating layer they should only be stripped along the conductor at an angle. This is especially true for aluminum conductors. If you run a knife at a 90 degree angle around the conductor, the insulation will, of course, be removed. But in further work with the slightest movements at the place of the cut, the conductor will eventually bend and, ultimately, the core will break.
Strip the insulating layer by 3-4 cm on the wires to be connected. Place the wires on top of each other at an angle of 45 degrees, but not in the area of the bare wires, but 1.5-2 cm above the place where the insulation was cut. Hold this place firmly with your left hand, and with your right hand begin to twist both wires. First, they will be twisted together with the insulating layer, then the connection of purely bare conductors will begin.
No matter how strong your hands are, be sure to finish twisting with pliers at the end, especially when it comes to aluminum wires.
Another important advice! After you make the twist, do not rush to insulate it. Give electrical circuit work for several hours, then turn off the input machine for the apartment and check the temperature at the place of twisting. If the node is hot, it means that the contact connection is unreliable and it is better to redo it. If no heating is detected, then the twisting is done well and can insulate it.
If necessary large number twists, you can use a screwdriver with a homemade device, as shown in the video below:
Methods for insulating twists
Twisting the wires is half the battle; it is very important to properly insulate this place. There are three ways to insulate a completed electrical assembly: using insulating tape, heat-shrinkable tubing, and PPE caps. Let's look at each of them in more detail.
Insulating tape
Insulating tape is a special material whose main purpose is to insulate the joint electrical cables and wires. Whatever appears modern technologies, you can hardly meet an electrician who doesn’t have a roll of electrical tape in his pocket. This is the most common and inexpensive insulating material.
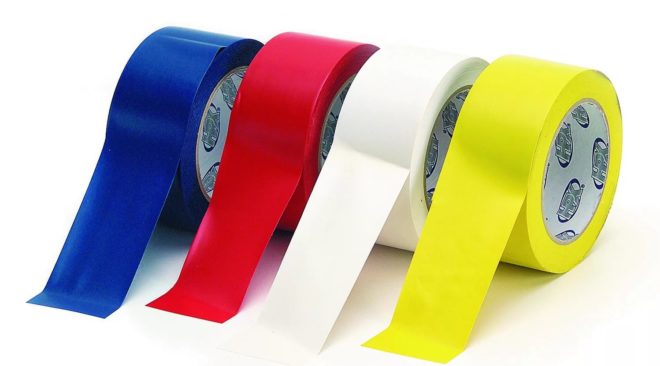
There are many varieties of it. Tapes are made from mica and fiberglass, polyester and epoxy films, acetate fabric and paper. To insulate twists in a household electrical network, we recommend using PVC tape (it is based on polyvinyl chloride). To make it, take a polyvinyl chloride film and apply glue on top. The quality of the insulating tape itself, and, accordingly, the reliability of the insulated joint depends on the quality of these two components.
The best insulating tape is considered to be the one made using rubber-based glue and PVC film class A. This material is distinguished by such positive qualities, How:
- High adhesion (adhesion of dissimilar surfaces).
- Increased elasticity (excellent stretch and adhesiveness).
So be sure to keep this in mind when purchasing duct tape.

The insulating tape should be wrapped around the twisted section in at least two layers. Start winding 2-3 cm above the bare twist, the tape should be placed on top of the wire insulation. This will allow you to achieve maximum tightness and insulating reliability, and will protect the contact connection from moisture. Next, wind it a little at an angle, moving towards the end of the twist. Having reached the end, bend the electrical tape around the tip of the twist and continue winding now in reverse side. Having reached the place where you started winding, cut insulating tape with a knife. For efficiency, you can repeat the same thing again and make four layers of insulation.
Thermal tube
Heat-shrinkable tube (abbreviated as HERE) is made of thermopolymer materials that have the property of being exposed to hot air, water or elevated temperature change its geometric shape and size (shrink or expand).
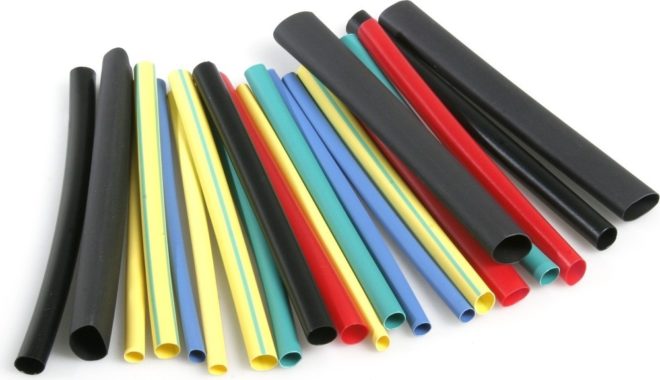
The main advantage of thermal tubes is that they can be attached to objects with complex profile, which is exactly what twisting wires does. Heat-shrinkable tubing provides excellent electrical insulation and protects against mechanical damage. The tubes are released different diameters. The material from which they are made does not support combustion and is non-toxic.
Industrial hair dryers are used to apply heat to the tubes. This tool is not cheap and it is not economically profitable to buy it just to insulate the spliced wires. Therefore in living conditions often use an ordinary hair dryer or lighter.
It is important to remember that with this method of insulation, heat-shrinkable tube must be put on one wire to be connected in advance (before twisting).
Cut the tube with a margin; when it is put on the bare area, it should extend onto the insulating layer of the conductor by at least 1 cm.
When the twisted connection of the electrical wires is completed, pull the tube over this place. Direct the heat jet of a hairdryer or the flame of a lighter at it; under the influence of hot air, the tube will instantly decrease in size and tightly seal the insulated area. Reliable, fast and inexpensive way.
Keep in mind that the connected wires, which are insulated with a heat pipe, can be used for laying in the ground or when immersed in water. Given insulating material It is recommended for use outdoors, in baths and bathrooms, as it will reliably protect the twisting area from moisture.
How to choose to use heat shrink tube shown in this video:
PPE caps
When installing wiring in an apartment or house, you can use PPE caps (connecting insulating clamp) to insulate the connection points.

In this case, it is enough to make only high-quality twisting, without soldering. The tip must be cut off and put on with PPE force; the crimp springs inside the cap will expand and tightly grasp the unit being connected. To better fit the connection surface, rotate the cap clockwise.
Now you know how to twist wires correctly and what material is best to choose for insulating the connection point. From the article it is clear that to perform twisting it is not at all necessary to be professional electrician, such work can be done by anyone who knows how to hold pliers in their hands. Just don’t forget that twisting is only important stage, which must be completed by welding or soldering.
It is important to connect the wires correctly! At the junction it should not increase over time electrical resistance. And the main thing here is “over time.” If the connection looks “decent” now, what will happen to it after a significant service life?
Next, check out how you can twist wires so that they don’t age. How wire clamps are used, what you need to consider when installing electrical wiring. This article may be useful to “all electrical wiring enthusiasts,” including professionals.
Twisting wires - how to do it
To perform quality electrical connection must be observed during installation certain rules and conditions. Let us consider, further, what lies behind this “general” phrase.What needs to be done to ensure that the twisting of conductors is of high quality and durable without a deadline.
Twisting is done with a certain amount of force using pliers so that the metal is slightly stretched. And its clutch appeared in tension. It is clear that the quality of twisting will depend entirely on the skill of the performer - everything is set manually.
But if the twist is done correctly (with some experience in performing it), then it becomes a “wonderful excellent connection.”
The twist of bare conductors must be at least 4 cm long for a 2.5 mm2 conductor. and less. A little longer it is possible, but not too much, so that there is no unnecessary waste of materials.
- To create twisting, the ends of conductors with a length of 5 cm are exposed.
- A pair of twisted conductors are held side by side with one pair of pliers.
- The initial twisting of the two exposed ends is done using the fingers of the hand (usually).
- The final stage of twisting is with the second pliers until some tension is obtained.
- The ends that are not wrapped must be bitten off with pliers.
This is called “making a twist” - you get a reliable, non-separable connection of wires.
Wire twist insulation
For copper conductors, the first thing to do before twisting is to check that the conductors have not oxidized. Copper oxides have increased electrical resistance and the connection will not work properly with them. Only shiny copper without oxide (not darkened) is allowed for twisting.Electrical tape is usually used to insulate the twist. How to wrap a twist with electrical tape - let's skip the detailed stories, one word - high quality! 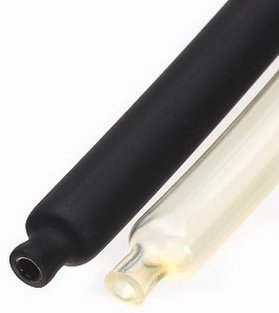
But... to really guarantee that the contacts of the twisted wires will be absolutely durable, you can use a heat-shrinkable tube with an adhesive layer (required).
The tube is put on so that it extends about 2 centimeters into the insulation, heated with a hairdryer, glue should flow from both ends of the tube. As a result, the connection becomes completely isolated from oxygen and moisture in the air, and oxidation of the conductors becomes no longer possible.
With such insulation, there is no need to weld the ends.

Unacceptable actions
Twisting between an aluminum and copper conductor is nonsense, this is well known. The galvanic reaction between the copper and aluminum destroys the bond.But here’s the nuance - if the twist of these conductors is isolated from the air in the manner described above, then the reaction between the metals stops. And the connection becomes durable.
The reaction between aluminum and copper is impossible without the presence of water.
Of course, this should not be done, since it is impossible to give a guarantee for this insulation, but, nevertheless, for your information, what can you do in a “hopeless” situation.
By the way, you can check out -
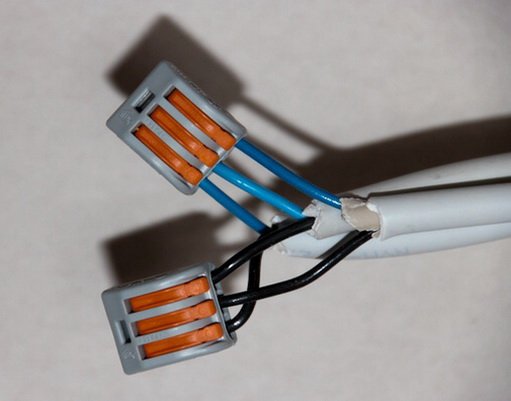
Connecting wires with a clamp
Wago clamp - connecting wires takes much less time compared to twisting.Wago clamps. differ in the type of material being connected - clamps only for copper and universal clamps for copper and aluminum.
The Vago clamp inside the case contains technical petroleum jelly, which isolates the contact point from the effects of water vapor and oxygen.
To make a connection, the insulation is stripped to a length of 12 mm and no more. Otherwise, the bare conductor will simply stick out from the Wago clamp. Professionals use high-quality tools to remove insulation and remove exactly 12 cm with one movement of the hand.
But at the everyday level you will have to “suffer”, but still achieve the specified length. After insertion into the clamp, the insulation will also be covered with a layer of technical petroleum jelly - a condition for the connection to be of high quality. The copper will not be exposed to oxygen.
By and large, the connection with the Vago clamp is non-separable. When the wires are pulled out, some of the lubricant is also removed. The new wires will not be hermetically connected.
If an error is detected in the installation and the connection needs to be re-wired, the conductors are cut off at the clamp, the clamp itself is thrown away, and the insulation is stripped with a new one (12 mm (!)). The conductor is inserted into the new clamp.
Another review article -
Is the connection using the Vago clamp good?
Please note that Vago clamps come in different types- for single-core and multi-core wires. Network installation is usually carried out single-core wire. It is cheaper and there is no danger of individual hairs burning out if damaged.Therefore, it is important to use clamps according to their intended purpose. For example, for Vago, information about what it is intended for is indicated right on top of the packaging box.
You can hear the opinion of electricians that connections in this way cannot withstand the loads.
But manufacturers give very serious technical specifications on Vago - 24 amperes and 400 volts of voltage. These clamps really can withstand this kind of load. But nothing more!
If the network uses clamps (24A), then circuit breaker should be designed for a lower current - 20 A.
Thus, if you use Wago clamps in accordance with their intended purpose and follow the installation rules, then there should be no problems. We will get an excellent and most importantly durable permanent connection.
The question remains - what to use - twisting or clamps?
Keep in mind that if you redo the twisting, much more wire is consumed than for the Vago clamp, and this reserve must be provided in the box in case of rewiring. In general, twisting is more complex and requires more labor. But you can use twisting and Vago clamps without problems, if correct use connections are obtained with equal reliability.