Everyone is thinking about drilling a well on their property larger number of people.
Everyone can quickly make a well at their dacha, independently and correctly, both with a pump and manually.
But this process is complex, as it is often performed using special equipment and requires knowledge and compliance with certain nuances.
There are several reasons for installing a well on your site:
- Own water source at the dacha.
- Independence from utilities.
- Access to water 24/7.
- Pure water without chlorine and heavy metals.
- We drilled it ourselves once and for years.
Let's look at the question of how to drill a well with your own hands in all details: types of drilling, nuances and the drilling process itself for practical implementation.
We are not talking about a well, since this is a different type of well, which does not always justify the investment of time and labor.
There are several ways to quickly and correctly drill with your own hands.
Let's look at them in detail so that you understand not only the essence of drilling, but also the options for choosing a method in relation to your dacha.
Shock-rope
A special drilling rig breaks the rock, first rising to a height of 2 meters above ground level. The operating principle is reminiscent of the piston stroke in an engine: rise, strike, rise.
When drilling in this way, it is worth constantly pouring water into the well so that the walls do not crumble, and the rock in the well is softened and easily extracted.
At percussion rope drilling you need a tripod 2 meters high, it stands directly above the drilling site. At the top of the tripod there is a block with the help of which the cable with the drill is pulled up and lowered.
You can easily drill up to 20 meters deep in a day. You can do without a tripod yourself, but you will be physically exhausted. Do not listen to such advice from “home-grown” drillers.
Watch the video: the tripod is very easy to assemble, and its role is invaluable.
Impact-rotational
The method is somewhat similar to the one described above.
The difference lies in the nature of the movement of the drill in the well - it does not just strike, but also rotates.
Soil is removed using a special bucket.
If the soil at the dacha is dense, then it is better to use this type of drilling.
Screw
The most common method that uses an auger is a metal rod with a screw thread along its entire length.
The auger has the advantage: it destroys the soil in the well and then brings it to the surface.
Auger drilling is performed in one of 2 ways:
- 1st – the blades are welded to the auger at an angle of 90 degrees. Disadvantage: the soil will still fall off the drill and will have to be removed separately;
- 2nd – the blades are welded at an angle of up to 70 degrees. No soil will get inside the well when extracting the drill, so this method is more profitable. You just need to have the necessary auger.
Please note that in order to drill a well quickly, correctly and without breakdowns, you need to supply water directly into the well itself, as it reduces the temperature of the drill itself and softens the soil in the well.
As a result, you can always pump it out yourself.
Core
This method is performed using a core bit, which looks like an upside-down empty glass with metal teeth.
When rotating and passing through the earth, the bit forms a well of the required diameter. All collected sludge accumulates in the bit and is then carried to the surface along with it and sand.
It is enough to hit the bit correctly with a mallet a couple of times, and it will immediately empty the entire “reserve” of soil from the bottom of the well. If the soil does not go, pick it with a rod. Only a clean drill can be loaded.
When drilling, water is poured into the bit through a pipe, which softens the soil. The core approach is suitable for any soil.
To summarize: of all types of drilling, auger drilling is less effective, although it is easy to do independently.
The auger is suitable for softer rocks; for hard rocks, only the impact-rope method or the impact-rotary method are used.
Types of wells
There are several types of water wells. Each has its own terms of use.
Well on sand
With a depth of 15 to 30 meters, such a well is drilled using an auger method.
The well in this embodiment is a pipe with a diameter of 10 to 12 cm, at the end of which there is a filter in the form of a perforated pipe wrapped in mesh.
When drilling a well, you need to find a layer of so-called aquifer sand and install a filter. Otherwise, such a layer is called a water lens.
The thicker the lens, the greater the well flow rate - you will get more water per unit of time. The service life of a well reaches up to 20 years; in winter, the well can be mothballed.
Rarely does a well silt up - in this case, it is enough to clean it with either a powerful compressor or an injector. The last option is preferable.
Advantages of a sand well:
- low cost of drilling;
- drilling takes only 1-2 days, even manually;
- can be drilled in hard to reach places, in the country, with small-sized installations;
- the water is not cloudy - not needed a complex system cleaning;
- Well licensing and registration are not required.
There are only two disadvantages: low durability compared to artesian, instability of water level and well flow rate. Water runs out quickly and takes a long time to fill.
At the same time, it is rarely cloudy, but is supplemented with sand - therefore a filter is needed. In a summer cottage, muddy water is only suitable for irrigation.
Artesian well
No filter is used during drilling.
Water accumulates in limestone layers, but it is not cloudy: porous limestone contains water and actively filters it, and its flow rate is up to 10 cubic meters per hour, which is a lot.
The service life of such a well can be tens of years!
Another advantage of such a well is that the water will not contain ammonia, microbes, suspended matter, and will not be covered with sand, so even a simple “Malysh” type pump will cope with the task.
Advantages artesian well:
- a certain depth (the geological map of the area is well studied);
- huge water yield, the water is rarely cloudy;
- durability - 30-40 years;
- constant water level;
- You can install a powerful pump at your dacha.
True, there are also a number of disadvantages: drilling takes up to 7 days (but don’t do it manually!), it is necessary to purify the water in the well from a high concentration of minerals, sometimes it is necessary permitting documentation for drilling.
There is also the familiar well and its Abyssinian variation. We do not consider them, because technically they are not drilled, but dug, and the water in them comes from the ground differently.
There is always a risk of contamination from outside in a well.
Do-it-yourself well drilling
The drilling process consists of 3 stages. After the description follows detailed video process.
Stage 1 – preparatory work:
- We find out from the land committee or from neighbors the depth of the water layer;
- Get ready for machine drilling - it is impractical to work manually in a well at a depth of 20 meters;
- All sources of sewage should be located as far as possible from the place where you will make the well;
- The diameter of the well is always slightly larger diameter casing pipe– 10-12 cm. Prepare the pipes in advance;
- We dig a guide recess in the selected area: a hole with a diameter and depth of 1.5 m. We reinforce its walls with slate, or metal sheets so that it does not get covered with sand.
Stage 2 – assembling the tripod for drilling:
- We take 3 metal pipes or very strong timber, the length of the part should be 4-5 meters;
- We place the structure on the ground so that two legs are turned in one direction, and the third in the opposite direction;
- In each leg you need to make a hole for fasteners;
- We fasten the legs in the shape of a triangular pyramid;
- At the top of the tripod we place a block along which the cable will slide freely;
- We install a mechanical winch, which we will use to move the drill manually (an electric one is possible);
- We secure the cable and attach the drill on top.
The tripod is ready.
Stage 3 – drilling:
- We take a tripod with a winch, a driving glass, a rope (cable) and a shock rod;
- We place a tripod, on top of it - a winch with a projectile over the dug hole, directly above the drilling point;
- We lift the glass with a winch above the drilling point and lower it with force. A tool driven into the ground grabs the soil with a glass. When lifted, the sludge remains inside the glass. We take it out - this should be done after each lift;
- We continue to drive the drill into the ground with the impact rod. When it is full, take it out and shake out the soil;
- When passing a certain step, say 1 meter, we immediately insert a casing pipe whose diameter is slightly larger than the diameter of the drill itself. It prevents the well from collapsing;
- As soon as the auger lowers to the entire length of the projectile, we attach an additional rod to it;
- When drilling, we constantly check the evenness of the laying of the entire column: if you hear the sounds of the drill hitting the pipe walls, the barrel must be straightened immediately. How to do it: drive wooden wedges between the casing and the wall;
- As soon as the projectile passed aquifer, we do not bury the pipe further. After the water arrives, wait 1 hour, then pump it out with a garden pump and check for cleanliness. Repeat this until the water becomes clear;
- We pumped out the water in the improvised well for the last time - leave the well until tomorrow;
- The next day, we measure the flow rate of the well: we multiply the depth of the well in meters by the pump capacity (cubic meters per hour) and divide the result of the product by the difference between the dynamic and static water levels. Static level is the distance to the surface of the water (we lower the load on a rope into the water and measure along the length of the dry part of the rope), dynamic level is the distance from the surface of the earth to the water, but after pumping it out. If the difference between the two levels is small, then the well’s flow rate is very large. This means that more water comes in per unit of time than the pump is able to pump out in the same unit of time. The pump body always indicates its power - cubic meters per hour;
- If the flow rate is several cubic meters, then cover the bottom of the well: fill a layer of gravel or crushed stone, 20-30 cm wide;
- We fill the entire space between the wall and the casing with gravel and sand;
- We immerse a pump in the well (any pump, even a budget “Kid”, will do a great job) according to the manufacturer’s instructions and attach it to the surface, supply power;
- We connect the hose, disassemble the tripod and winch.
Important point! This point is not indicated in the video, but it is significant: it is better to take the first extracted, already clean water to the laboratory so that a series of tests can be performed on it - it may turn out to be completely unsuitable for drinking and contain traces of heavy metals, pathogenic organisms and an increased amount of minerals.
Conclusion
Now you know how to drill a well with your own hands at your dacha.
Pay attention to the process itself: in the video, all the work is done at home using equipment that can be borrowed from neighbors or rented for a couple of days.
After drilling, using a pump, you can organize water supply to any point on the site, even to your house.
Place a simple submersible “Malysh” in the well and it will easily cope with the supply of water in the required volume.
Professional well drilling is a very expensive pleasure. Depending on the method of excavation, the cost of services of specialized companies ranges from 15-50 USD. i.e. for each meter of depth. Note that the task is really not easy, and therefore most owners of dachas and estates turn to specialists for a solution. Hence the purpose of this material is to consider options on how you can drill a well on a site with your own hands without the use of expensive equipment. We will describe available methods, so that you can assess the complexity and scope of work, and then start moving along the chosen path.
How deep is drinking water?
This main question, which is set by the homeowner when organizing the water supply of the home. Only geological exploration can give an accurate answer. summer cottage, held in last years. To make sure of this, it is worth studying the layout of aquifers in the thickness of the earth.
As you can see, the water is located at different horizons, between which lie impenetrable rocks - dense loam, limestone and clay. To determine the appropriate layer, we suggest deciphering the presented diagram a little:
- Closest to the surface lies the water that enters the ground due to precipitation - the so-called perched water. In some places it starts from a depth of 0.4-0.8 m and continues up to 20 m. As a rule, this is dirty and poorly filtered water containing harmful impurities.
- At depths of up to 30 m there are cleaner groundwater, whose reserves are also fed by precipitation. Most home wells are dug precisely to this horizon (its upper limit can be located at a distance of 5-8 m from the surface). Before consumption, this water must be filtered.
- Underground water accumulations located in the sand layer have undergone good natural filtration and are suitable for drinking water supply. If you want to make a well with your own hands, you will need to reach this horizon.
- The purest water is located in limestone voids at a depth of 80-100 m, which is unattainable using artisanal drilling methods. Because the artesian water is under pressure, after drilling a well, the flow independently rises to ground level, or even splashes out.
Note. The boundaries of the perched water and groundwater indicated very conditionally, their depth may vary depending on the terrain and other factors.

Location of the source of autonomous water supply
When we have figured out between which layers a suitable horizon is located, we need to determine the location for the future source of water supply. We will not talk about dubious options such as dowsing with a frame or a slingshot made of vines, but will give a number of simple tips:
- find out everything about your neighbors' wells and boreholes: their depth, water quality and location;
- retreat as far as possible from sources of pollution - septic tanks, street toilets and barnyards;
- Please note: wells are not drilled at higher elevations; for this it is better to choose a lowland.
In any case, you need to be patient. It is quite likely that you will get it the first time drinking water It won't work and you'll need to try several times.
About drilling technologies
Before we talk about the methods of drilling, we list the types of wells:
- to the water;
- on the sand;
- on limestone (artesian).

A shallow well for water is made in order to reach the upper horizons and organize the supply using a pump. This also includes an Abyssinian borehole well made from a small-diameter pipe. Accordingly, drilling for sand and limestone means going deep to the lower layers, as shown in the diagram above.

This is what auger drilling looks like
There are several technologies for punching narrow vertical channels through the earth:
- Using a drill made in the form of an auger. To reach the required depth, the drill is expanded with new sections as it dives.
- Core drilling. In this case, the main tool is a hollow pipe with a sharp end, into which carbide teeth are welded. During the deepening process, the glass is filled with rock, which is periodically cleaned out.
- Hydraulic method (direct or backwash). The point is that the drill is lowered into the channel along with the casing pipe, and the soil from working area is constantly flushed out by water pressure supplied by the drainage pump.
- The shock-rope method involves driving the same glass and periodically excavating soil to the surface. This uses the impact force from the free fall of a tool placed inside the casing. Typically, the operator manually lifts the glass, tied by a cable to a reel, and then releases it into free flight to the bottom of the well.

Reference. For the passage of loose layers or intermediate water carriers, when an auger or glass falls into the liquid, it is used special device- bailer or drill-spoon. This is a piece of pipe with check valve in the form of a petal or ball, filled with liquid rock with each dive. Then the bailer is raised and cleaned.

Construction of a homemade bailer
In addition to the methods listed above, water wells are drilled using Abyssinian well technology. In short, a pipe with a diameter of 32 mm with a cone at the end is immersed to the groundwater level, which is subsequently pumped out of the well surface pump.

In order to drill a well on a well site with your own hands and not use specialized equipment, you can implement only 2 technologies: shock-rope and Abyssinian well. We will talk about them further.
How to make impact punching
This is the most inexpensive technology, but quite labor-intensive. To work you will need the following devices:
- tripod made of rolled metal with a hook and a block on top;
- winch with a cable equipped with a handle;
- driving tool - glass and bailer;
- welding machine;
- hand drill

Glass for punching soil
Advice. In the presence of welding inverter and the skills to work with it, you can weld these simple devices in your garage. But making homemade devices justified when you need to drill not just one well, but 10 or 20. It’s easier to rent a tripod with a reel.
Before drilling the soil to the required depth, prepare casing pipes. Their diameter should be such that the working tool fits freely inside, but with minimal clearance, and the length should correspond to the height of the tripod. One condition: impact technology is not applicable on rocks or in soils with stone inclusions. To penetrate such horizons, you will need a drill with carbide tips.

Self-drilling a water well is carried out in the following order:
- Make a filter from the first section of the casing by drilling staggered holes Ø8-10 mm in increments of 7-8 cm on a section of pipe 1 meter long. Cover the top of the hole with a stainless mesh secured with rivets.
- Make a leader hole with a hand drill to a depth of 0.5-1 m. Here it is important to correctly position the tool at an angle of 90° to the surface so that the channel is strictly vertical.
- Insert the first section of casing into the hole, adjust the vertical and place the impact tool inside.
- Leaving an assistant to support the casing, lift and release the glass using the reel. When full, remove it and clean out the rock. As the soil is removed, the pipe will begin to take its place and gradually sink into the ground. To speed up the process, attach a couple of heavy weights to it.
- When the edge of the first section drops to the surface of the ground, weld the second section to it, strictly controlling the vertical level. Continue working in the same way until you reach the water layer.

Welding the next section in level
Important point. While going through the high water, you will probably come across slurry that falls out of the iron glass. A mixture of clay and water must be selected from the well using the bailer method, installing it instead of a conventional tool.
When the end of the pipe drops 40-50 cm below the groundwater level, stop punching the channel and proceed to “swinging” the source. To do this, lower the pipe connected to the surface pump to the bottom of the HDPE and pour 2-3 buckets of water into the shaft. Then turn on the unit and let it run for 2 hours, monitoring the cleanliness and water pressure. Last step- arrangement of a well and connecting it to the water supply of the house, as described in. For more details on the drilling process, watch the video:
Abyssinian borehole
Unlike traditional underground canals, the Abyssinian well has a small diameter (no more than 50 mm) and water is pumped out of it by a surface pump, not a submersible one. There is an opinion that, due to the vacuum created, such a well does not silt up, and over time its flow rate only increases due to the forced erosion of soil capillaries. In reality, such statements have no serious basis.
Before making an Abyssinian well, prepare required quantity casing pipes 2-2.5 m long. Since a depth below 15 m is not expected, it is enough to have on hand 6-7 ready-made sections of Ø50 mm plus the first section with a steel cone at the end - a needle. It will play the role of a drilling tool.

Finished needle with mesh
The technology looks like this:
- Make the first section of the casing - the so-called needle. Weld a metal cone to its end, and make holes on the sides and place a mesh, as described in the previous section.
- Dig a small leader hole, insert a needle into it and start driving, keeping it vertical. To do this, you can use the same tripod with a suspended weight or another device.
- As you dive, weld new sections and continue hammering the casing. As you approach the calculated depth, check the appearance of water using a weight on a string.
- Having passed aquifer, lower it into the well polymer pipeline, connected to a hand-held column. Fill it with water and pump the source for 30-60 minutes until clean water comes out. Then proceed with the installation of an autonomous water supply system.

Construction of an Abyssinian well
Advice. When you order the production of a steel cone, keep in mind that its “skirt” should be 3-5 mm wider than the casing pipe, so that when driving it does not tear off the mesh against the walls of the shaft. To make work easier, make the end of the needle as sharp as possible.
U Abyssinian well there is one significant drawback: before drilling it, you need to know exactly what is in this place there is groundwater. Otherwise, you risk burying all the pipes in the ground, since it is not always possible to remove them back. The advantages of the source are ease of execution and minimum consumption materials. If you wish, you can drill a similar well right in your house, as a team of workers demonstrates in the video:
Conclusion
Method impact drilling really suitable in a situation where you need to make a well in your country house on your own. And the Abyssinian well is built using the same technology. To use other methods - auger, core and hydraulic - you need special equipment - a drilling rig, drainage pump and so on. But these options cannot be completely abandoned, despite the high prices, because the composition of the soil and the depth of the water carriers vary. You can’t break through rock by hand and you can’t go to a horizon of more than 50 m.
Drilling a water well may be necessary for owners of areas where there is no running water or a well, or the water in which is not suitable for drinking.
The owners have to choose between an uncomfortable life without water and drilling a well. You will learn how to properly drill a well and get drinking water yourself from this article.
Drilling technology
A water well is a serious hydraulic engineering facility, the efficiency and service life of which depend on the design and adherence to technology.
The first thing you need to do when drilling a hole in the ground for water is to determine the location of the future water source. Drilling begins after the site is laid out.
Space is needed not only for the well itself, but also for the drilling rig and additional mechanisms, so there must be access to the future well. It is necessary to provide a place for draining technical water.
Approximately, to drill a shaft under water, you will need a flat area measuring 40 - 50 square meters.
In order for water transport equipment and a drilling rig to enter it, the width of the entrance gate must be at least 3 meters. No electrical wires should pass over the drilling site.
According to building codes:
- the trunk cannot be drilled closer than 3 meters from the house;
- nothing can be built over it;
- there must be access for equipment.
The technology for drilling a well under water involves three types of work.
Rock destruction - destruction by various mechanisms is most often used.
In industry, rock is destroyed mechanically, thermally or explosively, but when drilling wells under water in individual areas, two latest technologies do not apply.
Excavation - Mechanical and hydraulic methods can be used for this work.
With the hydraulic method, soil is lifted from a well to the surface using a liquid under pressure: water or a water-clay solution. At mechanically They use special equipment: drills, augers, bailers.
Strengthening the walls - it’s not enough to drill a hole in the ground. To prevent its walls from crumbling, it will be necessary to arrange the trunk.
To secure the walls, a metal casing pipe made of black steel, electric-welded or solid, is inserted into the hole.
Pipe sections can be connected threaded connection or by welding. If it is expected that the water from the well will be drunk, then a galvanized pipe cannot be used.
An ideal option for pipes through which artesian water will pass is stainless steel, but this material is too expensive.
Nowadays, the most common way to construct underwater wells is using double casing technology, when a liner made of a plastic pipe made of HDPE or PVC is inserted into the main metal column.
This allows you to significantly increase the service life of the well.
Four ways to drill a water well yourself
The choice of drilling method depends on the technical and financial capabilities, as well as on the desired technical characteristics future hydraulic facility.
The auger method is suitable when you need to drill a shallow well on a site. Drilling is carried out with an auger, the blades of which simultaneously destroy the soil and carry it upward.
An auger is a device that resembles a corkscrew in shape and mechanism of action. Its blades can be welded at right angles - in this case they also enter the soil at right angles and crush it before feeding it to the surface.


In this case, part of the soil may spill to the bottom and will require additional extraction to the surface.
A more progressive drilling method is when the blades are welded to the axis at an angle. Such an auger enters the soil and removes it without crushing or spilling.
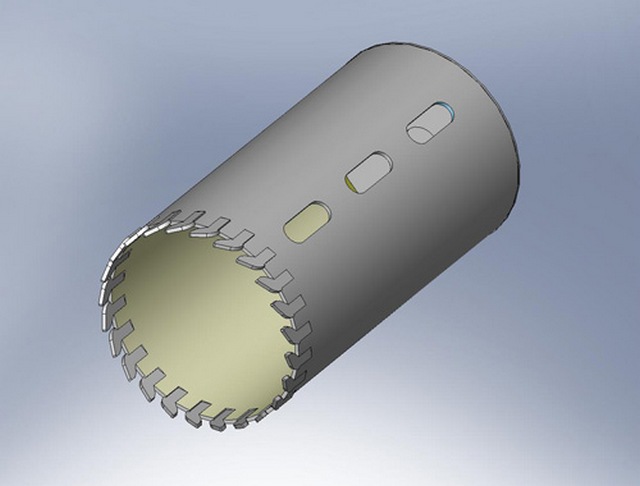
Core method - used for drilling special tool in the form of a tube with a nozzle at the end, which is a core column with cutters made of hard metal.
The method is suitable if you have to drill hard rocky rocks. In this case, the soil is first broken up with a chisel and then raised to the surface using a crown.
The tube rotates, sludge is filled into it and brought to the surface. A completely clogged tube is removed and cleared of rock by hitting it with a heavy sledgehammer.
When drilling a well using the core method, it is necessary to supply water with a suspension of clay into the hole - this protects the walls of the well from crumbling.
The impact-rope method involves first breaking up the soil with a heavy tool and then removing it using a cutting and gripping device located at the end of the pipe.
This device is called a bailer. A two-meter-high tripod is placed above the site of the future well. A block is installed on it, through which a cable with a bailer attached to it is passed.
If it is planned to construct a well less than 10 meters long, then the construction of a tripod is not necessary.
But in any case, if you drill a hole with your own hands, then this device will facilitate the process, since when working with a tripod you do not need to exert much physical force.
Impact-rotary - in this case, drilling is accelerated due to the fact that the installation simultaneously performs impact and reverse advance.
The method is considered the most productive method of drilling channels under water in rocky soil.
Drilling a water well with an ice drill
If you need to drill a shallow well for water with your own hands in an area with soft soil with minimal costs, then you can take a regular ice screw.
During the drilling process, the tool is extended with homemade rods. Ice drill knives replace the auger, and the rods can be made by hand from steel tubes with a diameter of 2.5 centimeters.
An ice drill is used to drill through ice and frozen ground during winter fishing or mountaineering. For drilling earth will do fishing ice screw
An ice auger is a lightweight tool with sharp knives. Him correct angle attack, thanks to which the knives easily bite into the ground.
It is quite possible for them to dig a shallow well for water or a hole for pillars on the site. The ice drill picks up dry soil well, but gets stuck in wet soil. It is not suitable for drilling clay.
To speed up the work, cutters need to be welded to the edge of the ice drill blades. In addition to the ice drill and rods, you will need casing tubes to secure the hole shaft, a shovel and a cart for loading and removing soil from the site.
How to properly drill a hole in the ground with your own hands using an ice drill?
The work consists of the following stages:
- dig a hole 40–50 centimeters deep with a shovel;
- a drill is placed in the hole and, rotating, it is inserted into the ground according to the rule for tightening the screws;
- Having made 3-4 turns, the tool is pulled out and manually cleared of the ground;
- After drilling the first meter, you need to start forming a channel for water; to do this, a casing pipe is lowered into the hole.
Advice: it is correct when the diameter of the pipe is slightly larger than the ice drill. When constructing a well with your own hands, it is better to use light plastic pipes, connected to each other using a threaded connection.
When the tool is completely underground, stop drilling and attach an extension to the drill (using threads, soldering or a steel rod pin).
You need to drill until the top 10 centimeters of the casing remain on the surface. The next segment is fixed on it.
When arranging the walls, periodically check their verticality, leveling them with pieces of wood. Wedges are driven into the gap between the ground and the outer wall of the pipe.
They continue to drill until water appears in the well. After this, the work is stopped, the tool is removed and the filter is installed.
Advice: the gap in the ground near the pipe needs to be filled with crushed stone.
Pipes can be inserted into the hole not during, but after drilling, but in this case the well will have to be freed again from spilled soil.
Then the pipes are lowered into the barrel one by one and connected to each other after the next section of pipe goes down.
Final works
You drilled a water well with your own hands, but this is only the first stage. Now you need to arrange your hydraulic structure.
The arrangement includes:
- caisson installation;
- starting the pump;
- installation of electrical equipment;
- laying water pipes.
The construction of an artesian well is carried out in mandatory, but if you don’t have enough funds, then you can do this a little later.
The arrangement is not necessary if the decision is made to drill a small well on the site solely for watering the garden and other non-domestic needs.
The arrangement begins with the installation of a caisson. A head is made for the caisson, that is, soil is removed around the upper edge of the casing and the caisson is lowered to a depth of about two meters.
Thus, the hole from which water will flow will be in the center of the caisson. The pipe is hermetically connected to the inner edges of the caisson.
The installation of a caisson is necessary to prevent the well from flooding with groundwater. Without a caisson, the water at the mouth of the hole may freeze in winter.
What is a caisson device? You can make a caisson with your own hands from a piece of ordinary pipe, the diameter of which is approximately one meter.
The thickness of the caisson walls should be about 4 millimeters. The inside of the caisson is coated with an anti-corrosion compound, the outside is insulated from water, and the top must be closed with a lid.
The pipe through which the water rises comes out of the caisson - its upper end is below the freezing point of the soil.
The well pump must supply water under sufficient pressure. A waterproof cable is mounted to the pump and a metal cable is attached for insurance.
The end of the cable is secured to the head of the casing.
If you wish, you can install the elements yourself automatic control to avoid turning on the pump manually.
The pump control panel allows the device to automatically turn on and off depending on the pressure the accumulator is under.
Hydraulic accumulator ( membrane tank) protects the pump motor from running in dry mode and from voltage surges in the electrical network.
Practice shows that drilling a hydraulic well with your own hands is quite labor-intensive, but possible.
If you don’t have the means to hire drilling equipment and have to do everything yourself, then you need to approach the matter responsibly - choose the right drilling option depending on the soil on the site, read the instructions.
But as a result you will get quality water from a hydraulic engineering facility made with your own hands.
Digging a well yourself is not the most simple work, but quite profitable. For this you need to acquire certain tools and equipment. Without them, this work cannot be done. These are various, winch, tripod. You also cannot do without an assistant who will help you remove the drill from the well.
When deciding on a specific location for a well, it is advisable to choose the lowest point on the site. It must be taken into account that this place should be as far as possible from places of soil contamination. Otherwise, in order to provide normal drinking water in the house, you will need to make an artesian well.
Equipment and tools for well installation
- Drilling tools: drilling core, drill rods, core pipe.
- Winch.
- Tripod.
- Metal auger or ice screw made of high-strength steel.
- A bailer for lifting soil to the surface.
- Pipes different diameters- casing, water pipes and hoses.
- Caisson.
- Water filters.
- Valves.
- Borehole pump.
To overcome soil layers of different densities, you will need special drills:
- Spiral drill or so-called coil. Used for drilling clay soil.
- Spoon drill. Suitable for sandy soil.
- Drill bit. Used for loosening hard soils.
Manufacturing a drilling rig for drilling a well

Figure 1. Drilling tripod installation diagram.
The easiest way to mount a tripod for drilling a well is proposed. To make it you will need:
- 3 beams 15-20 cm in diameter and 4-5 m long;
- thin pipe.
The tripod is mounted as follows:
- Lay the beams on the ground as shown in Fig. 1.
- Drill holes through them through which a thin pipe will be inserted.
- Insert a pipe through the holes of all three beams and secure them in different directions, forming a tripod.
- Attach the winch to the tripod.
- Make a cylinder block at the top of the tripod so that the mechanical winch cable can move easily.
- Attach the drill to the cable and start drilling the well.
Do-it-yourself well drilling
Process simple drilling looks like that:
- 2 people turn the auger, holding its handle, clockwise until it is completely embedded in the ground.
- The drill is pulled out with a winch until the cable is completely pulled out, after which the drill is pulled out manually and cleaned from the ground.
- This operation is carried out until the aquifer is reached.
Let's look at how this is done in more detail.

Figure 2. Scheme of the well drilling process.
- First of all, a hole measuring 150x50 cm is dug out. To prevent the recess from crumbling, its walls should be lined with either boards, plywood, or chipboard. You can also dig a trunk with a regular drill to a depth of 1 m, 15-20 cm in diameter. This is necessary to ensure that the pipe remains vertically stable.
- Place the tripod directly above the recess and secure the winch at the junction of its supports.
- To determine the diameter of the well and column pipe, you first need to select a well pump. Its movement through the pipe must be unhindered, that is, the diameter of the pump must be 5 mm less than the diameter of the pipe.
- Drilling a well is the process of lowering and lifting drilling equipment. The rod rotates while simultaneously hitting it with a chisel. One person spins the bar, the other hits it from above, thereby going deeper into the ground. The winch makes this climb and dive easier. When drilling, the rod should be marked. This will help determine when it is time to pull out the rod and clean the drill. Experts recommend doing this procedure every 0.5 m.
- To drill a sandy layer of soil, a special drill-spoon is used. In this case, water must be added during the drilling process. If the soil is too hard, a drill bit will help break through it. Such drills can be of two types - flat and cross. Their main purpose is to help loosen hard soil. Quicksand sands can be drilled using the impact method. For soil in which clay predominates, a coil drill, a spoon drill and a bailer are used. The coil does an excellent job of passing through clay soils thanks to its spiral design, the spiral pitch of which is equal to the diameter of the drill itself. The lower base of the drill is 45-85 mm, and its blade is 258-290 mm. Pebble soils with gravel can be penetrated by alternating a chisel and bailer with casing pipes. Quite often it is necessary to pour water into the hole. This makes drilling a well much easier. You can also drill a well using a pump.
- If the soil that is being delivered to the top becomes wet, then you are approaching an aquifer. To cross the aquifer, you need to go a little deeper. Drilling will become much easier, but under no circumstances stop. It is necessary to use a drill to hit the waterproof layer. In Fig. Figure 2 shows the process of drilling a well.
How to choose the right pump for a well

When choosing a pump for a well, you need to consider the following parameters:
- well depth;
- diameter of the casing pipe used;
- How far is the well from the house?
If the well depth does not exceed 9 m, then you can choose a surface self-priming pump.
If the depth exceeds 9 m, then choose among submersible well pumps. When the installation of the pump is completed, a pipe should be brought into the wellhead equipped with a caisson and welded to the head of the caisson. Next, a valve is installed on the pipe, opening and regulating the flow of water.
If the rate of water intake is excessive, then the water in an unproductive well will quickly run out, and the pump running idle will deteriorate.
Pipes for water supply to the room are connected in the caisson. The trenches under them must be waterproofed and insulated.
Recommendations from do-it-yourself well construction experts

- Before starting work, you should find out the level of groundwater in your area; if there are any wells or wells nearby, look into them.
- If the water level is no deeper than 5 m, then to drill a well, it is enough to use a garden drill.
- A compact drilling rig can be rented. You can do this yourself using good equipment, without overpaying a lot of money for it.
- Do not lower the water pipe to the bottom. It should be about 50 cm higher than it. This way the water will rise upward better.
- Ventilation holes must be made in the well pipe on the surface, otherwise the water will become musty. You can make a hinged cover on the pipe for access to the well.
- For well ideal solution There will be installation of a plastic pipe.
- When the well is ready, give the water sample to experts for analysis. You can drink water whose transparency is more than 30 cm, the nitrate content does not exceed 10 mg/l, there are no more than 10 E. coli in 1 liter of water and the taste and smell score is 3 points.
Pros and cons of drilling a well manually
The main advantages of drilling a well manually are: it affordable price; no need for large special equipment; homemade wells due to its small depth, they are easy to pump and do not tighten; If there is no electricity, water can be delivered using a hand pump.
Disadvantages include: limited drilling depth and a shortage of specialists who can help maintain a homemade well.
Well care
Each well needs care and timely cleaning. When the pressure of water weakens, which can be supplied in jerks, with air, with sand, it is time to take care of cleaning the well. This must be done in a timely manner, since the well may lose its effectiveness, and then the well will have to be built in another location.
To blow sand out of a well, water or air compressor. If this method does not help, then there are more radical methods - using acid or short circuit. Since this is quite risky, it is better to entrust well cleaning using such methods to professionals. Otherwise, you may simply ruin the well.
An equipped water well is an autonomous and reliable source of water supply for a dacha or private home.
The organization of individual water supply is not always caused by the lack of a centralized water supply; the reason may be poor quality of water in the main, interruptions in supply, deterioration of the water supply network, high cost of water, its shortage, and other factors.
Almost all owners of dachas or country cottages have an autonomous source of water. Another thing is that their choice may differ. Some people prefer a well, others prefer a well.
By the way, it will be useful to familiarize yourself with comparative characteristics – .
This article is for those who have chosen a well.
It should be noted that wells are divided into two types depending on the drilling depth.
Types of water wells

Since we plan to drill with our own hands, we will consider in more detail the construction of sand wells, as they are the most accessible in terms of independent implementation.
Drilling a water well - step-by-step instructions
1. Depth detection
- shallow (up to 3 m) well breaks through if the aquifer is located close to the ground surface, and the water is intended to be used only for technical needs or irrigation. To drill such a well, a drill, casing and a hand pump are enough;
- medium-deep (up to 7 m) well will make it possible to obtain water suitable for human consumption. To drill a well yourself, in addition to a drill, you will need a shovel and time to construct a hole. A pit (pit) with dimensions of 1.5x1.5x1.5 is designed to facilitate drilling to great depths. For ease of use, it can be reinforced with plywood or boards. After completion of the work, the pit is filled up. Water is supplied using a pump;
- deep (more than 7 m) well, will completely cover the water needs of all residents of a private house or cottage. At the same time, there will be enough water not only for individual consumption, but also for technical needs, sanitary requirements, watering, maintenance of a pool or pond (reservoir).
In general, the choice of water intake type is determined after a geological study of the location of the well. We suggest considering the last option - the device deep well with your own hands, as the most complex of those presented.
2. Methods of drilling a well
The listed types of wells (this does not apply to artesian or lime wells) can be drilled using the following methods (technologies):
 Auger drilling using an auger drill.
 Core drilling (a ring-shaped drill is used).
  Percussion-rope drilling. IN in this case A drill bit is used that is driven into the soil without excavation. The soil is simply compacted away from the axis of the bit. The bit is driven in using a tripod with a winch.
  Rotary percussion drilling. The work of the drill is supplemented by washing out the soil with water. The method is labor-intensive for individual use.
  Rotary drilling (provided by a mobile drilling rig).
 The photo shows a small-sized drilling rig MGB50P-02S with a movable hydraulic rotator, manufactured by Horizontal.
3. Project for drilling water wells
In the event that the depth of the aquifer is precisely known, it is possible to drill directly with the size of the drill for the casing pipe. If not, you will first need to find out at what depth the aquifer lies.
Thus, any well is an individual project, which is influenced by the following parameters:
- geological structure of the soil;
- selected drilling method;
- requirements for the quantity and quality of water;
- the requirement to maintain the required distances to places of contamination (arrangement of a “sanitary zone”);
- the depth of the aquifer. Moreover, this does not mean the first vein that the drill reached, but the one that will meet the conditions of use from the point of view of ensuring the flow of the well.
4. Tools for drilling water wells
Since the shock-rope method is described manual drilling, then its advantages should be noted:
- maintaining most of the useful soil layer in its original state. Those. heavy equipment will not damage the plantings on the site;
- no restrictions on the drilling location. A hand drill can be used to drill in almost any part of the site;
- simplicity of equipment and minimum requirements for driller qualifications.
To work you will need:
- shovel;
- drill with reinforced cutting part. Tip: you can strengthen the drill by welding cutters onto the screw, the role of which can be played by file elements or a metal shank. In addition, the cutters can be sharpened using a grinder;
- cart for removing excavated soil;
- “baby” type pump with hose;
- container with water.
For arrangement you will need:
- crushed stone or gravel for a pillow;
- steel wire for filter;
- pipes;
- wire for arranging a bottom filter.
5. Selecting a location and constructing a pit
With the help of hired specialists or traditional methods (dowsing, barometric method, using silica gel, by the amount of dew, exploratory drilling, etc.) we determine the place where the aquifer is closest to the surface.
 Next, we dig a pit. This is the excavation of soil of a certain depth, the purpose of which is to facilitate the process of drilling a well.
Construction of the pit important stage for two reasons.
Firstly, the drilling depth of the drill is reduced.
Secondly, the possibility of a soil collapse around the well is eliminated.
The dimensions of the pit are determined by the driller, but are usually 1.5x1.5 and 1.5-2.5 m. in depth. To prevent the soil from crumbling, the pit is reinforced with plywood, boards or metal.
6. First method: tripod - drilling rig
 A tripod is a shock-rope mechanism for drilling water wells. A support structure will be needed to facilitate the drilling process through the use of a drill nozzle.
 The tripod can be made of wood (knots excluded) or metal pipe(or profile). The length of the beam or pipe should be 4-5 m. How to make a tripod for drilling can be seen in the diagram.
  Next, a mechanical winch with a cable on which the drill bit is attached is attached to the tripod.
 This drilling rig is compact and has a significant margin of safety. The principle of operation of the installation is simple: when a glass falls into the ground, it absorbs soil. Depending on the composition of the soil, you can select from 20 cm to 1 m of soil per blow. You can make the work easier by filling the drilling site with water. From time to time, the drill bit needs to be cleared of any soil packed into it.
Attention: The cable on which the drill is attached must be longer than the depth of the well. Otherwise, it will break off and the drill will remain at the bottom.
The casing pipe can be installed simultaneously with advancement to depth or after all work has been completed.
7. Second method - casing and drill
During the drilling process, you can immediately install the casing pipe. Then its diameter must be larger than the diameter of the drill so that the drill can move freely in the pipe.
While performing work, you need to constantly monitor the moisture content of the soil being removed so as not to miss the aquifer (otherwise it can be covered with a pipe). The main signs are below.

Material prepared for the website website
 Once an aquifer is discovered, it must be pumped out. dirty water in order to understand whether there are enough water reserves in a given vein. A submersible or hand pump is used for this.
 If after pumping out 2-3 buckets muddy water, a clean one has still not appeared, you should continue drilling to a more capacious layer.
Important: the pump is not designed for such operating conditions, so after purifying the water it may break. It is recommended to use only a high-quality pump.
8. Well casing
Steel or plastic pipes can be used for casing (service life up to 50 years). But the use of galvanized pipes is not recommended, due to the risk of water contamination with zinc impurities.
The meaning of casing is as follows:
- preventing well walls from collapsing;
- prevention of well siltation;
- eliminating the possibility of perched water (water) getting into the well upper layers, melt or rain water);
- eliminating the risk of well clogging.
Installation of the casing pipe is carried out immediately after completion of work or directly during the drilling process.
Advice: if the pipes are creaking, you need to apply a sledgehammer to them.
9. Flushing the water well after drilling
The matter does not end with installing the casing pipe. Now you need to flush the well. To do this, a pipe is lowered into it, through which water is supplied under pressure. Thanks to the water pressure, a layer of clay and sand will be washed out of the well, which needs to be pumped out. After the appearance clean water it needs to be submitted for analysis. Requirements for the quality of water from a well are regulated by SanPiN 2.1.4.1074-01 (Russia) or DSanPiN 2.2.4-171-10 (Ukraine). If the water quality is satisfactory, you can continue working.
10. Bottom filter for sand well
The purpose of the filter is to protect the pipe from silting.
 How to make a filter for a well?
You can make a slot filter with your own hands; to do this, you need to make notches (cuts) with a grinder at the end of the pipe.
Tip: for notches you need to use a thin disk (0.8mm). Pay attention - many notches will weaken the pipe.
 Alternatively, you can drill holes in the pipe. Next, the place of the notches/drilling needs to be wrapped with wire or mesh. Place the filter obtained in this way on a crushed stone bed, the backfill of which will prevent the filter from silting.
  Advice: the diameter of the filter pipe should be smaller than the diameter of the main pipes in order to be able to plunge into the well without problems.
 The most simple option There will be a purchase of a ready-made filter.
Important: without a filter, the well will not work for long. Its absence is justified only in deep-water wells (more than 40 m)
11. Water well debit
To get a complete picture of the capacity of a sand well, you need to wait a day and then check the level of incoming water. If the incoming water is sufficient for the needs of users, the distance between the soil and the casing can be filled. The pit is also buried.
12. Borehole pumping after drilling
This is a required step. To perform pumping or simply final cleaning of the well, you need to install centrifugal pump high power and periodically pump out water for 1.5-2 weeks.
Advice: you should decide in advance where the pumped water will be redirected.
13. Drilling a water well with your own hands - video
Manual technology using the shock-rope method of punching a hole.
14. Installation of a pump for a water well
Please note that surface-type pumps are not intended for installation in a well. Due to the depth limitation of 8 m. For these purposes only submersible pump– centrifugal or vibration. Each of the subspecies has its own advantages, and the final choice can be made by analyzing the influence of such factors as:
- well depth;
- water level in the well;
- casing diameter;
- well flow rate;
- water pressure in the well;
- well pump cost.
15. Commissioning of the well
If the drilling of a water well was not carried out independently, but with the involvement of a third-party organization, then before accepting the work you need to require the following documents:
- hydrogeological conclusion on the feasibility of implementing the water well project;
- well passport;
- permission from the sanitary and epidemiological station (checks the quality of water and compliance of the sanitary zone with the requirements);
- certificate of completion.
If all the work is carried out independently, then the main thing is not to rush, but to maintain the technology and comply with everything key points process of drilling a water well. However, do not forget that only the use quality materials(in particular, pipes and a pump) will be the key to long-term operation of the well.