In a modern home, a mirror has long become an interior item or even a highlight of the room design. Mirrors are installed in the bathroom, in the hallway, in the living room and even in the bedroom. From time to time, mirror glass has to be removed in order to make repairs, hang wallpaper and lay tiles. After re-gluing the wallpaper, the mirror panels return to their original places, and the question automatically arises of how to attach the mirror to the wall with wallpaper.
What prevents you from mounting a mirror on the wall?
A mirror is one of the few items that can be attached to walls anywhere and in unlimited quantities. There is even a certain interior design style that uses a large number of mirror panels of different designs. If you correctly position and secure mirrors on the walls, you can significantly change the perception of the room and even visually expand the boundaries.
Most owners, after renovation, do not want to drill into the walls and spoil the newly hung wallpaper. Most often, they try to attach the mirror using adhesives; you just need to choose a good glue and solve the problem of how to clean the wallpaper from dust after repair.
But attaching mirror glass with glue is not as easy as it might seem at first glance. Most often, problems arise in the following situations:
- When trying to fix a mirror on recently pasted wallpaper. A small and relatively light mirror can stay on the wallpaper surface, but at the same time “pull” part of the wallpaper into an “accordion”. You cannot attach mirror glass directly to a fresh canvas, otherwise you will have to look for a way to remove wrinkles from the wallpaper after drying;
- In case the glass plate of the mirror needs to be attached to a water-based emulsion, latex, liquid wallpaper, drywall or a lime-whitened wall. None of the listed materials are friendly to glue and shear loads, so there is no point in trying to attach even a small mirror - the coating will peel off.
For your information! You should not try to attach a thin mirror to wallpaper using high-strength adhesive with strong shrinkage. In this case, the adhesive mass can create strong stress on the glass base; even a small load can lead to cracks.

Most high-strength adhesives based on alcohol, dichloroethane, and acetone have high shrinkage. The exception is epoxy adhesives, but due to their low viscosity, they are almost impossible to attach heavy objects to the walls of a room.
The opposite situation is also possible, when the wallpaper is glued to the wall with relatively weak CMC glue. In this case, attempting to attach heavy mirror glass with glue will result in the wallpaper breaking along with the mirror.
Is it possible to attach a mirror with glue?
In order to understand how to properly attach a mirror to wallpaper, let’s perform a small estimation calculation. The average weight of the glass base of a wall mirror is 2.5 kg. The fastening technology involves applying an adhesive layer 1-2 cm wide over the entire horizontal width of the wallpaper base, which is approximately 60-61 cm.
As a result, the load on the gluing line is 2500:60=42g/cm2. For CMC, the maximum load ranges from 3 to 5 g/cm2, for the most durable polyurethane adhesive such as Molefix, the strength of the glued seam reaches 9 kg/cm2, and for cyanoacrylate, also known as cyacrine, the strength of the seam can reach 150 kg/cm2. The strength of silicone glue is 450 g/cm2.
Any of the synthetic adhesives is strong enough to attach even a heavy mirror to a wall with wallpaper. But it's not that simple. In order to attach a mirror to a wall with glue, three conditions must be met:
- The adhesive joint must have the same strength in any direction of application of the load. Using cyanoacrylate, you can glue a weight to a wall, but only if the load is directed normal to the surface. Under shearing and bending loads, the strength of the seam is reduced to 1.5 kg/cm 2 ;
- The adhesive mass must have very high adhesion to the base of the wall. It is best if the wall surface is coated with a polymer primer. It is almost impossible to apply polyurethane, epoxy, silicone glue to lime, cement-sand, gypsum plaster; the material simply does not stick to the base;
- The reverse side of mirror glass is coated with a special mastic or paint; the strength of the coating is low, and in addition, not all adhesives wet such a coating well. Therefore, before you try to attach a mirror with glue, you need to check the adhesion strength of the adhesive mass to the paint.

It is quite possible to attach a glass panel to a wall with wallpaper; the easiest way to do this is if the wallpaper panels were glued to a wall lined with plasterboard. You just need to carefully prepare the surface for gluing, figure out how to remove dust from the wallpaper after repairs, and select the most durable and at the same time elastic adhesive composition, which has increased adhesion to the coating on the back of the mirror. In order to attach a small mirror to the wallpaper, it is necessary to prime and strengthen it with PVA or acrylic varnish. All that remains is to apply glue and fix the mirror on the wall while the glue dries.
Glue the mirror to the wall with wallpaper
First of all, you should not try to glue a glass slab to the wall, as they say, “on the fly”, simply by applying a certain amount of adhesive mass to the wallpaper and the return glass. If the walls were not previously covered with plasterboard before wallpapering, then, most likely, the reverse side of the glass base of the mirror will not be able to lie flat against the wall. Contact with the wall will be at a maximum of three points. Even if you cover the entire back side of the mirror with glue, the contact patch will be very small, no more than 10% of the area of the glass base, which is clearly not enough to hold the glass firmly.
To attach the mirror with maximum strength, you will need to install an intermediate plate, for example, a small sheet of fiberboard. To make the transition plate, a rectangular piece of fiberboard is cut out, with an area of 30-40% of the surface of the glass sheet. First you will need to determine the optimal position of the mirror on the wall, make marks with chalk or a simple pencil.

Next, you will need to secure the fiberboard rectangle to the wall. This can be done using ordinary plastic plugs and screws. To attach a mirror weighing 3 kg to the wall, you will need four self-tapping screws. Before screwing in the screws, the edges of the holes drilled in the plate are trimmed with an 8 mm drill and treated with PVA so that the heads fit flush into the fiberboard and do not tear the plate material under load. The intermediate plate should be placed in the upper half of the mirror contour markings made, with the smooth side facing up.
Important! When screwing in self-tapping screws, it is necessary to control the plane of the fiberboard plate using the level and depth of screwing in the fastener.
Medium-sized mirrors can be attached to the plate using silicone glue. Heavy and massive objects are attached only with polyurethane adhesives. Subsequently, if necessary, everything can be removed using a thin string, which cuts the silicone layer like butter.

It is known from practice that the least suitable for fixing mirrors are:
- Polyurethane foam;
- Sealing silicone sealants;
- Solid polyethylene adhesives for hot glue guns;
- All types of paint, including acrylic, alkyd oil, polyurethane and epoxy;
- Adhesive compositions for gluing rubber.
Any of the listed materials does not provide a sufficiently strong and stable seam with high adhesion. As a rule, all attempts to attach a mirror panel end in failure. Instead of glue, you can use good quality double-sided construction tape.

Mechanical mirror mounting options
The weight of mirrors can reach 10 kilograms or more, so it is not always possible to attach a massive glass slab with adhesive to the relatively weak surface of the wallpaper. In this case, reliable fixation can only be achieved using mechanical fastening.
Most often, two options are used to securely mount a mirror:
- Picture hanger on a string or wire;
- Hook on hooks and bars glued into the wall.
In any case, the mechanical fastening method has an undeniable advantage over adhesive options. Firstly, attaching a mirror can be much faster and easier, and secondly, if necessary, it can be quickly and painlessly removed, for example, when cleaning or painting wallpaper. If you attach the glass with glue, it will be almost impossible to remove it without damaging the wallpaper.

Mechanical mirror mounts
The simplest method of fastening is a picture hanger. If the mirror glass is installed in a wooden, metal or even plastic frame, then you can attach the structure to the wall in half an hour of work. The mounting scheme is very simple, but you will first need to make mounting points on the frame.

If the thickness of the frame allows, then it is enough to screw one self-tapping screw into each of the sides from the back of the frame, departing 10-15 cm from the top edge. If the frame is too thin, then instead of self-tapping screws, you can glue two aluminum plates with hooks. Between the screws or hooks we stretch a thin steel wire or a strong nylon cord with a slight slack.
According to the markings on the wall, we hammer in a dowel or plug under the self-tapping screw. We screw a small anchor hook into the cork, after which you can hang the mirror glass. The above diagram allows you not only to securely attach it, but also to align the structure, remove it and hang it back in a matter of minutes. In this way, you can attach relatively small objects to a brick or concrete wall.
Heavier mirrors can be attached using a hidden block. Before gluing the wallpaper, a niche 30-35 mm wide and 20 mm deep is cut out in the wall using a puncher to cover the entire width of the future mirror. A longitudinal groove of 10x10 mm is milled on the end surface of the wooden block. The block is secured in the niche using dowels, and the groove should protrude beyond the plane of the wall by 2 mm. Next, all that remains is to tighten the cord in the same way as in the previous case and attach the mirror to the wall.
If there is no frame, then the process will become slightly more complicated; you will need to glue a wooden or metal plate with ready-made screwed-in hooks or holes for attaching a hanging cord on the back side. Sometimes they try to attach the structure using hooks installed on the intermediate plate. The strength of such a suspension will be no worse than that of a wire system, but in this case it will be very difficult to level the mirror horizontally.
Conclusion
Each hanging method is suitable for its own type of wall. For brick and plastered concrete walls, it is best to attach a mirror on a picture hanger; for plasterboard, you can use polyurethane or silicone glue, but with the obligatory gluing and priming of the wallpaper with polyvinyl acetate emulsion. If you need to attach any structure to tiles, glass, or mirror, then the only possible option is silicone glue, but not sealant. Good adhesion and high elasticity of the silicone seam guarantees high strength for several years of operation, after which the fasteners need to be renewed.
A mirror is an integral attribute of any home. Not a single home can do without it. If the mirror is part of the furniture, then installing it will not be a big problem, which cannot be said about mounting the mirror on the surface. This article will tell you how to mount a mirror on the wall and do it without using fittings.
The choice of the thickness and size of the mirror is especially important when it comes to mounting it on the wall. There are some nuances that you should pay attention to before purchasing:
- Thin mirrors, as a rule, have an uneven surface, that is, they are made of poor quality. The result is a disproportionate reflection. The optimal mirror thickness is 5 mm. The thicker the mirror, the more expensive it is.
- Assess the condition of the protective coating on the reverse side.
- The mirror should be smooth. There should be no frozen air bubbles, stains, unevenness or other defects on it.
- Large mirrors (1.5-3 sq.m.) are not recommended to be hung on the wall without fastening them yourself.
- When ordering a mirror from a workshop, you must indicate its size as accurately as possible. You need to measure the interior item with a small margin of 4-5 mm. If you plan to hang a mirror in the bathroom, then you must leave a gap necessary for grouting the walls.
- The size of the mirror should correspond to the location of other interior items, that is, its edges should not touch shelves, cabinets, etc.
- To avoid having to cut the mirror surface yourself, which is quite difficult, you need to set the right task for the craftsmen.
Installation Requirements
- Decide on a location. Since you will have to hang a mirror on the wall without mounting (that is, without using special fittings) once and for all, it is worth thinking in advance where it will be placed.
- Prepare the surface. Depending on the type of facing material, the types of installation work also change. Read more about how to hang a mirror on a wall and tiles without fastenings below.
How to hang a mirror on the wall without mounts?
There are two main ways to attach mirrors without using fittings:
- Hang the mirror using a special adhesive.
- Attach to a “liquid nail”.
In addition to the methods described above, some craftsmen practice installing mirrors with the additional use of double-sided tape.
Instructions for mounting a mirror on the wall
- First of all, you need to choose the right glue. The substances in its composition should not interact with the material from which the back side of the mirror is made. It is necessary to choose a moisture-resistant adhesive so that it can withstand the effects of condensation, especially if the mirror is mounted in the bathroom. But the most important function of the glue is to ensure the strongest possible connection between the mirror and the wall.
- The next step is choosing a base for the mirror. Often the canvas is hung on concrete, tiles or chipboard. The most suitable base is tile and concrete. The technology for mounting a mirror on these surfaces will be discussed below. It is not recommended to place a mirror on OBS or chipboard, since wood does not tolerate temperature changes well, which means it can subsequently cause the mirror to lag behind the wall.
- Next, they begin to prepare the working surface. The walls must be carefully inspected for unevenness, cracks and defects. If protrusions or chips are found, the walls are leveled. The walls need to be cleaned, leveled with cement/concrete mortar and primed. It is better to use a primer with a deep impregnation agent. The process of priming the walls is very important, since it is what protects the surface from moisture, condensation, and therefore from the growth of bacteria and mold.
Important! Even a small unevenness of a few millimeters can cause serious distortion. A poorly leveled surface can cause the canvas with the mirror to peel off from the wall.
 We fix the mirror without fastenings using liquid nails or glue
 Work technology
A mirror is glued to a concrete wall like this:
- Turn the mirror back.
- Glue pieces of thick double-sided tape onto it.
- Remove the protective shell/film from it.
- Apply adhesive to the back side along the contour. It is advisable to do this in small pyramids.
- Next, the glue is applied to the surface in equal stripes - 15-20 cm.
- After the adhesive has already been applied, the mirror is pressed tightly against the wall.
- It is advisable to support the canvas with something from below, since the glue will set tightly only after 30-40 minutes. Double-sided tape performs the same function. Until the glue hardens, there is no need to tear off the tape; it will maintain a stable position of the canvas.
The technology of gluing a mirror to a “liquid nail” follows the same principle. The sealant is applied to the back wall of the canvas and waited for some time.
If the mirror is small, then only the contours are processed with a “liquid nail”. Some craftsmen advise using special holders for a while until the sealant hardens.
Mirror in the closet
Very often, mirrored canvases are hung on closet doors - in the hallway or bedroom. The gluing technology is simple and in many ways similar to the previous method. The first thing to do is to mark the boundaries of the future mirror on the door with a pencil. Next, special glue is applied to the back side; this must also be done along the contour and in the middle in the form of a lattice. Don’t forget about double-sided tape, which is glued every 20-30 cm in the form of vertical stripes. It is important to remember that some types of glue set very quickly, so you need to level the mirror as quickly as possible.
 Save space in the bedroom: install a wardrobe with a mirror
 Mirror on the wall with ceramic tiles
A mirror is an integral part of the bathroom interior. In many apartments, the bathrooms are finished with ceramic tiles, and this is an excellent basis for gluing mirror cloth. In order to hang a mirror in the bathroom without fastenings, you can use the same glue as for concrete coatings. The surface of the back of the canvas is lubricated with an adhesive composition. You need to step back 1-2 cm from the edge so that the glue does not extend beyond its contours. In the middle, glue can be applied in the form of a lattice. Once the adhesive is applied, the mirror can be pressed onto the ceramic tile. The gluing speed with this base is the same as in the case of concrete walls. The technology of work is identical. There is only one difference during installation - the edges of the mirror glued to the tile must be sealed with sealant. The color palette of these materials is not very diverse. You can choose a suitable shade - white or transparent.
Experienced craftsmen advise not to hang large mirrors alone. An assistant will be useful to support the canvas during installation. Also, a prerequisite for competent and safe work is to protect your hands from possible cuts. Fabric gloves are ideal for this purpose. If the condition of the walls allows, you can additionally secure the mirror using fasteners.
 Fixing a mirror to the tiles in the bathroom
 Mirror on PVC panels and plasterboard
You can hang a mirror on PVC panels and drywall without fastening. But this only applies to light canvases weighing up to 25 kg. For this, “liquid nail” or special glue is used. When working with plastic panels, it is important to know that mirrors are attached to such walls by drilling only if there is a small distance between the base and the cladding. Otherwise, it will not be possible to make high-quality sheathing.
If the wall cladding is installed on a deep layer of glue, then the mirror sheet may deepen somewhat when installed using fasteners. To avoid such situations, a metal profile is attached to the covering material, and a sheet of plasterboard is fixed to it. GVL is secured using special butterfly dowels and “liquid nails”. The mirror, in turn, is glued to the drywall using moisture-resistant mounting tape and glue.
Upon contact with cement mortar, the mirror surface may darken. To prevent this, the base is treated with a special protective compound.
 Attaching a mirror to drywall using butterflies
 How to hang a mirror without fasteners?
This question is very often asked by specialists and novice craftsmen. If you plan to hang a mirror without “original” fasteners, then additional parts can be purchased at a hardware store. With the help of such fasteners, the mirror is firmly held on the wall. Such fittings support the canvas from below and on the sides.
Sometimes it happens that you have to make holes in the mirror itself for fastening. And, as you know, the mirror surface is very capricious and fragile. Glaziers are best suited to handle this task. But if there are none, you can do it yourself.
Installation nuances:
- First you need to mark the locations of future holes.
- After this, holes are made at the marked points using diamond drills.
- To prevent the mirror surface from cracking, it is recommended to periodically cool it.
- At home, you can build a special plasticine bath to cool the mirror. It is constructed and fixed directly at the site of the future hole.
- As it decreases, water must be added. You need to drill the mirror with the utmost care so as not to spoil the canvas.
- Some glaziers advise drilling the mirror a little at a time, periodically dripping turpentine into the holes.
- After the work is done, the holes are cleaned and rounded using sandpaper.
- Next, the pre-purchased fasteners are screwed into the finished hole.
- After this, a decorative plug is inserted into place of the fastening element.
What do you need to know about a mirror before hanging it?
- If you hang a mirror crookedly, it will distort the image.
- It is more appropriate to hang a human-sized mirror in the hallway.
- In rooms with a small area, it is recommended to place mirrors from floor to ceiling; this will visually increase the space.
- Light should not enter the mirror, otherwise it will lose its reflective properties and quickly fade.
- An oval mirror increases the height and length of the room.
- Any base on which you plan to hang a mirror must be cleaned and treated with alcohol.
 We hang a full-length mirror in the hallway; a small-sized version is suitable for the bedroom
 What glue should I use?
There is a huge selection of adhesives for attaching mirrors. The most popular of all is the Bostik 2750MS. This glue has excellent performance characteristics. There is no need to apply a primer underneath. It is suitable for gluing various surfaces. The glue does not lose its adhesive properties and does not corrode the mirror amalgam.
When working with ceramic tiles, it is better to choose a polymer-based adhesive. An example is the hybrid sealant Bostik 2720MS. Compared to silicone compounds, its adhesive properties are an order of magnitude higher, and it is not at all afraid of moisture. This glue can be used for decades. Its characteristics will remain the same.
The mirror can be hung without fastenings. This article discussed the main installation methods; which one to choose is up to you.
The mirror is a mysterious object. It seems that it reads thoughts, evaluates actions. Mystical properties are attributed to him. It is not recommended to look at it when you are in a bad mood or during illness.
A mirror is an important interior element that exists in every home, used both for its intended purpose and as a decorative item.
There are many beliefs about an astral spirit sitting in a mirror, which sucks positive energy out of a person. But in this article we will tell you not about superstitions, but about howattach a mirror.

Before hanging a mirror on the wall, you need to carefully consider its location and height.
In production, sheet glass is used, obtained from a mixture of sand, soda, limestone, and other materials. They must contain a minimum amount of iron salts, which impart unnecessary tints to the glass.

The modern glass mirror is familiar to everyone and is a sheet of polished glass, on one side of which a thin layer of metal called amalgam is sprayed.
The initial mass is boiled, fired, shaped into sheets, polished, and cut using diamond rollers. A metal coating is applied to make the surface reflect light and protected with varnish.

Aluminum is used in the manufacture of budget mirrors, and silver – in expensive ones.
When choosing a finished product, take into account the thickness of the glass, the quality of the coating on the reverse side - uniformity, absence of stains and other defects. They take into account the degree of distortion of the display - it happens that the mirror “fattens” or “slims” - choose according to your taste.

In everyday life, it satisfies a person’s physiological need to see himself, and is an element of the interior that allows him to change the perception of space.
Fastening
It should be reliable, as inconspicuous as possible, simple, and minimally disrupt the finishing of the walls. Mounting mirrors on walls is done in the following ways:
- WITH kobs with through fasteners, supporting from below, on the sides;
- P hanging by means of two screws, thread with gluing of the backing (like a panel);
- N adhesive on the substrate;
- P using glue, liquid nails;
- IN gluing together with tiles;
- H through the openings of the product, by other means.

There are several ways to attach mirrors; you need to choose the best one based on the design, weight of the product, and the type of wall.
On a brick base
For installation using glue, prepare the surface - if necessary, remove the wallpaper, carefully level it with a primer, followed by sanding. Be sure to clean it and wipe it with an alcohol solution.
Special glue intended for glass with amalgam coating is used according to the instructions. They are applied to the surface not in a continuous mass, but in parallel stripes at equal intervals or in “fat” drops in a checkerboard pattern.

Then the product is pressed tightly and held for about a day until it sets completely.
If, when deciding how to attach a mirror, this method is chosen, you need to remember that it will no longer be possible to remove or rehang it. This is the last place of its “stay” - then it can only be broken up and removed.
When using thick double-sided tape, the surface is prepared. It is glued on the back side of the glass along the perimeter and surface in vertical or horizontal stripes in increments of 5-7 cm. After which the protective film is removed from it and pressed into place.

All this can be easily done with your own hands.
The composition of liquid nails allows you to reliably hang a mirror , and does not spoil the decorative surface of the installation site. The strength of this construction adhesive is significantly superior to PVA glue, and some modifications are equivalent to the characteristics of dowels.

The option is very convenient, since there is no need for tools and fasteners, you only need suitable glue.
Important! Using adhesive tape, a product with an area of only up to 1 m² is installed; a larger one may simply fall off later.
Important! Despite the guaranteed strength of adhesive materials, when working it is better to use a combination of two methods.

The surface of the wall cleared for the mirror must be flat, otherwise the fastening will be unreliable.
Hardware is usually used to mount a mirror that has ready-made holes. To do this, you need to drill recesses in the wall along the diameter of the dowel used, 5 mm longer than the length of the self-tapping screw that you plan to use. After drilling, they are cleaned of dust, dowels are installed, the product is attached, and the screws are tightened one by one. Be sure to cover with decorative heads.

When hanging a mirror, you need to pay attention to the shape of the interior element.
On tiled flooring
A practical option is to mount the mirror on top of the tiles using tape or glue. You can also dismantle the tile in the area where the product is intended to be placed and glue it in.

If the tile is already on the wall, then you should not try to glue the mirror.

There is no need to worry about the tiles cracking if the material used is of high quality.
Not a bad option - hang a mirror , using hardware, making several drillings in the partition. To do this, you need to prepare a drill, a screwdriver, special tile drills, fastening brackets, and plastic dowels with screws.

It is necessary to drill holes in the tile and base.
- IN make holes in the wall and the product, secure it with screws, after installing dowels and special rubber gaskets;
- P purchase and install original mirror mounts in the form of brackets that are fixed to the wall and support the product.

The number of fasteners is determined by the size and weight of the item. The larger the dimensions, the more staples are required.
On drywall
Drywall is not the most durable finishing material; it cracks and crumbles. The technology for mounting a mirror on the wall is determined by its weight. If less than 10 kg, use liquid nails or double-sided tape.

After installation, it is necessary to maintain the required setting period, sometimes up to 24 hours.
To install various accessories on such a base, special dowels are used - “butterflies”, which can withstand up to 10 kg. Installed in pre-prepared holes (according to their number in the product).

The “butterfly” is fixed to the drywall plate and securely holds the self-tapping screw.
For products that do not have drillings, stores offer special fastenings for mirrors when mounted to a wall, including brackets, profiles, and fasteners.

The system is suspended from drywall, and the product is inserted into it.
Installation work
You can use the services of a workshop that has the appropriate equipment. When making it yourself, use a drill or a diamond drill.

Installing a mirror on the wall in the bathroom is not very difficult.

It is only important to adhere to a certain algorithm of actions.
First, degrease the surface with alcohol. The hole is made at a distance of at least 30 mm from the edge. The tool is oriented perpendicular to the plane. Drilling is carried out starting at low, then at medium speed.

High tool speeds, pressure, work without cooling are unacceptable!
It is practical to arrange a rim of plasticine around the drilling area and pour water. The finished holes are cleaned with sandpaper.

How to mount a mirror on the wall is a completely solvable task; there are many ways to mount it.
Each has its own characteristics, the choice is made taking into account:
- P rooms (bathroom, living room, hallway - different in humidity level and air speed);
- TO structures (presence of frame, substrate, shelf, hangers);
- Dimensions and weights;
- N presence of holes;
- M room wall material;
- D failure of drilling with disruption of finishing;
- WITH false elimination of defects after removal of the product.

A light mirror can be glued to a flat wall using liquid nails, treating the joints with sealant.
How to hang a mirror on the wall and not to disturb it is the most important issue for a bathroom, where every hole can ruin an expensive finish, but of little significance for a concrete, brick or plasterboard partition, on which traces of drilling can be easily and imperceptibly eliminated.

It should be remembered that the glue hardens very quickly, so the mirror must be leveled as quickly as possible.
If the product has holes, it is attached to the drywall with a “butterfly” type device; when hanging on a brick wall, a regular dowel is used.In the absence of drilling, mounting with glue or tape and reliable special fastenings such as staples are equally applicable.

There are many installation conditions and installation methods - there is an option for every situation.
VIDEO: Hanging a mirror in the bathroom.
Mirrors in the interior of the house – 50 photo ideas:

Mounting a mirror on a wall is often a cause for concern. Firstly, mirrors are fragile, and secondly, nothing should cause damage to the amalgam on the reverse side.
There are several ways to attach mirrors; you need to choose the best one based on the design, weight of the product, and the type of wall. This material discusses the main, common methods:
1. Stick the mirror on the wall;
2. Secure the mirror using bracket holders;
3. Attach the mirror to the wall using profiles;
4. Secure the mirror with a backing.
How to glue a mirror to a wall
In a modern interior, mirrors of any size (even very large areas) look good, simply glued to the walls, that is, without visible fasteners. This option is very convenient for installation, since there is no need for tools and fasteners, you only need suitable glue.
Although we cannot say that everything is so simple. In this case, several issues need to be resolved.
First of all, prepare the wall. It is necessary to free up space according to the size of the mirror (remove tiles, wallpaper, etc.). If the finishing material on the wall is thick enough (thicker than the mirror), this may cause the mirror to end up in a recess. The problem is solved by attaching an additional base (for example, a piece of plywood or drywall) under the mirror.
The surface of the wall cleared for the mirror must be flat, otherwise the fastening will be unreliable. Therefore, clean, putty, fill in uneven areas with putty, and sand after drying.
It is necessary to prime the surface to which the mirror will be glued.
What is the best glue for mirrors? Everything here is elementary: we choose either special glue for mirrors (that’s what it’s called), or liquid nails, but also for mirrors (it is important that the glue does not damage the amalgam during the use of the mirror).
We apply the glue pointwise, but often (large dots at a distance of about 5-6 cm from each other). When fixing the mirror in this way, you can combine glue and double-sided tape (to stick a mirror in the bathroom, use moisture-resistant tape).
If you decide to fix the mirror on the wall with glue, you will have to be patient - you need to press it against the wall for 10-15 minutes so that the glue bonds the surfaces well. For a heavy mirror, it is worth organizing supports and leaving it there for several hours (overnight, ideally).
You need to understand that it will be impossible to dismantle the mirror later in order to move it to another place - you will only have to break it and remove the fragments.
Mounting a mirror using fasteners
There are several options.
Through mounts for mirrors;
Brackets for mounting mirrors;
Hanging a mirror.
How to make holes in a mirror
You can attach dowels to the wall, and screw special through mounts for mirrors into them. True, for this the mirror will need to be drilled in several places. Drilling a mirror is not an easy task; if you don’t know the technology, you shouldn’t try to make mounting holes. Glass cutting workshops are everywhere, most of them have special equipment that will help you make holes in glass and mirrors in minutes. By the way, the cost of such work is cheap.
If you still want to try to cope with the task yourself, you will need a drill with a diamond drill bit (for glass, mirrors, ceramics). An excellent tool from the group of small-sized ones is the Dremel. In general, this miniature device with removable tips is very helpful for the home craftsman - it can, if necessary, be a jigsaw, a drill, a grinder, etc.

To make a hole in a mirror:
1. first decide on their exact location;
2. be sure to degrease the surface with alcohol;
3. drill carefully, at low speeds;
4. Cool the drill constantly.
Organizing drill cooling is quite easy. Make a small bath from plasticine, pour water into it, and place it in place of the future hole. You need to drill through the bath, periodically adding water. It’s even better to fill the plasticine container not with water, but with turpentine.
When the hole is ready, its edges must be carefully sanded with fine-grain sandpaper.
Mirror mounts - brackets

The easiest way to mount a mirror on the wall is to use special brackets for mirrors, of which there are now a large variety on the market. Thus, the design of the holders can be lateral or straight, and the materials can be wooden, metal (mainly aluminum, chrome), plastic (brackets made of transparent plastic are interesting in this regard). The design is also different - from discreet, where the mirror itself comes to the fore, to stylish, with decorations. The convenience of attaching a mirror to brackets is that you do not need to make holes in it.
How to attach a mirror using staples?
1. Mark the places where the brackets are attached on the wall.
2. The mirror is inserted into the holders and clamped.
3. Fixed on the wall.
How to make mirror brackets yourself
You can mount the mirror on the wall using a backing and homemade brackets. It's simple.
We cut out the backing for the mirror from a piece of hardboard (thin fiberboard) or plexiglass (plexiglass).
Using washers, we attach strips of galvanized steel to the substrate so that they protrude slightly beyond the edge. We do this along both the upper and lower edges of the substrate.
Along the upper edge of the base, at the same distance from the corners, we attach a pair of strips with holes drilled in them (ears for hanging the structure).
Place the mirror on the base.
We bend galvanized plates and strips onto a mirror surface.
We hang the mirror structure on the wall by the ears.
How to attach a lightweight mirror using self-tapping screws without drilling
To make such a mount, you will need an assistant who will press the mirror to the wall in the right place.
Large self-tapping screws are screwed into the wall above and below the mirror, close to the edges. The mirror is fixed, all that remains is to put decorative plugs on the heads of the screws.

There are also enough profiles on the construction market for attaching mirrors - from different materials. The difference in mounting the mirror on brackets and mounting the mirror using profiles is small.
How to make holes in the wall to mount a mirror
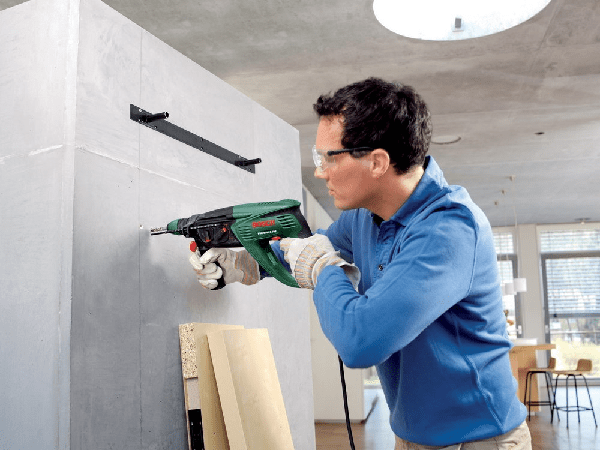
Carefully select the appropriate drill bit for the application. This is very important: if the drill is the wrong size, the dowels in the wall will gradually become loose, and in certain circumstances the mirror may fall and break.
The hole for the mirror mount should be drilled not straight, but slightly obliquely. That is, it is better to drill from top to bottom. This approach will allow you to make a very reliable fastening. Even if for some reason the fastener becomes loose, it will still not be able to fall out of the wall, since the dowel will be held by the wall itself. The slope may be quite small.
Actually, fixing a mirror to the wall is not a very difficult job. The peculiarity is that the mirror should be approached a little more responsibly compared to other materials. Otherwise, there are no “tricks” or “nuances” here.
According to archaeologists, people used mirrors back in the Stone Age, rubbing pieces of tin, gold or platinum until they shine. But the prototype of the modern glass mirror appeared only in 1240, when people learned to blow glass bottles. The inside of the bottle was covered with a layer of metal and broken. The fragments were used as a mirror. They learned to make a flat mirror only at the beginning of the 16th century in France.
The modern glass mirror is familiar to everyone and is a sheet of polished glass, on one side of which a thin layer of metal called amalgam is sprayed. Aluminum is used to make budget mirrors, and silver is used to make expensive mirrors. The metal film is covered with a layer of varnish on top to protect it from external influences. Therefore, when attaching a mirror to the wall, you must work very carefully so as not to accidentally damage the delicate mirror coating and the glass itself.
Today, when creating the interior of premises, mirrors are widely used, thanks to which you can change the space by visually expanding the walls of the room or raising the ceiling. I also decided to visually enlarge my hallway and hung a large mirror on a column protruding from the wall. The mirror also serves its intended purpose, allowing you to see yourself in full height. My wife really liked the presence of a large mirror in the hallway.
How to fix a mirror on a tiled wall
I already had experience attaching small mirrors to walls. One mirror, measuring 60x90 cm, was mounted on a tiled wall in the bathroom, above a glass shelf. When water procedures are taken, moisture usually condenses on the surface of the mirror, and it becomes covered with drops of water. Therefore, I chose a mirror with a silver amalgam, coated with a protective layer of copper and a double layer of paint. Over twelve years of operation, the mirror has not changed its original appearance.

The mirror was made to order, and I provided two large holes in the upper part for fastening. To hang the mirror on the wall, you just need to put it on the bases of two lamps. To prevent the mirror from moving on the plastic body of the lamps, shallow grooves were made in it with a width equal to the thickness of the mirror. Placing the lamps on the plane of the mirror made it possible to increase their efficiency, since the light from the back of the lampshades is reflected from the mirror and directed into the room.

To prevent mechanical damage to the amalgam and the protective varnish layer on the tiles when installing and washing the mirror, several thin rubber plates were glued to the tiles in the corners and center of the mirror.
How to fix a mirror on a brick wall
Another mirror measuring 35x110 cm was mounted on a brick wall in the hallway above a low cabinet. Since the mirror practically stood on the cabinet, there were no special requirements for mounting; it was enough to support the mirror so that it could not fall to one side.

For beauty, the mirror was placed in a frame consisting of two strips of MDF. In the center of the sides of this baguette, a sample was made with a depth of 10 mm and a width of 5 mm. The sample was filled along its entire length with a small amount of silicone, the mirror was inserted into these grooves and, after the silicone hardened, it became one with the frame.

The mirror is fixed to the wall using two hangers, one of which you see in the photo. The mirror with holes in the hangers is mounted on self-tapping screws screwed into dowels that are installed in the brick wall.
How to fix a mirror on a plasterboard wall
The above methods of attaching a mirror did not present any difficulties, since the mirrors were small in size and therefore light. Questions arose when I was faced with the need to hang a large mirror on a plasterboard wall in the hallway (mirror size 66x170 cm, weight 12 kg). The difficulty was that, in addition to its large size, the mirror was only 4 mm thick, therefore, it was necessary to install four dowels with high precision so that when fixing the mirror on the wall, it would not crack.
Choosing a mirror mounting method
on a plasterboard wall
Currently, there are three main methods of attaching a mirror to the wall: gluing with double-sided tape or special glue and screwing with self-tapping screws through holes in the mirror itself. Each method has its own advantages and disadvantages.
Only small mirrors with an area of no more than one square meter can be glued with tape, since the holding force of the tape is not great, and the reliability of this type of fastening for large mirrors will be low. The mirror may fall off over time. But the method is very simple and does not require high qualifications and tools. You need to cover almost the entire surface of the mirror with tape.
The adhesive method of fastening is very reliable, does not require high qualifications and tools, but, if necessary, it will be impossible to remove the mirror without damage, except perhaps together with a piece of the wall. Only glue intended for gluing mirrors is suitable for gluing, for example, “Soudal” polyurethane, the label of which should contain an inscription, including “for gluing mirrors.” You must be careful with the choice of glue, since unsuitable glue can damage the amalgam of the mirror.
Fastening with screws using special holders allows, if necessary, for example when renovating a room, to easily remove the mirror from the wall and then install it again without any problems. The only drawback of this method is the need to drill holes in the mirror.
My choice fell on the method of attaching the mirror using self-tapping screws, especially since the mirror was made to order and four holes in the mirror in the corners were drilled in the workshop. All that remained was to drill four holes in the wall for the dowels and tighten the screws.
Choosing accessories for mounting a mirror
To determine the diameter of the mounting holes in the mirror, fittings for mounting were selected in the workshop. One set of fasteners included a brass bushing with a plastic gasket, a decorative nut, a self-tapping screw and a dowel.

Upon closer examination, it turned out that the mirror is pressed against the wall by directly pressing the protrusion on the metal sleeve, and the decorative brass nut, when tightened, will also rest against the surface of the glass. Contact between glass and metal can lead to cracks, so the fastening had to be modified.

For this purpose, an additional gasket was made from polyethylene 0.5 mm thick. First, using a punch, a hole with a diameter of 5 mm was punched (this is the diameter of the end of the sleeve that fits into the mirror hole). The gasket can also be made of rubber or soft plastic.

The sheet with the punched hole was then placed over the sleeve and a decorative nut was screwed onto it. All that remains is to draw a line around the nut and cut along it with scissors. Installing a homemade additional gasket will completely eliminate metal contact with the mirror.

Four mounting kits have been modified to mount the mirror on a brick or concrete wall. To attach mirrors to a plasterboard wall, you will have to replace the standard cylindrical dowels with special ones called “Butterfly”.
Large mirror mounting technology
Usually large mirrors are hung on the wall at some distance from the floor. This is done not only for aesthetic reasons, but also to make it possible to install a floor plinth so that the mirror does not get dirty when cleaning the floor, and to prevent accidental damage. The fitting showed that the optimal height from the floor to the edge of the mirror in my case is 10 cm.

To hold the mirror at a height when marking holes for drilling and when mounting it on the wall, I placed a stack of chipboard scraps on the floor near the wall. But since the mirror was beveled (this is when a transparent strip of glass is ground along the edge of the glass of the mirror, forming an obtuse angle with its outer plane, it is clearly visible in the photographs below), it slipped into the gap between the stand and the wall. I had to additionally install a miter box, and put a plastic corner on it to protect the bevel from damage. Thanks to the miter box, the mirror could not slide into the gap between the wall and the stand.
If the mirror is mounted on a brick or concrete wall, then with the help of a stand it is pressed against the wall at the installation site, and with the help of a pencil, places for further drilling holes for dowels are drawn through the holes in the mirror. The mirror is removed, and using the device described on the website page Drilling holes in walls - a drill with a Pobedit drill - holes are drilled.

Marking holes when installing a mirror on a plasterboard wall can be eliminated by drilling holes in it with the mirror attached using a thin-walled tube of suitable diameter. The tube can be taken, for example, from a telescopic antenna by removing an elbow of suitable diameter from it. For better drilling, you need to make teeth on the end of the tube with a needle file.

With a tubular drill, if held in a hand vice, drywall can be drilled easily even by hand, but you can also use a drill, drilling holes at low speeds. The mirror itself will serve as a conductor. To make the mirror easy to hold in your hands and without gloves, I did not remove the wrapping paper from it, but only tore it at the corners to gain access to the mounting holes.

After receiving the first hole, you need to insert a dowel into it to prevent accidental displacement of the mirror when drilling subsequent holes. And then, after drilling the next hole, you also need to insert a dowel into it. As a retainer, instead of a dowel, you can use a wooden or plastic stick slightly smaller than the diameter of the hole in the mirror. The dowel should not be inserted completely so that it can be easily removed by hand.

For mounting on a plasterboard wall, special dowels are used, which are called Molly (Molly) or popularly “Butterfly”, because in appearance they resemble a butterfly. One Butterfly dowel is designed for a load of up to 10 kg, the mirror weighs 12 kg. The mirror is fastened using four such dowels, therefore, the load per dowel will be about 3 kg. The safety margin is more than sufficient.

When all the holes are drilled, the mirror is moved to the side and dowels are installed in the holes. The size of the base of the Butterfly dowel was slightly larger than the diameters of the drilled holes, so they had to be drilled out a little with an ordinary drill. I had PVA glue on hand, and for better adhesion of the dowel to the wall and to prevent coloring of the plaster, I smeared the holes with this glue before installation. It is not necessary to lubricate the holes with glue, but this will hold the dowel more securely.

Now all that remains is to squeeze the wings of the dowel with your fingers, insert it into the hole and hammer it in. Everything is ready to attach the mirror.

The mirror is placed back on the stand and secured to the wall with self-tapping screws using previously prepared bushings. Here it should be noted that the length of the self-tapping screw for guaranteed screwing into a “Butterfly” type dowel must be equal to the length of the dowel straightened in length, since the dowel behind the sheet of drywall may not return to the shape of the butterfly.

All that remains is to screw the decorative nuts onto the bushings, and the work of attaching the mirror to the wall can be considered complete. By the way, in this photo, the edges of the facet are clearly visible. Thanks to the facet, due to the refraction of the reflection in it, the mirror looks elegant.
How to make a beautiful frame for a mirror
A quick glance at the mirror mounted on the wall revealed that it did not harmonize with the surroundings in the hallway. The mirror hung as a separate element and did not fit well into the interior. It was clearly missing framing it with a baguette. I had to do some modifications and figure out how to make a frame for the mirror.

When visiting a building materials store, I noticed a decorative corner designed to decoratively protect the outer corners of walls. You see him in the photo. It consisted of two strips of cardboard covered with a film with a wood pattern. A distinctive feature of this corner was the ability to take any angle. The width of the edge of the corner was 20 mm, the length of the corner was 2.5 m. Just along the entire perimeter of the mirror, a section of the wall 20 mm wide remained uncovered. My imagination suggested that this was exactly what could be used to make an excellent frame for a mirror.

The corner was cut lengthwise into two strips, and sections of the required length were sawn off with end angles of 45°. This can be done using a miter box and a hacksaw. The frame was glued to the wall with Moment liquid nails, which I used when installing ceiling skirting boards.

After framing the mirror with a decorative frame, it harmoniously fits into the interior of the hallway. An evaluation of the result of the work after installing a large mirror in the hallway confirmed that the task of expanding the space and the ability to see oneself in full height was successfully solved.