This collection of material presents step-by-step technology sowing, planting and caring for the plant. A description of the most popular and recommended pepper varieties by experts will help you make your choice.
Sweet pepper, description
Sweet pepper is an annual herbaceous plant belonging to the Capsicum species and the Solanaceae family.
The famous agricultural crop is grown in temperate, tropical and subtropical latitudes of all continents. America is considered the birthplace of the plant.
It is warm and moisture-loving vegetable plant bears tasty and nutritious fruits.
The pepper fruit looks like a juicy hollow berry with numerous seeds. Fruit colors range from red, yellow, orange, green and white to brown or purple. The size and shape of the berries also differ depending on the type of pepper.
Semi-lignified stem and powerful branched root system allow you to hold it on the plant at the same time large number ripe large fruits. A low bush, with simple and short-petioled leaves, green in color, it became popular precisely because of its healthy and aromatic fruits.
Bred and cultivated around the world huge amount varieties of sweet peppers. In our country, the most common variety is bell pepper.

Sweet pepper varieties
Successful cultivation of sweet peppers largely depends on the well-chosen variety. Taking into account the main varietal characteristics of a vegetable crop: ripening time, size and shape of fruits, crop preferences in certain climatic conditions, it is important to choose the most suitable varieties of pepper.

Let's look at the most popular and productive varieties.
- "Tusk"
Early ripening, tall variety(up to 160 cm high), has sweet and aromatic red fruits. The fruits are elongated and cylindrical in shape. Pepper is suitable for growing in greenhouses and in open ground.
- "Agapovsky"
Characterized by medium ripening and cultivation in greenhouse conditions. The bush is compact, with cube-shaped red fruits.
- "Bogatyr"
Mid-season variety, with large (as the name suggests) red and juicy fruits.
- "Apricot Favorite"
Cone-shaped, smooth, orange fruits ripen early. A compact, low (up to 50 cm) bush suitable for growing indoors and outdoors.
- "Big Daddy"
Early ripening, low-growing variety with thick-walled, fleshy, purple-colored fruits. Universal for planting location (greenhouse or open ground), variety.

- "Yellow Bell"
It is distinguished by yellow, cube-shaped fruits and early ripening (about 70 days).
- Hybrid F1 “Star of the East white”
A powerful bush, with large whitish-cream fruits and early ripening.
- Hybrid F1 “Star of the East chocolate”
Semi-spreading bush, with large, prism-shaped and brown, juicy fruits. Characterized by medium ripening periods.
- "Gladiator"
Dutch variety, with large and fleshy (wall thickness 10-13 mm) yellow peppercorns. It has a mid-season ripening period.
- "Medal"
An early ripening variety with a long fruiting period. The fruit is large, thick-walled (10-12 mm), bright red.
- "Yova"
Early and unpretentious variety, different high yield And large fruits.
- "Victoria"
The fruits are cone-shaped, slightly ribbed, medium in size. The variety is medium early.
- "Brochka"
The variety is distinguished by early ripening and is resistant to diseases. The bush is not tall, with orange-red thin-walled (5 mm) fruits.
- "Bogdan"
A variety with a long fruiting period, with light orange thick-walled, large and fragrant fruits. The weight of one peppercorn is about 200-250 g.
- "Golden Pheasant"
High-yielding variety, with yellow fruits, pronounced sweet taste. The peppercorns are large (up to 300 g) and thick-walled.
- "Belozerka"
A low bush, densely covered with yellow and red cone-shaped peppercorns.
- "Kolobok"
It is distinguished by its rounded shape and thickened walls, fruits, and red color. Has excellent taste.
- "Alba"
A high-yielding variety with blunt-conical fruits of medium size. The peppercorns are thick-walled, juicy, and orange in color.
- "Sun"
A variety with yellow and large fruits, has high taste and technological qualities.

Varieties can also be distinguished according to individual characteristics. For example:
- Varieties of sweet peppers with a pronounced sweet taste (Swallow, Winnie the Pooh, Tenderness, Maikopsky 470).
- Varieties resistant to diseases, pests and hot climates (Ararat, Terek, Adler, Erivan, Kazbek).
- Varieties for growing in open ground (Etude, Karat, Curious).
- Varieties for growing on the windowsill (Watercolor, Candy, Tomboy, Yarik, Chanterelle, Treasure Island).
- Varieties for growing in a greenhouse (Orange Miracle, Alyonushka, Winnie the Pooh, Tenderness, Lastochka, Californian Miracle).
- Varieties characterized by thick-walled and large fruits (California Miracle, Gladiator, Winnie the Pooh, Gift of Moldova).
- Varieties for conservation (Kupets, Victoria, Ermak).
- Early varieties of sweet pepper (Lumina, Aivenhoe, Triton, Alantik F1).

The best sweet pepper According to agronomists and gardeners, the following early and mid-season varieties are recognized: Eroshka, Funtik, Hercules, Fakir, Chardash, Younga, Accord, Viking, Claudio, Cornet, Atlant, Big Papa, Licedey, Ulybka. According to reviews, these varieties of sweet peppers have proven themselves to be hardy, high-yielding crops, with high taste and technological qualities.
In any case, when choosing a variety to plant on your site, it is first better to become familiar with its characteristics and suitability for a specific climatic zone.

Growing sweet peppers
Light and heat-loving plant, pepper grows well in the open ground of the southern regions, with a warm and mild climate. In the zone of central Russia, the crop is mainly grown in greenhouses and greenhouses.
Sweet peppers have a long growing season. Therefore, for successful formation and ripening of fruits, peppers are planted in open ground with ready-sprouted seedlings.

Technology for growing sweet pepper seedlings
The process of planting sweet pepper seedlings includes several main steps:
- preparing seeds for sowing;
- sowing seeds in a container;
- seedling care;
- planting seedlings in separate glasses;
- planting seedlings in open ground.
Let's take a closer look at all of the listed stages of growing sweet pepper seedlings.

Preparing sweet seeds before sowing
- To begin with, you need to select the strongest and most viable specimens from the total mass of seeds. Having poured all the seeds into a container with salted water, only the “drowned” seeds are left.

- Selected sweet pepper seeds are disinfected (20-30 minutes) in a weak solution of potassium permanganate, after which they are washed.
- To improve germination, soak the seeds for 12 hours in a growth stimulator.
- Even without additional growth stimulation, the seeds need to be kept moist (on a damp cloth or cotton wool) for about 2 days. This procedure will allow the seed to germinate faster in the soil.

Sowing sweet pepper seeds
- The timing of sowing seeds for seedlings varies from the end of January to the beginning of March.
- The seeds are planted in a single container, making not deep (1-2 cm) grooves with a pencil or stick with a row spacing of 5-6 cm. The distance between the seeds is about 2 cm. “Continuous” sowing is also practiced over the entire surface, without rows.
![]()
- You can sow directly into individual cups, for example, peat pots, about 10 cm in diameter.

The opinions of practitioners on this matter are divided. Some believe that it is easier and simpler to care for a single large container, and that after the seeds germinate, it is more convenient to select the strongest and healthiest sprouts, which are then replanted separately. Others argue that peppers do not tolerate transplantation well, so it is better to immediately sow them in disposable cups. And if you replant, do it very carefully and correctly, without injuring the roots of the seedlings.
- The soil in the container should be light and loose. The soil mixture consists of humus, sand and turf soil. To create a more nutritious environment, add 1 tbsp per 1 kg of mixture. wood ash.
- After sowing, the seeds are sprinkled with soil, lightly compacted and covered with film to create a greenhouse effect. The container with seeds is placed in warm place for subsequent germination.
- During this period, ensure regular ventilation and watering of the planted seeds.
- After 1-2 weeks, the first shoots of pepper appear. In this case, the film must be removed immediately.

Caring for sweet pepper seedlings
- The temperature of the room in which the seedlings germinate should be around +22-25° C.
- To ensure that the seedlings have enough sunlight, the container is placed on the windowsill. In cloudy weather, in the morning and evening, you need to add light to the seedlings fluorescent lamp. Normally, the plant should receive light from 8.00 to 20.00. With a lack of lighting, yellowing and falling leaves are observed.
- As the soil dries, provide watering at room or slightly warm temperature. It is important to provide seedlings moderate watering, avoiding either drying out of the soil or stagnation of moisture. Excessive watering of seedlings can lead to blackleg disease. Seedlings respond favorably to spraying (from a spray bottle) the leaves with water.
- When ventilating the room, it is better to remove the seedlings from the windowsill, because they don't like drafts.

Planting sweet pepper seedlings in separate glasses
- When appearing on young plant two true leaves (not counting cotyledons), the seedlings are transplanted into separate cups or pots.
- First, the soil of the container is moistened with water.
- When transplanting, carefully prying up the sprout, keeping a lump of earth near the root, the seedling is planted in a separate container. This event will ensure better survival of the seedling.
- When transplanting, it is better to pinch the main (long) root, about 1 cm, to stimulate the development of lateral roots.
- The seedling is placed in a cup with soil mixture, sprinkled with soil to the level of the cotyledon leaves and watered.
- During the period when 2-3 leaves appear, the first feeding of seedlings is carried out. To do this, take 0.5 g of ammonium nitrate, 1 g of potassium-containing fertilizers, 3 g of superphosphate and dissolve everything in 1 liter of water.
- The next feeding is carried out after about 2 weeks with a double dose of fertilizer.
- The last application of fertilizers occurs during the period before planting the seedlings (2-3 days before) outside. The dose is doubled again.
- Many gardeners recommend spraying them with a solution of a natural growth stimulant a day before planting seedlings. The plant will be more hardy, resistant to diseases and will show high fruiting results.

Planting sweet pepper seedlings in open ground
- For a permanent place, seedlings of heat-loving sweet pepper planted only in May month (at the age of 90-100 days). The plant by this time has about 10 leaves. Seedlings planted on the plot in the first half of the month are covered with film to prevent freezing. If the pepper was planted in the second half of May, no additional shelter is needed.
- Before planting seedlings (1.5-2 weeks before) in open ground, carry out hardening. For this, in good weather, seedlings are periodically exposed to the street (balcony), gradually increasing the exposure time. At night, the seedlings must be brought indoors.

Sweet peppers for greenhouses
- Seedlings for planting peppers in a greenhouse are grown using the method described above.
- The soil in the greenhouse, before planting, is fertilized with organic and mineral fertilizers.
- Seedlings for greenhouses are planted at an earlier age (50-60 days), at a distance of about 40-50 cm between seedlings and with a row spacing of 60-70 cm.
- Peppers are planted in the soil of the greenhouse along with a lump of earth from the cup where the seedlings grew. The procedure is done carefully, avoiding transplant stress for the plant.
- After planting, the seedlings are watered abundantly and the soil is mulched.

Planting sweet peppers
Planting peppers is carried out in the process of planting germinated and hardened seedlings.
Sowing seeds in open ground is not advisable, even in warm, southern regions. The plant will develop more slowly, and the yields will not be large.

Choosing a place to plant sweet peppers
- The place for planting sweet peppers in open ground should be open, sunny and windless.
- The soil for sweet peppers should be light, nutritious and loose, with good aeration. You need to add straw, peat, sawdust, and humus to dense soil. Poor soils must be fertilized with organic matter, potassium and phosphorus mineral fertilizers. Acidic soils should be limed.
- The predecessors of pepper on the site can be any vegetable crops (onion, cucumber), except representatives of the nightshade family (tomato, potato).
- Peppers are susceptible to cross-pollination, so other varieties of peppers or hot peppers should not be planted nearby.

Agricultural technology for planting sweet peppers
- For planting, prepare holes measuring about 30x50 cm. In one hole, at different ends, you can plant two plants at once, then the size of the hole and row spacing is slightly increased.
- Approximately 30-40 cm are left between holes, 40-50 cm between rows. Often, to save space, staggered planting is practiced.
- It is better to plant in the evening.
- Water is poured into the hole, after it has been absorbed, the seedlings are planted.
- The seedling is covered with soil up to the level of the stem neck.

Sweet pepper, care
Sweet pepper is a vegetable crop that requires care and quality soil composition. To achieve maximum yields, you need to follow all agrotechnical techniques for caring for the plant: watering, loosening, fertilizing and pest control.
In addition to the main activities, the central flower on the plant is pinched, which can significantly increase the yield of sweet peppers.
In addition, in hot, humid weather, pinching is carried out, removing the side stepsons and lower leaves.
- Watering is carried out regularly as the soil dries out.
- You need to water the pepper often, but little by little.
- Excessive moisture, as well as drying out of the soil, leads to the fall of pepper fruit ovaries.
- It is better to use warm water for watering.
- Shows excellent results drip irrigation pepper beds.

Loosening and mulching
- To prevent the soil from drying out, the beds are mulched with peat or sawdust.
- After watering, if the area is not mulched, it is necessary to loosen the soil shallowly (taking into account the shallow root system of the plant).

Fertilizer application
- It is recommended to apply fertilizing (2-3 times) during the growing season of the plant.
- The first fertilizing, as a rule, is nitrogen. You can use nitrogen-containing fertilizers or liquid manure (12:1). Do not exceed the norms for applying fertilizers. An excess of nitrogen will negatively affect the fruiting process of the crop.
- Before budding begins, potassium-phosphorus fertilizers are applied.
- After flowering, during the period when fruiting begins, superphosphates and wood ash are added.
- Sweet pepper responds well to application liquid fertilizers organic fertilizers.

Pest and disease control of sweet peppers
- The fungal disease “black leg” appears when improper care for pepper and contamination of the soil layer: with excessive moisture, using cold water for irrigation, planting in places with constant drafts or dense clay soils. A sign of the disease is a blackened stem at the base. In case of infection, top layer the soil is removed and the area is disinfected with a weak solution of bleach.
- Prevention of the disease “late blight” is disinfection of seeds in a solution of potassium permanganate. Signs of the disease - appearance brown spots on the stem and leaves. Infected plants are sprayed with infusion onion peel or Bordeaux mixture.
- To prevent sweet peppers from becoming infected with “bacterial black spot,” all plant debris is collected and burned in the fall. The seeds are first disinfected.
- When attacked by aphids or spider mites, spraying with tincture of garlic, wormwood or tansy helps.
- The fight against mole crickets and slugs comes down to the use of special chemicals or traps.

Sweet pepper garter
- Tall varieties of sweet peppers need staking and bush formation (2-3 main stems are left).
- Already when planting seedlings, you can install a support next to the bush and tie up the stem.

Harvesting sweet peppers
- Both ripe fruits and unripe (greenish) fruits are collected.
- Unripe fruits are placed in boxes for ripening at room temperature. This will ensure better ripening of the young fruits remaining on the bush.
- When harvesting, the fruits are cut and not broken out, so as not to damage the branches and stems of the bush.
- From the first, large and mature fruits, you can collect seeds for sowing next year.

Thus, by following the basic rules of planting and caring for the plant, every gardener, including beginners, can easily grow sweet peppers on their plot.
Well, the undeniable benefits and high nutritional value this vegetable crop will be an additional incentive self-cultivation pepper
Sweet pepper, photo


Video: “Features of growing sweet peppers”
Video: “Typical mistakes when growing sweet peppers”
Planting peppers in open ground can ultimately yield a good harvest if everything is done correctly. Sweet bell pepper is considered an unpretentious plant, but it is still important to observe some subtleties in care. How is it necessary to plant and grow peppers in open ground?
Many gardeners believe that it is better to grow sweet peppers from seeds. After all, then you can give the plant everything it needs from the very beginning, so that later you can get juicy and large sweet peppers. Planting peppers in open ground is a troublesome, but interesting task.
Agronomists recommend sowing sweet peppers in open ground in the spring, when the frosts have definitely passed. Enough warm temperature soil and air will contribute to the active development of plants. How to properly germinate bell peppers from seeds?
- First you need to carefully prepare the seed material. To do this, the largest and smoothest seeds are selected and soaked for about 30 minutes in a 1% iodine solution. This is necessary so that bacteria and other microorganisms that may interfere with germination die. After this time, the seeds are thoroughly washed clean water. Next, you need to take warm water (about 50 degrees) and pour a small amount of it onto a saucer. Put gauze there, spread the seeds on it, then cover them with another layer of gauze;
- It is important that the gauze is always damp during the germination process. Therefore, it is necessary to constantly wet it warm water from a spray bottle. The saucer should be in a fairly warm place. Usually 2-3 days are enough for the seeds to begin to germinate;
- As soon as the first sprouts appear, you can start planting peppers. To do this, prepare the ground in advance. It is best to mix sand and humus in equal quantities, and then mix it with ordinary soil. For every 1 kg of soil, be sure to add about 1 tbsp. l. wood ash. It is best to first plant the peppers in boxes, and when the second row of true leaves appears, transplant the seedlings into open ground. In order for the seedlings to grow stronger as quickly as possible, it is necessary to cover the boxes with film at the very beginning, and then periodically open them to allow more light and heat to enter.
Planting in open ground
To grow good bell peppers, seedlings must be planted in open ground correctly. Peppers are planted in the garden when the second or third row of permanent leaves appears. IN ideal The stems should already be quite thick by this time. After all, the bell pepper that is planned to be planted must be strong.
You should thoroughly loosen the soil in the garden in advance and add the necessary missing elements to it. Sweet peppers love sand and humus. Sand makes the soil loose, allowing roots to breathe freely. And humus gives everything essential microelements. As for sowing, sand and humus must be added to the soil in equal quantities.
First you need to dig holes in the soil for seedlings. Their depth directly depends on the height of the plants. Remember that the entire root system must be in the ground. But it is extremely undesirable for the stems to be deeply buried in the ground. This can provoke rotting processes, as a result of which the plants will die very quickly, without having time to produce a harvest.
A little ash is immediately poured into the holes, and the soil is moistened if necessary. Planting sweet peppers in soil that is too dry will not provide sufficient compaction of the roots in the earthen coma. When planting, you should preserve the earthen ball as much as possible.

It is recommended to plant seedlings in the ground at a distance of at least 25 cm from each other. Gradually growing, the bushes will require more space. Therefore, it is so important to provide them with relative space for normal development and fruiting.
Features of care
Gardeners must know how to properly care for bell pepper seedlings in open ground. Mature, strong plants that have already budded do not require any special attention to yourself. Bell peppers, which are easy to plant, require more careful care at the beginning.
- At first, you should water the plants as often as possible, but try not to overdo it! Experts recommend watering in the morning or evening. Once a day will be enough. It is better to use soft, slightly warm water for this;
- It is recommended to loosen the soil before each watering. Otherwise, it may turn sour, which will certainly lead to fungal diseases of the roots. Excessive dryness, waterlogging and insufficient air are the main risk factors for infection with “blackleg” and other dangerous diseases;
- It is best to tie up sweet peppers by placing a wooden peg near each bell pepper bush. The leaves and stems, even if they are already strong, are quite tender. Therefore, they can easily break from exposure strong wind or from birds and animals;
- If sweet peppers are grown in open ground in a region characterized by frequent climate changes, then it is best to make a small “fence” of garden net. If the winds are very strong, then in addition to the fence you can build a small tent, the roof of which is also made of a tightly stretched mesh;
- Don't forget to pinch the sweet peppers in a timely manner. This will not only contribute to the development lush bush with numerous ovaries, but will also prevent tangling of the roots. And this is extremely important, since often inexperienced gardeners have the roots of neighboring plants tangled with each other, which interferes with normal fruiting and development.

Growing bell peppers in open ground has its own secrets. Knowing them, you can delight yourself with a bountiful good harvest. What rules must be followed in order for the crop to constantly bear fruit?
- Timely feeding is one of the key factors. Sweet peppers love urea. Therefore, fertilizing with such a substance should be carried out periodically. The first fertilizing can be done after the appearance of the 4th row of leaves. At all times it is necessary to use a solution prepared at the rate of 1 tbsp. l. urea per 10 liters of water;
- To ensure that bell peppers are protected from pests and resistant to diseases, before planting them in open ground, it is recommended to disinfect the soil with a solution of copper sulfate. This must be done a couple of days before planting the seedlings. The solution is prepared at the rate of 1 tbsp. l. vitriol in a bucket of water;
- For normal development of sweet peppers, the presence of heat and sun is necessary. But at the same time from direct sun rays It is better to shade the plants slightly. Best to choose small area, where sun and partial shade will alternate throughout the day. But in no case should you keep the pepper in complete shade, as then you can collect good harvest it certainly won't work.
So, it’s now clear how to plant peppers in open ground and care for them. There is absolutely nothing complicated here if you follow certain rules. Growing this crop with your own hands is quite possible even for an inexperienced gardener.

Bell pepper. Planting and care in open ground
Hardening of seedlings
Hardening is of no small importance for the success of growing bell peppers. You need to start it 2 weeks before planting the sprouts in the ground. First, the windows are opened, then the pots are taken out to the balcony or terrace during the day if the weather is warm. 7 days before planting, the seedlings are sprayed copper sulfate to protect against fungal diseases. Hardening is of particular importance for growing bell peppers in open ground somewhere in Siberia.
Planting seedlings in open ground
About how to grow good pepper already in open ground, as described in this section of the article. First of all, you need to choose a warm (not hot) day for transplantation.

Optimal timing for planting
Growing sweet peppers in open ground usually begins at the end of May, since frosts no longer occur at this time. Air temperature is 15–17 °C, and soil temperature is 10–12 °C.
Site selection and preparation
The area needs to be well lit and protected from the wind as much as possible. Land with good drainage is cleared of weeds. Depending on the type of soil, the following additives are necessary:
- if the soil is sandy, then per 1 sq. m bring in a bucket sawdust and 2 buckets of humus, peat and clay;
- if the soil is peaty, then add 1 bucket of turf soil and 1 humus;
- for clay - two buckets of peat and 1 bucket each of sawdust (rotted) and coarse sand.
7 days before planting, the soil should be watered abundantly. The holes are made approximately the same size as the cup in which the seedlings were, before planting they are watered with water at the rate of 2 liters per 1 hole. 
Good and bad predecessors
An important role is played by the predecessors of the Bulgarian vegetable in the selected soil. It is not recommended to grow it where eggplant, pepper, tomato, tobacco, physalis and potatoes previously lived. But the soil after such garden inhabitants as cucumbers, root vegetables, herbs, pumpkins, cabbage and legumes is quite suitable.
Scheme of planting seedlings
Peppers are planted according to the following scheme: 60–70 by 20–30 cm. Carefully pulling the bushes out of the pots, place them in the holes in vertical position and plant a little deeper than in the previous dish.
Care during growing peppers
To get a good harvest you need proper watering, weeding, tying and fertilizing.
Frost protection
Tents made of wooden blocks, burlap or cardboard will save you from the cold. You need to cover the pepper in the evening, and open it again in the morning.
Prevention from pests and diseases
For protection when growing bell peppers in open ground in middle lane(and not only there) against various diseases and pests there are the following rules:
- do not allow the soil to become waterlogged;
- remove dying leaves in a timely manner;
- apply fertilizers according to a certain pattern;
- in case of late blight, spray the plant with a 1% solution of Bordeaux mixture;
- Remove gray rot using garlic solution.
Watering, weeding and loosening
Watering should be done with rain or settled water (24–26 °C). Before the plant blooms, it needs to be watered once a week, in hot weather it is better to water 2 times, and during flowering and fruiting - 2-3 times. Good weeding is also included in the complex of quality care. With a shallow root system, loosening sweet peppers should be as careful and superficial as possible. Mulch or hay is also used.
Feeding
The signal for the first feeding is the appearance of 1–2 leaves on the seedlings. Superphosphates (3 g) are mixed in a liter of water, potash fertilizer(1 g) and ammonium nitrate (0.5 g). After 14 days, the sprouts need to be fed again, only with a double dose.
Garter
Unfortunately, pepper shoots break easily, so it would be a good idea to tie them to pegs. It is better to plant the garden bed with tall plants - this should protect the planting from the winds.
Harvesting
With proper care, a wonderful harvest awaits you. Harvesting is simple: the fruits do not break off, but are cut off with pruning shears along with the stalk, so as not to damage the entire rather fragile shoot. At the moment of technical maturity, peppers are selectively pruned every 5-10 days, and at the moment of biological (real) maturity - every 4-5 days.

Today, many people like to eat sweet peppers, making a variety of dishes from them or eating them just like that. Sweet peppers can be added to salads, meats, stews, or cooked as a separate grilled dish. In addition, this plant is extremely useful because it contains a large amount of vitamins and minerals.

Growing sweet peppers in open ground
Of course, in the summer you can buy peppers in any supermarket, but how nice it is to plant them on your own summer cottage, and then get a rich harvest of fragrant, sweet and juicy fruits.
The topic of this article is growing sweet peppers in open ground. In it we will look at practical tips for planting and caring for this plant.
Growing sweet peppers - where to start?
In order to get a good harvest, you need to start sowing seedlings from the very beginning of February. This time is the most appropriate, because by the time the seedlings are planted in open ground, they will already be quite healthy and strong.
So, as soon as the first days of February arrive, you should start. From the very beginning it is necessary to prepare planting material. The seeds need to be soaked by placing them in a vessel with water for several days. You can add it to water small piece aloe, which is necessary to strengthen and disinfect seeds. You should also prepare containers where the planting material will be planted in the future.
Bell pepper: benefits, cultivation and best varieties
After several days, when the seeds are ready for planting, we send them to a container with loose, nutritious soil. It is sold in all specialized stores, so choosing it will not be difficult. The seeds are sown at a shallow depth. After this, the container must be covered with cling film until the first shoots. When the peppers hatch, the film should be removed.

Sweet pepper seeds
Watering seedlings plays an important role in healthy growth. It is necessary to water with warm water that has settled. Pepper does not like drought, so the main thing is to monitor the soil moisture, but you should not overdo it either, because the root system may not withstand too much waterlogging.

When the time comes and the seedlings form their first true leaves, it is necessary to transplant the bushes of two peppers into one container. This is done to avoid weaving and entangling the root system of plants. Immediately after transplantation, growth may slow down, but this is natural, because the plant does not like to be transplanted from place to place.
Planting sweet peppers in open ground
How to plant seedlings in open ground? First of all, before planting, you need to warm the soil by covering it with film. Pepper is a heat-loving plant, so it reacts poorly to cold and coolness. To ensure a successful landing, it is important to follow some rules:
- Location. An open place should be chosen, since pepper loves the sun and does not tolerate wind and drafts. You can get rid of the wind with the help of nearby growing bushes. Remember to rotate crops by always changing planting locations. Never plant peppers in the same place - otherwise it will affect the growth of the plant.
- Holes. The holes must be made at a distance of about forty centimeters from the bush to the bush, and the distance between the rows should be about half a meter.
- Fertilizer. In each hole you need to put ash and not a lot of humus. You should not use mineral fertilizers, as they will affect the ripe pepper.

The plant itself sinks into the ground until the first true leaves. You can immediately prepare the pegs for further tying. After planting, you should immediately cover the seedlings with film for about two weeks. Watering should be done once a week until color appears. You need to water with warm water that has stood for some time. After the color appears, increase watering - once twice a week with the same water at the root.

Important! When the plant reaches about a quarter of a meter, the top of the main stem should be cut off. After which the plant will begin to develop in width. On each pepper plant you need to leave about twenty-five fruits, that is, remove all the stepsons except the top four. If the summer is very hot and dry, then pinching is not required.

So, growing sweet peppers in open ground- the task is not difficult and anyone can do it, even novice summer residents. We hope that our tips will help you reap a rich harvest of juicy and aromatic peppers.

Heat-loving peppers are grown in open ground only seedling method with sufficient moisture supply.
Place of pepper in crop rotation and site selection
Good predecessors are cabbage, root vegetables, pumpkins, legumes, for which large doses of organic fertilizers are applied.
Peppers are placed after other nightshade crops no earlier than three to four years in order to protect them from diseases common to them.
Peppers should not be planted in an area where they have been introduced. fresh manure, since excess nitrogen causes the growth of the vegetative mass to the detriment of fruit formation.

The site must be protected from the wind, which increases moisture evaporation, cools the soil and plants, and carries away carbon dioxide rising from the soil. As if preventing moisture loss, plants shrink their pores, which inhibits their growth and development. You can plant beds of tall plants (corn, beans, etc.) to create a more favorable microclimate for the peppers and retain moisture in the soil.
Soil requirements
Humus-rich soils are preferred better light ones structural, sandy loam and light loamy chernozems. Heavy clay soils are unsuitable for growing peppers. In addition, pepper is sensitive to alkaline and acidic soils, the optimal pH value is 6.0-6.5. On acidic soils it is necessary to carry out liming (300-500 g of lime per 1 m2).
Preparing the beds
The beds begin to be prepared in the fall after harvesting the predecessor. The area is cleared of plant residues, compost is added (a 1 m2 bucket with the addition of 20-30 g of superphosphate), it is dug up onto the bayonet of a shovel, removing the weed roots.
Bell pepper cultivation and care in open ground, video and photo
In spring, the soil is processed additionally. If you haven’t had time to apply organic fertilizers since the fall, this can be done in the spring (a bucket of humus per 1 m2 with the addition of a glass of ash). You can grow peppers on flat surface and on ridges, which are made higher on heavy, cold soils (30 cm or more).
Transplanting
Seedlings are planted when the stable average daily air temperature is 13-15°C and there is no threat of return frosts, and the soil at the planting depth warms up to 10-12°C. In cold soil, plants do not develop well and may become sick.
In order for pepper seedlings to take root better and the flowers not to fall off, a day before planting in a permanent place, they are sprayed with epin, zircon or etamon.
Planting scheme depends on the variety(usually its characteristics indicate the power supply area). Seedlings of medium-sized plants are planted at a distance of 30-35 cm from each other (six plants per 1 m2), tall and densely leafed - 40-45 cm (four to five plants per 1 m2).
Plant seedlings in well-watered holes (0.5-1.0 liters of water per plant). Plants are placed in the hole at the same depth at which they grew in the pot. The roots are tightly pressed with soil; it is better to plant plants on cloudy days or in the evening (they get sick less, take root well and grow faster).
After planting, the soil is mulched with peat, film (black and white) or non-woven material (polypropylene). To do this, before planting, the bed is covered with film and slits are made in it through which the seedlings are planted.
As a rule, peppers planted under mulch grow faster, do not require weeding or loosening the soil, and moisture does not evaporate and the soil does not become compacted. Pepper grown in better light (on white film) gives a yield increase of up to 20%.
Planting care
To protect against frost, beds can be covered at night with lutrasil or other covering material that allows light, air, precipitation to pass through and retains heat.
Watering
Water the plants at the root so as not to get on the leaves and flowers, spilling the soil with warm water to a depth of 20 cm. Then the soil must be loosened, trying not to damage the root system. Watering cold water(10-12°C) can cause flowers and ovaries to fall off. It is not recommended to water plants in hot weather.
Feeding
During the growing season, two or three feedings are carried out. For the first feeding (10-15 days after planting), granulated bird droppings (0.5 kg per 10 liters of water) or a solution of ammonium nitrate, superphosphate, potassium sulfate or complex fertilizers are suitable. After 10-15 days, when the ovary forms on the plants, a second fertilizing with mineral fertilizers (a solution of nitrate, superphosphate and potassium sulfate) is carried out. Then the peppers are fed at the moment mass formation and filling the fruits with mineral fertilizers. For feeding, you can use the Kemira Lux complex fertilizer, which contains, in addition to the main elements, iron, boron, copper, manganese, molybdenum, zinc, as well as universal humate, AVA, crystallon.
Growing peppers in open ground
Pepper cultivation
Growing peppers using “lazy” technology
How is growing sweet peppers different from growing its popular relative, the tomato? Firstly, pepper is more demanding of moisture and fertility soil. Secondly, pepper fruits can be eaten and prepared even green. Pepper requirements for heat and light approximately the same as tomato.
Like many varieties of tomato, pepper can be grown without a lot of labor and time, without the use of complex fertilizers and pesticides, without special agricultural techniques that take away the always scarce time and effort of the “lazy” gardener. However, to get a good harvest, it is useful to know a few recommendations.
Sowing seeds
It is best to sow in early March or (if targeting early harvest) in the second half of February. Pepper seedlings do not stretch as much as tomatoes. The soil for seedlings should be taken more fertile than for tomatoes, add up to 1/3 of a bucket of old rotted manure or compost and a mug of wood ash to a bucket of soil. You can sow in the same way as tomatoes, but before sowing it is advisable to soak the seeds in damp gauze (not water!) for 2-3 days in a warm place. After sowing, be patient: even at the most favorable temperature (+22 +28° C), seedlings of some varieties of pepper may appear only after 7-10 days. Further care for seedlings is the same as for tomatoes; However, pepper seedlings prefer warmth - they do not need to have cool nights. In addition, picking pots can be smaller - 6 cm in height and width. Pepper seedlings are not as demanding of light as tomatoes and can develop normally on western and eastern windows.
Caring for pepper seedlings
Seedling care peppers and tomatoes are also similar. “Lazy” gardeners don’t even have to feed pepper seedlings if they don’t turn pale and grow normally. By the end of April, some of the seedlings have early ripening and mid-season varieties you can pinch the top above the 5-6th leaf. Pinched seedlings will stop growing for 2-3 weeks, which is very convenient - the seedlings will be small, easily transported, and easier to take root in the ground. And most importantly, you can expect a higher yield, since the bushes will begin to branch earlier, and the fruits are mainly formed on the side shoots. True, the first fruits with pinched seedlings will be ready for consumption 10 days later. Therefore, we recommend pinching some of the seedlings - you will remove the first early fruits from unpinched ones; pinched ones will give a bountiful harvest later.
Caring for peppers after planting in the ground
The time for planting peppers in the ground is the same as for tomatoes. The landing spots are similar. True, if elevated and sunny places are in short supply, early ripening varieties can also be planted in an area with slight (no more than 2-4 hours a day) shading. Peppers, unlike tomatoes, can be safely planted on one raised bed in two rows. The distances between bushes in a row are from 20 cm for short-growing varieties and up to 35 cm for tall varieties, between rows - 1.5 m. A furrow for watering up to 10 cm deep must be made more thorough than in the case of tomatoes - peppers need watering all summer. If it wasn't good rain, should be watered at least once a week.
One major recommendation. As soon as the fruit has grown to a normal size for this variety, remove it immediately - if the fruit is left to ripen, new ovaries will stop growing. There will remain 2-3 fruits on the bush until the end of summer, but they will ripen. By regularly removing growing fruits from a Sibiryak bush, for example, you can get more than 10 fruits per season. At the end of summer, do not rush to remove all the small green fruits - peppers are not as susceptible to diseases as tomatoes, and the fruits of most varieties grow until the bushes die from frost. Even if the bush partially freezes during light frosts, which are possible here in late August - early September, the fruits remain undamaged (the leaves protect them). As a rule, peppers can grow in open ground until early September.
Pepper in greenhouses and greenhouses
To be honest, a “lazy” gardener does not need greenhouses and greenhouses for growing peppers.
If you want to have an early harvest, sow the seedlings early. As already mentioned, pepper seedlings stretch less than tomatoes, so you can sow from the second half of February. Illumination of seedlings is also not necessary. A greenhouse does not significantly extend the growing season of pepper. Until the beginning of September, as a rule, it can grow in open ground, but in September the yield increase in the greenhouse will be small - it’s already a day. short, there is not enough sun, and in the second half of September severe frosts are possible, from which unheated greenhouse won't save. In addition, peppers in a greenhouse must be watered at least every other day; there is a high probability of aphid attack. So growing peppers in a greenhouse is unlikely to reduce the hassle.
So, as you can see, growing sweet peppers is probably easier than growing tomatoes. Fertile soil, good varieties and seeds, reasonable sowing and planting times, watering and sunlight guarantee a harvest in any year. Unlike tomatoes, even gourmet varieties of peppers (California Miracle, Gogoshary, etc.) can be grown by “lazy” farmers without much risk. Spraying, special fertilizers and agricultural techniques can, of course, increase the yield, but its foundation is laid by following a few simple cultivation rules given above.
Intensive Pepper Growing Methods
Unlike tomatoes, intensive methods of growing peppers differ slightly from simplified ones - only a few techniques are added pre-sowing treatment seeds and plant nutrition. These techniques are as follows.
Treat the seeds before sowing 1% solution of potassium permanganate for 20 minutes, soak (2-3 days) or bubble (18-24 hours) in an infusion of ash in snow water at the rate of 2 matchboxes per 1 liter of water (you can add aloe juice). You need to sow in small wooden boxes filled with a nutrient mixture, the same as for tomatoes. Sowing is done to a depth of 1-1.5 cm, the distance between grains is 1.5-2 cm, between rows 3-4 cm. The ground temperature should be +22 - +25° C. Before sowing, water the rows with warm, preferably snow, water. Cover with glass or film and place in a warm place. Shoots appear on days 6-10, earlier with preliminary bubbling. Best Temperature for seed germination +25 - +28°C, below +15°C peppers may not sprout at all. After germination, expose the boxes to light.
In the first week after germination the air temperature should be maintained within +16 - +18° C. At this time, intensive root growth occurs, and coolness inhibits the growth of seedlings (their elongation). You only need to water with warm water. Picking is carried out after 2-3 weeks when two true leaves appear. The root system of peppers after picking grows worse than that of tomatoes. Therefore, when performing this operation, avoid damaging the roots (only 1/3 of the main root is removed from below). The nutrient mixture in pots should consist of soil, humus and sand in a ratio of 6:3:1. Starting from seed germination, peppers and eggplants are in great need of phosphorus, so it is absolutely necessary to add superphosphate. When picking, plants, as in the case of tomatoes, are buried down to the cotyledon leaves. For several days after picking, peppers should not be exposed to direct sunlight. When warm weather sets in, at least 10 days before planting in the ground, seedlings need to be hardened off in the fresh air, but at the same time protect them from cold northern winds.
Planting in the ground or in a greenhouse carried out when the ground warms up to at least +15°C at a depth of 10 cm. Peppers can be planted in the greenhouse from the second half of May, in the ground - together with tomatoes - from the first ten days of June. We recommend covering the ground intended for peppers with film after the snow melts. This helps to better warm the soil and retain moisture in it. When planting, seedlings must have at least 7-9 developed leaves and formed buds (early ripening varieties can be planted even with an ovary).
One of the recommended pepper planting schemes- double rows of ribbons. Between ribbons 60 cm, between rows 40 cm, between plants in a row 20 cm. The root system of pepper lies at a depth of only about 10 cm, so loosen shallowly and carefully.
Watering peppers
To obtain good harvests, except preliminary preparation soil, regular watering and fertilizing are required. With a lack of moisture, the stems quickly become woody, the fruits become smaller and the yield decreases. However, excess moisture is also undesirable, as it contributes to the spread of diseases in the soil and air. Therefore, after watering, loosening is very useful; in addition, greenhouses must be regularly ventilated. Never water with cold (below +18°C) water! During the summer, it is recommended to top the plants with humus or turf soil mixed with ash.
Feeding peppers
Feeding at the beginning of growth- bird droppings (1:15) or mullein (1:10) with the addition of 10 g of urea, 30 g of superphosphate, 20 g of potassium sulfate per bucket of water. In the flowering phase, the last three components are added in a ratio of 7:40:30, and in the fruiting phase 15:30:40. During the fruiting phase, you can also use a solution of nitrophoska (3 tablespoons per bucket of water, 1 liter per bush).
Sweet peppers in open ground. Growing experience.
Peppers love feeding wood ash at any time, add 1 tablespoon per plant. Foliar fertilizing with urea and potassium permanganate is useful (1 matchbox urea per bucket) during the growth period.
During mass flowering and fruit set, you can give foliar feeding with an infusion of ash (1-2 cups per bucket) according to the color and leaves. This fertilizing can be replaced with microfertilizers applied according to the instructions.
When growing peppers in a greenhouse or under film Make sure that the air temperature does not rise above +35°C, otherwise the flowers and ovaries will begin to fall off, water at least once every 2 days at sunny weather. You can protect the roots from overheating by mulching with peat, sawdust, hay, etc., covering the soil with a layer of 5-10 cm. This also reduces drying out of the soil (watering can be done 2-3 times less often), the growth of weeds, the difference between day and night temperatures Throughout the summer, it is recommended to close greenhouses at night and open them during the day (from the ends). To avoid excessive overheating in the greenhouse, it is useful to place containers with water.
Pepper harvest
Cleaning begins, when the fruits of the first tier reach technical ripeness, the signs of which are the maximum size and color characteristic of a given variety. Pepper shoots are fragile, so remove the fruits very carefully, using scissors or a sharp knife. The fruit must be cut with the stalk. In a warm room, the fruits will reach biological maturity within 20-25 days. It is recommended to collect fruits after 4-5 days.
Getting pepper seeds
To obtain seeds select the bush that is most productive and characteristic of a given variety. Fruits for obtaining seeds (no more than two or three pieces) should be left in the third tier from the bottom, kept on the plant for the most complete ripening; do not remove these fruits until the end of summer. At the same time, be sure to remove the remaining fruits and growing ovaries every week, otherwise the seeds may not ripen. After the seed fruits on the vine reach biological maturity (as indicated by their size and color), cut them off and keep them in paper bags until they dry completely (in a completely dry place!), a sign of which is the sound of the seeds when the fruit is shaken. Then cut the fruit, collect the seeds in a paper bag, indicate on it the name of the variety, characteristics and time of removal of the seed. The obtained seeds should be stored in a dry place at room temperature. Normal germination is maintained for three years.
Pepper is a self-pollinating plant, but if you want the seeds to fully retain the characteristics of the variety and to avoid cross-pollination, do not plant peppers of a different variety closer than 2 m from the seed bush.
Home » Diseases » Secrets of growing peppers in open ground
Secrets of growing peppers in open ground
Growing peppers in open ground
Pepper- this is one of the popular vegetable crops and it can be found at every summer cottage. Growing it is not difficult. It is planted both as seedlings and in a seedless way. But you need to know that when grown by seedlings, the yield increases significantly and the ripening time is reduced. I begin my work by preparing the soil.
Soil preparation
Pepper loves fertile, light soil. I start preparing it in the fall. Having removed all the harvest and tops from the garden bed, I dig it up and sow it with rye.
I have been sowing the entire garden with rye for more than 10 years and thanks to this I have gotten rid of many diseases, weeds, and the soil structure has improved. In the spring, two weeks before planting, I dig up the entire area with the crops, incorporating them into the soil as green fertilizer. During this time, the crops begin to rot and the number of earthworms in the soil increases, churning the soil. Our soil is heavy clay, and in order to achieve more fertile soil, I deposit it on square meter 2 buckets of humus each, and for lightness - stillage (beer production waste - rotted barley).
Then I rub all the soil with my hands, the soil for planting turns out to be fluffy. I add humus and stillage on the day of planting the seedlings.
Hardening of seedlings
In order for the pepper to hurt less after planting, I harden it for two weeks. I plant pepper seedlings in boxes and, in warm weather, take them outside, starting from 30 minutes, protecting them from direct sunlight and wind.
Planting seedlings
Pepper is a heat-loving plant and even slight frosts are destructive for them and I plant it in warm weather, when the earth warms up to +15 degrees (late May, early June), I plant it in beds, in rows at a distance of 30 centimeters between each other and 40 cm in row spacing. I deepen the plant to the depth at which it grew before transplanting, otherwise it can lead to a disease such as blackleg.
Watering
Pepper seedlings are very demanding on soil moisture. After planting, I water it generously with warm water. Next, I moisten it as the soil dries.
On hot days I water it daily. Lack of moisture leads to the shedding of ovaries and flowers, slows down the growth of the plant and can lead to death. I always water at the root, without touching the leaves.
Loosening
In order to ensure sufficient access of air and moisture to the root system, I loosen the soil after each watering.
Growing seedlings
Top dressing
Two weeks after planting, to give an impetus to growth, I feed the plants with an infusion of mullein or chicken manure per 10 liters of water - 0.5 liters of mullein slurry or 0.3 liters of chicken manure slurry. I do all subsequent feedings every two weeks - complex fertilizer, which includes all the necessary organic and mineral fertilizers. Fertilizing should be done only after watering.
Picking
I pick peppers in the same way as tomatoes, leaving 2cm cuttings. When picking, I form the bush into three trunks (more is possible). The more trunks, the smaller the fruits.
Harvest
I collect the peppers as they ripen, giving the opportunity for new ovaries to form and the rest to ripen. I cut the pepper with a knife so as not to damage the entire bush.
I, Galina Nikolaevna Sukhova, have vast experience in farming, which I generously share on the pages of my website
The secret of growing peppers
There may be several reasons for failure when growing sweet bell peppers: poor seed germination, weak seedlings, poorly chosen place for planting, insufficient or ineffective fertilizing. We must remember that, unlike other crops, pepper has a slow seed germination rate, as well as a relatively low speed plant growth.To get guaranteed harvest on your site, you need to know the secret of growing peppers.
Open ground is not for peppers
Peppers love warmth, so in central Russia they need to be grown in a greenhouse or in open ground in an ordinary bed, but with arches with covering material installed above it.
Temperatures below 20 and above 30°C in combination with low air humidity (up to 50%) lead to delayed formation and ripening of fruits and shedding of flowers.
High temperatures lead to the formation of small and ribbed fruits. In a cold summer, a crop may form, but it will not have enough heat to reach biological maturity and the peppers will remain green. Fruits picked from the plant ripen due to internal resources. But due to the fact that the fruits have not had time to accumulate a sufficient amount of vitamins, sugars, and dry substances, when ripening in room conditions, they can easily wrinkle and wither. In order for them to turn red, become orange or yellow (in a word, to reach their biological maturity ), it is necessary that the fruits not only begin to turn slightly brown, but also begin to color - turn red or yellow - while still on the plant.
Choose the “right” seeds
To avoid a similar situation in the future, residents of regions with cool climates should choose varieties and hybrids early date maturation ( Belozerka, Winnie the Pooh, Lisa, Knight, Health, Jubilee Semko F1, Novosibirsk, Zarya F1, Apollo F1, Eroshka, Morozko, Merchant, Tamara F1, Bogatyr etc.).If there is space and opportunity, it is better to purchase a greenhouse from cellular polycarbonate- it will provide a harvest in cool and wet years.
Good seedlings are the key to success
Since pepper does not like picking, it must be planted immediately in separate containers. Read the article on the website about how to grow good seedlings
How to plant peppers
The bed should be cleared of weeds, protected from the wind, and well lit. The best place for planting peppers is after cucumbers, root vegetables and green crops. You need to add a bucket of humus, 2 cups of wood ash, 1 tablespoon of superphosphate and potassium sulfate per 1 sq.m. to the soil. Fresh manure should not be applied to the peppers, as excess nitrogen will lead to rapid growth vegetative mass of the plant and delayed fruiting. Planting density is 5 – 6 plants per 1 sq. m. In a greenhouse you need to plant more rarely - 3 - 4 plants per 1 sq. m. m.
Pay attention to the ovaries
When ovaries appear, be sure to remove the crown flower - the one that appears on the fork. If you leave it, then the plant will primarily spend all its energy on it, which will hinder the development and ripening of other fruits. If the peppers have set in the seedlings already above the first fork, then they can be left. The crown can be pinched. Although this leads to a slowdown in plant growth, it contributes to the formation of a more powerful root system, which will have a positive effect on the harvest. Greenhouse - perfect place for growing peppers
Plant care
Caring for plants consists of watering and fertilizing. Pepper reacts negatively not only to a lack of moisture, but also to an excess of moisture. After planting seedlings, the plants need to be watered often, but not very abundantly (3 - 4 liters per sq.m.) in the morning.
As the fruits ripen, the need for water increases. Irregular watering during the fruiting period leads to cracks in the fruits. After watering, the soil should be carefully loosened. If mulching material is used, you can do without loosening.
Feeding pepper seedlings
For the first time, seedlings need to be fed 10 days after planting. Then fertilize regularly every 10-12 days, depending on the condition of the plants. It is advisable to use both mineral and organic fertilizers: for example, alternate Mortar, Ideal and bread mash(pour a quarter bucket of bread crusts with 1.5 - 2 buckets of water and add half a shovel of ash). It is imperative to spray the peppers once or twice with skim milk. During the budding period, peppers require nitrogen fertilizers, and during the fruiting period - phosphorus.
This should be taken into account when applying fertilizing. During the growing season, peppers must receive a sufficient amount of calcium, since its deficiency leads to the formation of blossom end rot. Therefore, it is good to carry out foliar feeding with a 0.2% solution calcium nitrate(2 - 3 times per season). If you take into account all these requirements when growing pepper, you will definitely get a good harvest. Everyone will grow sweet peppers! I wish you success, dear friends! Receive new articles directly to your email. Enter your email:
What kind of vegetable is this pepper?
Pepper is one of the most beloved and popular vegetables among summer residents. And this is not without reason. Pepper is ahead of tomatoes and eggplants in terms of the content of useful vitamins and minerals, in addition, it takes first place in the content of vitamin C. It also contains vitamins B1, B2, E, zinc, copper, iodine, iron. Sweet pepper loves heat very much, from -for this reason, it is best to place a box with seedlings on a windowsill where sunlight falls. However, in order to grow such a rich vegetable, you need to know the secrets of growing sweet peppers:
- The sowing period depends on the timing of planting seeds in open ground. Pepper growth occurs slowly, so the age of seedlings at the time of transplantation should be 70-80 days from the time of planting. Pepper is very light-loving, so it is not recommended to plant it in the shade.
This red beauty should be in the sun all day, from dawn to dusk. It is important to avoid strong winds and drafts. Optimal place for planting - south of the house, where there is no wind and a lot of light. Pepper seeds take a long time to germinate.
In this case, they need to be bubbling for 2 days. After which the seeds are laid out on a dampened cloth and placed in a warm place (with a temperature of 20-30 ° C). The correct temperature for seed germination is 10-15 ° C. After the seedlings begin to grow leaves, they need to be transplanted into another pot, larger in size.
Such seeds are easier to replant. It is important to remember that seedlings cannot be taken from dry soil, otherwise the soil will crumble from their roots. By the time of planting, the seedlings will have a good fibrous root, reaching 20 cm, and leaves up to 10 cm.
You can plant peppers in open ground at a temperature of 15°C, when there is no chance of soil frost. If the seedlings have not seen sunlight before planting, they will certainly burn. This will slow down its growth for 3-4 weeks. When planting, the pepper root is buried at the same level as in the previous pot.
Sowing sweet pepper seeds
Peppers need to be watered regularly. Because even short-term drying out of the soil leads to the death of root hairs. Due to the fact that the process of growing sweet peppers is quite long, they need to be sown early: in late January to mid-February.
The first shoots appear only after a month. It is worth knowing that the germination of this vegetable is relevant only for one year. The procedure will have to be repeated next year. Soil mixtures and their ratios that will be required for growing peppers.
Kira Stoletova
Caring for peppers in open ground involves following certain recommendations. Compliance with them helps strengthen the plant and achieve a high yield.

Temperature
Pepper is a heat-loving crop. It will not develop and grow properly when low temperatures. Indicators from 20°C to 25°C are considered optimal.
At temperatures below 14°C, plants stop growing. In cool weather (13°C), the bushes are covered plastic film. The formation of lilac-colored areas on the fruit indicates an unsuitable temperature regime.
Watering
After planting the plants in a permanent place, the soil is moistened every 2-3 days, adding 1-2 liters of water. This contributes to their good survival. Further watering is carried out as follows:
- before flowering - once every 7 days, in hot weather - 2 times;
- during flowering and fruiting - 2-3 times every 7 days.
In the first case, the water consumption should be 12 liters per 1 sq. m., in the second - 14 liters per 1 sq. m. After mass ripening of the fruits, a break is taken. When flowers appear again, watering is resumed. The amount of water is adjusted depending on the type of soil: heavy soil requires less water consumption, and light soil requires more. The crop needs soil moisture when all parts of the plant darken.
Water is applied only at the root so that it does not fall on the leaves and stems. The temperature of the liquid must coincide with the temperature of the soil. Its quantity is also monitored. Sweet peppers do not like excess or lack of water, so in rainy weather watering is reduced or stopped altogether. On hot days, the leaves of the bushes wilt, but this is not a sign of a need for water.
The soil should not be allowed to dry out for a long time.
When the nights are cold, plants are watered only in the morning. If they are warm, you can add water in the morning and evening. Watering is done with different sides row, alternating.
Loosening and hilling
After planting in a permanent place, bell peppers stop growing for 2 weeks. The culture adapts to new conditions and grows its root system. At this time, you should not loosen so as not to damage weakened plants.
Loosening
Loosening is recommended to be carried out 2 weeks after transplantation. The depth of soil placement should not exceed 5-10 cm to avoid damage to the surface root system of the crop. For soil with a heavy structure, you can loosen it to a greater depth, this will help to ventilate and warm the soil well.
The soil is loosened after each watering and rain. At the same time, wait until it dries a little. Do not allow a dry crust to form.
Weeding

Plant care includes regularly removing weeds so they don't choke out the peppers. The bushes are hilled until the stem becomes lignified. The procedure helps to activate crop growth, increase oxygen access to the root system, and prevent the development of pathologies. Such actions ensure a good harvest.
Mulching
Mulching helps retain moisture in the soil. Weeds do not develop under mulch. But this can only be done after the soil has warmed up.
Stepping and bush formation
The lower shoots of bell peppers are removed (with the exception of non-sprouting varieties). The procedure is performed throughout the summer using scissors. It is better to trim the stepsons in hot weather for quick healing of wounds. You can lubricate them with charcoal.
When most of the fruits have set, pinch the top of the plant and remove the inflorescences. The vegetables from them will no longer have time to ripen; they will only take up part of the nutrition.
Compact pepper grinds do not require shaping. It is necessary to carefully monitor the growth of highly branching varieties. They remove excess shoots and those that grow inside the bush. Pruning is carried out for the purpose of additional lighting, since thickening does not contribute to high yield. Large varieties require garters to stakes to prevent plant breakage.
Top dressing
Compliance with the rules of caring for sweet peppers when grown in open ground involves its stimulation. During the growing season, the crop is fed 3 times:
- The first application of fertilizers is carried out 2 weeks after planting the plants in open ground. For this purpose, a solution of slurry is used, which is prepared in a ratio of 1:5. Instead, you can use a solution of bird droppings in a ratio of 1:10. The following fertilizer is also used: 1 tbsp. l. urea, 1 tbsp. l. superphosphate, 10 liters of water. 1 liter of product is poured under each bush.
- The second time is fed during mass flowering. The following fertilizer is used: 40-60 g of superphosphate, 150-200 g of wood ash, 10 liters of water. Consumption - 1 liter per 1 plant.
- The third time, fertilizing is applied during the period of mass formation of fruits. To do this, use a solution of mullein or bird droppings. You can prepare mineral fertilizer: 2 tsp. potassium salt, 2 tsp. superphosphate, 10 liters of water. Pour 1 liter of liquid under 1 bush.
Diseases and pests
The process of caring for sweet peppers includes the prevention and control of diseases. Most often the culture is affected by:
- blackleg;
- bacterial, verticillium, fusarium wilt.
To prevent them, you need to observe crop rotation, buy quality seeds, do weeding on time. If infected, remove diseased plants.
Housewives always try to rationally design kitchen space. This also applies to those located in this room.
It is advisable to choose one that is both beautiful and necessary.
The best option for the kitchen is decorative. It looks very aesthetically pleasing, especially when the fruits appear. These same fruits are used in cooking as a very hot seasoning.
In addition, in winter it will serve as a pleasant reminder of the warm green summer.
Botanical description
The plant, which is commonly called, does not belong to the pepper family. This culture belongs to the nightshade family and has the second name “capsicum”.
The culture is widespread on all continents. Can grow in open ground and in a flower pot indoors.
Decorative indoor pepper- a plant that can grow and bear fruit in an apartment for up to 4-5 years. Propagated by seeds and. Height - 20-55 cm. Branched crown. The leaves are sharp, long or elongated, oval, ovate. Color varies from light to dark green. It can bloom singly or in bunches; the flowers are often white. 
Did you know? Capsicum means "bag" in Latin. Apparently, peppers are named after the shape of the fruit.
The fruits may have different color: yellow, orange, red, purple. Moreover, different colors of fruits can occur even if they appeared on the same plant, depending on ripening. Also, peppers are different in shape (with a sharp or blunt end, spherical, oval) and size (small, medium, large - maximum 5 cm). It all depends on the variety.
Flowering and fruiting are not separated in time. There can be flowers, unripe fruits, and ripe peppers on the bush at the same time. Fruits, as a rule, very abundantly.
The alkaloid capsaicin gives the fruits bitterness, pungency and spiciness.
Important! The stems and leaves of ornamental peppers are poisonous.
Popular types
There are many types of home decorative items. They differ in crown, leaves, color and shape of fruits, fruiting time, care features, etc.
Annual
Annuals varieties are also called indoor paprika, vegetable pepper, sweet (although individual varieties quite sharp). They differ in that after shedding or picking the fruits, the plant may dry out. Not all yearlings face such a fate. In room conditions individual species can bear fruit for more than one year.  The bushes are low, compact, 35-55 cm high. The fruits are varied in shape and color depending on the variety.
Common varieties:
- "Tepin";
- "Redskin";
- « Siberian prince»;
- "Cherry Bomb";
- "Golden Baby" and others.
Shrubby
Shrubs varieties are very well suited for indoor conditions: window sill, loggia, balcony, etc. This perennials. They grow successfully and bear fruit for 5-6 years.
The variety is interesting in shape, but its yield is average. You can only collect about 20 peppercorns in an apartment. “Lemon Lollipop” and “White Crystal” are grown more often; they are traditionally productive.  The taste of pepper is sweetish, there is very little heat in it.
This is a fairly tall species. It grows up to 80 cm, so it is often placed in an apartment not on the windowsill, but on the floor on a loggia or balcony.
Chinese
Chinese variety is less common. This plant is up to 50 cm high, like other species. Its leaves are ovate, light green, slightly wrinkled. The flowers are white with a greenish tint.
The fruits are varied in shape, sometimes even taking the shape of a lantern. Chinese pepper probably has the hottest and hottest fruits.
The disadvantage is that this species has relatively slow growth.  Common varieties:
- "Santa Lucia";
- "The Devil's Tongue"
- "Devil's Yellow"
pubescent
Pepper pubescent(or fluffy) is grown more in open ground because it is very tall (up to 3-4 m). Only certain varieties are suitable for growing in an apartment, for example, “Rokoto” (it is not so tall).
In this species, the entire bush is densely covered with pubescence. And not only stems and leaves, but even...
It has a pungent taste and is consumed raw. 
Best conditions for pepper
Regarding the capriciousness and unpretentiousness of pepper and caring for it at home, the opinions of lovers of ornamental fruit plants are divided. Some believe that caring for the crop is not difficult, others note that the plant is capricious and difficult to care for.
Important! During the flowering period, peppers need to be shaken periodically to increase yield.
Let's take a closer look at the conditions of detention and features of care.
Humidity and temperature
House pepper is a heat-loving plant. It will grow well in spring and summer at temperatures around 25°C. In winter, the temperature should be lower: 15-18°C will be normal for him. In addition, it loves differences in night and day temperatures, so in summer it is better to keep it on a loggia or balcony.  Air humidity is required to be moderate. Pepper loves to swim (more on that later).
Lighting
When caring for decorative peppers in a pot, it is imperative to monitor the lighting. For good development and fruiting, the plant should be placed on a southern, southwestern or western windowsill.
The culture is very photophilous; in spring and autumn it needs up to 3-4 hours of open sunlight. Just not more than 4 hours, otherwise burns may appear on the fruits and leaves. In summer you need to shade it, because the sun is very active. If the lighting is not enough, then you need to use artificial lighting.
If there is a lack of lighting, it is sparse and has few leaves; in addition, there will not be a good harvest. 
Growing substrate
For cultivation, a light neutral type is used. You can buy it ready-made in a specialized store, or you can make the mixture yourself.
For pepper, a mixture of turf soil, leaf humus and sand in a ratio of 2:2:1 is suitable.
Did you know? In botany, capsicum fruits are defined as berries.
Planting seeds and cuttings
Most often the plant is grown from seeds, but cuttings are also possible.
Growing from seeds
To grow peppers from seeds, you need to purchase seeds, prepare a container and soil, plant the seeds, wait for them to sprout and provide them with proper care.
Peppers should be planted in February.
There are two approaches to growing peppers from seeds. They differ in that one uses a seedless and non-transplanting method, while the second uses growing seedlings and subsequent transplanting.
1st method:
- Indoor peppers are not grown as seedlings and are not transplanted from one pot to another as they grow. You immediately need to select a container in which the adult plant will grow. Its volume should be 4-6 liters.
- Before planting seeds in a pot, add soil, ensuring good soil.
- Soak the seeds for 1 hour in water and place in a damp cloth for a day.
- Plant the seeds and cover them with 2-4 mm of soil. Moisten well with a spray bottle and cover with film until germination.
- Be sure to place the pot in a warm place. After germination, with the appearance of four leaves, pinch to form a crown.

2nd method:
- Prepare a small container, about 200 ml, for planting seeds.
- Make drainage and pour earthen mixture into the pot. After placing the prepared seeds, cover them with soil to a depth of 2-4 mm.
- To prepare the seeds, they must be soaked in water for 1 hour and left in damp gauze for one day.
- Moisten the soil well, cover with cling film and place in a warm place for germination.
- Pepper shoots appear in 2-3 weeks.
- With the appearance of two pairs of leaves, the pepper requires replanting, picking and pinching.
- The container for further cultivation should be about 4-6 liters, with good drainage.
- A sprout with a large earthen lump is planted into it by transshipment and watered abundantly.
- The top is pinched.
 More often they choose the second method, but, as practice has shown, the first is no worse.
 Whatever method of seed germination - 1st or 2nd - you choose, then caring for the pepper is the same.
How to propagate a plant from cuttings
Peppers can be propagated by cuttings in spring and summer. To do this, cut off the side shoots and place them in a container with a sand-earth mixture for rooting.
Water generously at first, then as the soil dries.
The container must have good drainage. This is necessary both for the cutting and for the rooted plant, because it will continue to grow here. There is no need to replant a rooted cutting.
In order for the cutting to take root faster, it must be pinched. 
Cultivation care
Caring for the “Ogonyok” pepper that grows on your windowsill is special.
Before this, we did not mention the Ogonyok variety. But the fact is that ordinary housewives call any variety of indoor decorative pepper that way.
How to water
Peppers should be watered generously in spring and summer as the soil dries out. In addition, be sure to “bathe” the plant, spraying it 1-2 times a week, on hot days - every other day.
Watering should be done with water at room temperature.
Important! Plants placed on window sills with radiators under them need more frequent watering.
In autumn, reduce, in winter - minimize, water moderately.
To obtain a good harvest of bell pepper, it is important to create the necessary conditions for it. High humidity And elevated temperature- these are the indicators that have a positive effect on this vegetable. But such a plant can be grown not only in warm regions. It is often found in vegetable gardens. In order for peppers to bear fruit, it is important to know how to plant peppers in open ground, what to put in the holes, and also what the distance should be when planting peppers in open ground, and how to properly care for sweet peppers in open ground.
Seed processing technology
Growing bell peppers in open ground begins with proper preparation seeds The technology for preparing bushes for planting involves calculating the timing, because sowing must be carried out so that by the required date the pepper is ready for planting in the ground.
There are several seed treatment techniques for successfully preserving and improving planting material. With their help, you can increase guarantees for a successful harvest.
Interesting! If the seed is not processed, the seeds will sprout fourteen days after planting. When processed, the result will be visible on the third day.
First of all, it is necessary to determine which seeds are healthy. To do this, they need to be filled with a 3% solution of baking soda and water at room temperature. After five minutes, healthy seeds will remain at the bottom of the vessel, and empty and unsuitable for planting will float on the surface. After checking, the seed is washed from salt and prepared for processing.
Seed material is disinfected using various solutions. This could be Albit, Fitosporin, Alirin-B or Trichodermin. You can also use your grandmother’s recipe and treat the swollen pepper seeds with a solution of potassium permanganate. 30 minutes will be enough for the treatment to produce results.
Drugs such as Ecogel, Novosil or Epin increase the plant’s immunity and accelerate its growth. They are used according to the instructions attached to them. To improve the effect, such drugs can be used after the sprouts have emerged.
In order to make the seeds strong and strong, special fertilizers are used that strengthen the seeds. To do this, just soak the seeds in diluted fertilizer for 12 hours.
Growing pepper seedlings

Seedlings are grown in the ground three months after sowing the seeds. Therefore, it is necessary to prepare from February. It is important to complete all the necessary procedures before starting to seed. First of all, it is necessary to process and disinfect the seeds. They are then hardened and soaked. After this they are ready to disembark.
Sowing seeds
In order for the pepper to grow faster, you must first wrap the seeds in a damp cloth and hide them in a warm place for two days. After this, you can plant them in previously prepared soil (in boxes, pots or other containers). The distance between the peppers when planting in the ground should be 1.5 cm, after which the container is covered with glass or plastic film until the seedlings emerge.

Important! To plant bell peppers, you need light soil, which consists of sand, black soil and humus. Water the seedlings with water, which is infused for one day.
It is important to regularly add organic and mineral fertilizers to the soil. The first feeding occurs after the first leaves bloom on the seedlings.
Growing pepper seedlings
You can prepare soil at home using the following ingredients:
- turf land;
- peat;
- humus;
- sawdust.
All components are mixed in a ratio of 2:4:1:1. Then ash and sand are added to the resulting soil, adhering to the following dosages: for one bucket three tablespoons of ash and 0.5 l river sand. The resulting consistency is poured with potassium permanganate.

There are two methods to grow bell peppers:
With the help of picking
It is important to pick on time so that the plant takes root better. As soon as the seeds germinate, the vegetable grower counts 20 days and makes a pick. Since the root of the pepper does not recover well, it is not touched, but other parts of the plant are used.
Without using picks
This technique is more common. You just need to move the seedlings from a smaller container to a larger one. Then the root system is not affected and the plant takes root faster.
Growing peppers on a windowsill

When growing bell peppers on a windowsill, you need to know several subtleties and nuances. First of all, you need to choose the right time for planting seeds. Since bell peppers at home often do not have enough heat and sufficient humidity, they will take longer to germinate. Therefore, it is recommended to plant seeds in late February - early March.
For normal plant growth, it needs to be provided with 12 hours of lighting. To do this, it is enough to keep the windows constantly clean, since dirty windows take away some of the light.
Don't forget about the humidity in the room. For bell pepper it should be 70%. To do this, install an air humidifier in the room. Of course, you can spray plants with a spray bottle, but a humidifier will be more rational and safe.
For planting seeds, two-hundred-gram cups are used, which are replaced by liter cups after one month has passed after planting.
Bell pepper, cultivation and care in open ground

The technology for growing peppers in open ground is similar to growing tomatoes. It is important to water the plant on time, feed it, shape it, and, if necessary, remove the stepsons. Don’t forget about protection from various pests and diseases.
It is necessary to water sweet peppers as soon as they are planted in open ground, then after five days. After each watering, it is necessary to loosen the soil so that there is no hardened soil. The plant is fed three times per season. For this purpose, nitrogen, potassium and phosphorus are used.
Don't forget about protection from heat. To prevent pollen from losing its abilities, it is necessary to make screens that will darken the plant.
Bell pepper grown in a barrel
You can also grow the crop in a barrel. To do this, you need to take a barrel and remove the bottom. In order for oxygen to enter the barrel, holes must be made in its walls, 1 cm in diameter at a distance of 20 cm from each other.
Then the following components are laid out in layers: fading (layer thickness 10 cm), soil mixture (turf and ordinary soil, compost).
At the beginning of May, one pepper bush is planted and covered with film. After three hours, tear off all the lower leaves and fill the plant with 10 cm of soil mixture. After the plant grows, repeat the procedure. Do this until the barrel is completely filled with earth (this will be the beginning of June). Then the barrel can no longer be covered with film.
Features of agricultural technology

Agricultural technology for growing sweet peppers in open ground consists of the following processes:
- Irrigation. Seedlings must be watered with settled water every day. You need to be careful not to overdo it with water.
- Prevention. Periodically spray the plants with a spray bottle to maintain moisture.
- Temperature. It should not exceed 22°C during the day and 15°C at night.
- Feeding. To increase the immunity of pepper, it is necessary to feed it with minerals.
Principles of growing on site
Sweet pepper is a plant that requires care and attention. That's why experienced gardener prepares everything in advance necessary tools to care for him. Outdoor care for sweet peppers consists of the following steps:
- seedling preparation;
- planting a plant in the ground;
- watering;
- feeding
Preparation of bushes
Before planting seedlings in open ground, they must be hardened off. To do this, the plant must be periodically exposed to the sun to adapt. Due to this, the pepper will be resistant to weather conditions and will be strong. Hardening begins two weeks before planting.

The process of planting plants in open soil
To get a good pepper harvest, you need to choose the right place for the beds. This area should not be exposed to direct wind currents, be sunny and protected from drafts. From autumn it is important to prepare required area for planting, having previously dug it up and fertilized it. It is necessary to plant bell peppers in open ground by impregnating the soil with potassium and phosphorus substances.
When planting, it is important to remember that sweet peppers do not like direct sunlight and too hot air. Therefore, it is necessary to ensure that the seedlings are in the shade.

Depending on which variety is planted, a scheme for planting bell peppers in open ground is developed. The holes should be 35 cm apart from each other, and 45 cm between the rows. If two peppers are planted in the ground, then the distance increases to 60 cm.
There is also a square-cluster method of planting peppers. Its essence is that each hole has identical sides that do not exceed 60 cm.
Peppers are transplanted into the ground at the end of spring or early June, depending on weather conditions. It is recommended to do this on a cloudy day or in the late afternoon, so that there is no direct rays of the sun on the ground.
Planting pepper in open ground begins with the seedlings first being watered and carefully, without damaging the root of the plant, removed from the container along with a lump of soil. At the same time, it is important to know at what depth it is necessary to plant pepper seedlings in the hole. The stem of the plant is placed underground up to its first lower leaves. After planting sweet peppers in open ground has been completed, it is recommended to insert pegs nearby to which they will be tied in the future.
Features of watering

Bell peppers do not require regular watering and moistening of the open ground. Initially, it must be watered during planting, then after 5 days and then once a week. Approximately one liter of water is needed for one pepper bush.
During flowering, water for irrigation should be about 20°C. Don’t forget to loosen the soil around the bush after each watering to prevent a crust from forming. To keep moisture longer, it is recommended to mulch bell peppers. Mulching peppers in open ground is done using rotted straw or grass.
Pepper feeding
It is necessary to fertilize the soil three times throughout the entire season. In order for plants to develop and grow normally, they need nitrogen. Therefore, the first feeding is preparations containing nitrogen. It is done 2 weeks after planting the bushes in the ground.

The next feeding is carried out during the flowering period of pepper. The plant needs potassium to form fruits. It is found in wood ash. AND last feeding occurs when the first fruit is formed. For this, potassium salt and superphosphate are used. Two teaspoons of each component are added to a bucket of water and the plants are watered with the resulting solution.
Possible diseases and pests and their control
The following pests can often be observed on pepper:
- slugs;
- Colorado beetle;
- whitefly;
- bear

These pests are collected by hand, and a solution of wood ash is used for aphids.
Popular diseases are:
- Yellowing of leaves. This means the pepper is lacking nitrogen. For treatment, you need to add 1 teaspoon of urea to 10 liters of water and spray the bushes with the resulting solution.
- Falling of the ovaries. Solution from boric acid will solve the problem (1 spoon per bucket of water).
- Fruits develop poorly. Treated with superphosphate or wood ash.
- Blackleg. Occurs from excess moisture.
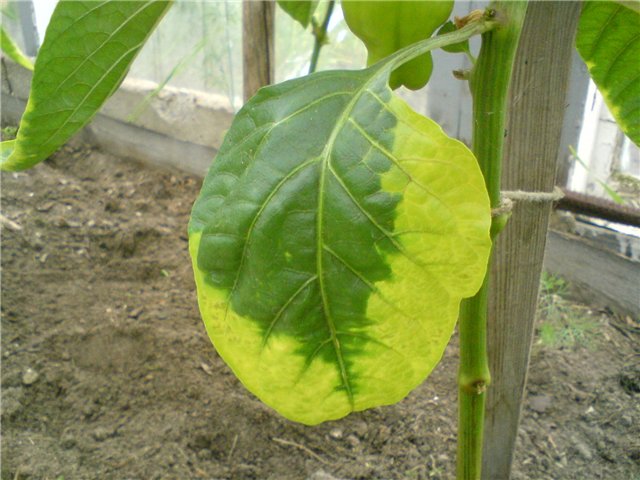
Growing greenhouse peppers
Planting a crop in open ground under a film is considered as convenient as possible, as it brings the crop closer to normal conditions. Seedlings can be planted in the greenhouse in April. To do this, holes are made in the greenhouse, maintaining the correct distance.
Before planting the seedlings, it is important to fertilize the hole. A solution based on chicken droppings or manure is perfect for this (half a glass of fertilizer per 10 liters of water). After planting, the bushes are watered at a rate of 1 liter per bush. And to support the plant, you can make a support from pegs, so that you can then tie the pepper to it.
Collection and storage
Bell peppers are harvested as the fruits ripen. Some vegetable growers may collect unripe fruits to remove the weight from the bush. This vegetable is used in many recipes, fried, stewed or baked. The fruits can be peeled and frozen or canned.

In order to receive fresh pepper until December, you can flowering bush together with the soil, transplant into any container and leave on the windowsill in the house.