In the old days, installing heating radiators yourself was problematic due to welding work, which was an integral part of the installation. Modern materials make it possible to do without special devices, which makes it possible to install heating radiators in the house with your own hands.
To carry out similar activities in an apartment, it is recommended to involve plumbers from a service company, since you will need to completely disconnect the system from the main line and drain the water. Not everyone knows how to do this correctly, and a poor-quality connection can result in a flood of hot water.
Determining the location of radiators
If we are talking about replacing old structures with new ones, then the issue of location disappears by itself. When planning a circuit design, it is necessary to take into account important factors according to which the batteries must provide reliable thermal protection. No matter how high-quality modern double-glazed windows are, they are still sources of cold air flow. That is why batteries are installed in almost all rooms below the window. But it is worth considering that the radiator must cover at least 70% of the window opening. Only then will its functioning be effective.
Read also: SIP wires: features, types, installation of products
— the distance from the window sill to the top of the heating device should be within 9-14 cm;
— a gap of 7-12 cm is required from the bottom of the battery to the floor;
— a distance of 3-5 cm should be left between the radiator and the wall;
— the heating structure should be placed in the center of the window opening.
Based on the listed requirements, we can summarize that the installation location must precede the choice of model. Only if certain parameters are available, the power and configuration of the sections are selected.

Radiator connection options
The diagonal method involves connecting the supply pipe to the top of the heating device, and the return pipe from the bottom, but located on the other side;
The bottom connection is made at the bottom of the battery on opposite sides;
The lateral or one-sided method is more often used with a vertical wiring diagram with a connection to the right or left side of the radiator.

Stages of installing heating radiators with your own hands
1. Preparatory work includes dismantling old structures if necessary. The water must first be completely drained from the disconnected system. You will need to install special fasteners for batteries on the wall or check the strength and correct installation of existing hooks. You should also examine the wall surface for integrity. Often cracks and gaps form under the window sill over time. They must be sealed with cement mortar, and foil insulation must be fixed to the dry surface. Other wall finishing options include: plaster with a special insulating compound, plasterboard sheathing with an insulating layer, etc.
Read also: Grooving walls for wiring: methods for forming grooves, installing wiring in grooves, current recommendations
 2. The radiator kit includes: installing an air vent, screwing plugs into unoccupied holes in the manifolds. In case of mismatch between the diameters of pipes and manifolds, the connection is made using adapters.
3. Next, shut-off and control valves are installed. For this purpose, ball valves are installed at all inlets and outlets. They will allow subsequent repair work to be carried out without completely shutting down the heating system. Thermostats are not required elements, but their use saves coolant consumption on warm days. Therefore, regarding additional devices, each owner makes his own decision.
 4. When hanging radiators on mounts, it is recommended not to remove the protective film from new models. It will protect the surface of the batteries from contamination until finishing work is completed.
5. The supply and outlet pipes are connected in series using one of the existing methods: threaded, crimped, pressed, or welded.
 6. The next step is crimping. Water into the system should be opened at low pressure; a sudden start can provoke a water hammer, as a result of which the shut-off valves will fail.

To increase heat transfer and save thermal resources, it is worth fixing a sheet of foil insulation to the wall on the back side of the radiator. Penny costs will allow you to save up to 10% on heating.
High-quality heating is the key to a favorable climate in the house and the absence of cold weather even in the most severe frosts. Therefore, if you have an old and ineffective radiator in your apartment or cottage, then it is worth replacing it. At first glance, this seems to be a very complex job, accessible only to specialized specialists with significant experience. But with the right attitude and the availability of some tools, installing heating radiators with your own hands does not pose a serious problem.
Rules for battery location and connection diagrams
In addition to the characteristics, it is very important that one of the factors affecting the efficiency of the heating system is the choice of the right location for the product. True, in most cases it is predetermined in advance - the new battery will most likely stand in place of the old cast-iron one, which has been there since the building was built. But still, here are some recommendations for proper placement of the radiator.

Firstly, it is advisable to place the battery under a window. The fact is that it is a “bridge” through which the cold from the street enters the apartment or cottage. The presence of a radiator under the window forms a kind of “thermal curtain” that interferes with the process described above. In this case, the battery should be placed strictly in the middle of the window, and, preferably, occupy up to 70-80% of its width. You can see what it is and how to install it on our page.
Secondly, there should be at least 80-120 mm from the floor to the radiator. If it is less, it will be inconvenient to clean under the battery; a huge amount of dust and debris will accumulate there. And if the radiator is located higher, a certain amount of cold air will collect under it, which requires heating and, as a result, worsens the operation of the heating system. In addition, too short a distance to the windowsill negatively affects the battery efficiency.
Thirdly, a distance of 2.5-3 cm is allowed between the back of the radiator and the wall. If it is smaller, the processes of convection and movement of warm air flows are disrupted, and, as a result, the battery works less efficiently and wastes some of the heat.

Table. Standard connection diagrams for heating batteries.
| Name | Description |
|---|---|
| Due to the specific location of heating system risers in residential buildings, this type of battery connection scheme is the most common. Quite easy to implement, the efficiency of the radiator is average. The main disadvantages of this connection method are visible pipes and inability to accommodate batteries with a large number of sections. |
| The second most common radiator connection diagram. The main advantage is the uniform circulation of water throughout the battery, and, as a result, high operating efficiency. |
| A similar scheme is often used in country houses - many cottage owners prefer to hide heating communications under the floor so that they do not spoil the appearance of the room. But at the same time, the bottom connection of the radiator is 12-15% less efficient than the diagonal one. |


Video - Replacing heating radiators in winter
Installing a heating battery with your own hands - step-by-step instructions
Let's consider the process of installing a bimetallic battery connected laterally to a single-pipe heating system. It is worth saying that in this case the work was carried out in a building where the temperature in the radiators was relatively low, because the supply and bypass were made of metal-plastic pipes. Before you begin installing the battery yourself, familiarize yourself with the structure and characteristics of the heating system in your home. For your apartment or cottage, connecting pipes may need to be made from materials that are more resistant to high temperatures.

Let's divide the process of installing a heating battery with our own hands into several separate stages:
- dismantling the old radiator;
- installation of a new bypass and shut-off valves;
- installing the battery and connecting it to the connection.
Preparing for work. Removing the old battery
Do-it-yourself installation of a heating battery begins with preparing the tools and dismantling the old radiator. In this example, we will be talking about a standard cast iron product, which still heats many apartments. How to install , You can read in our article.
Step 1. Bring home a new battery. Unpack it, check if everything you bought is there. Also inspect the radiator itself to see if it has any damage or defects.

Step 2. Cut the packaging of the new battery into two equal parts. Use one as a backing for the radiator - this way you won’t scratch it on the floor covering. Place the second part of the package behind the heating riser - when dismantling using a grinder, a sheet of cardboard will protect the wall from contamination.


Step 3. Prepare everything you need to dismantle the old and install a new radiator - fittings, taps, pipes, tools. Determine for yourself what should be located where - searching for something necessary for installation, but lost in the clutter, can significantly slow down the work of replacing the battery.

Step 4. Remove the three-way valve connecting the heating riser, bypass and supply line. First, loosen it with an adjustable wrench. If water starts to drip, immediately screw everything back in - most likely, the riser was not closed properly. And if everything is in order, continue working on dismantling the crane.


Step 5. Next, disconnect the old battery and line from the riser. First, unscrew the nut on the thread strip. Then determine how far this thread can be cut so that you can then mount a tee connecting the inlet, bypass and riser without any problems.


Advice! In some cases, old paint applied to the nut and connection of the riser to the bypass and liner may interfere with operation. You can remove it using a regular knife with a retractable blade or a metal brush.
Step 6. Remove the battery from its mounts.


Step 7 Using a grinder, trim according to the previously determined mark on the threads connecting the heating riser to the battery.


Step 8 Remove the old battery and take it to a place where it will not interfere with further work. Given the high weight of the cast iron radiator, if possible, do this in tandem with someone else.

Step 9 Remove the old battery mounts from the wall. If they hold particularly tightly, use a hammer and chisel.


In order for the installation of heating radiators to be completed as quickly and efficiently as possible, it is most rational to involve specialists in this. However, there are situations when the cost of services announced by professionals is clearly beyond the customer’s means. And what to do in this case? Look for cheaper workers whose services are more accessible? But in a number of cases, the quality of the work they perform raises strong doubts. And then any customer comes to a logical solution - to install heating radiators themselves. It's completely doable. The main thing is to do everything carefully, having first read the simple rules and snips.
Installation of heating radiators
General description of the radiator installation process
How to install a heating radiator correctly? The process of installing radiators is not as complicated as most of us imagine it to be. More precisely, it can be difficult if the radiators themselves “try.” Therefore, before choosing any model, it is important to familiarize yourself with the rules for its installation. For example, anyone, even if they are not a professional, can perform such an operation as installing an aluminum radiator, since they do not require skills in using additional equipment. However, the same cannot be said about cast iron radiators - in order to install them, you will have to master the rules of using a welding machine.
Before purchasing radiators, you should take a close look at the existing models on the market.
In addition, it would be a good idea to determine for yourself what exactly the characteristics of the radiators you need will be based on the following criteria:
- wear resistance;
- efficiency;
- flow;
- resistance to the environment.

And if you correctly determine these parameters and are able to select the appropriate radiators, then the heating system in your home will delight you with warmth for many years. A significant role is played not only by the installation diagram of heating batteries, but also by the material from which the radiators are made. The fact is that many modern models, made of ultra-high-quality and environmentally friendly materials, have exorbitant prices. Therefore, try to look realistically at your capabilities and needs. It is unlikely that you will need super-expensive batteries in a country house.
When installing heating radiators yourself, you should be extremely careful and careful.
In particular, during installation, parameters such as the height of the radiator relative to the floor and the distance between the wall and the radiator should be taken into account. To a lesser extent, it matters which wall the battery will be attached to - most modern models can be easily mounted on walls covered with plasterboard. However, remembering the characteristics that you should rely on is quite simple - the distance from the floor to the bottom point of the battery should not be less than 5 cm. The same distance (at least 5 cm) should be between the wall and the rear wall of the radiator.
It is very simple to carry out such an operation as installing heating batteries yourself. If you have never dealt with any similar work before, then the necessary information and the complete installation process can be found on our website, where instructions and video materials are presented. In addition, today there are a large number of specialized forums and resources where professional craftsmen share tips and show optimal installation schemes for heating radiators. And, using information from such a site, you can easily find out how to properly install a heating battery yourself.
Installation tools
If you have never done repair work or installed radiators before, you can assume that you are unlikely to have the necessary set of tools. However, this does not mean that you necessarily need to run to the store and buy everything. Firstly, it is quite expensive, and secondly, you may not need it in the future.
Therefore, the most rational thing to do before installing a radiator is to simply ask your friends - perhaps someone has what you need.
So, to install radiators you will need: an impact drill and a drill with a Pobedit tip, a screwdriver, pliers, and a building level.

A little trick - when purchasing heating radiators, check in advance that all the elements are assembled. If this is not the case, ask the store to put everything together for you - this way you won’t have to purchase an expensive and unnecessary key in the future.
How to choose the right size batteries
Before purchasing batteries, you need to correctly calculate what size they should be - how many sections they should consist of. Quite a lot depends on this, including the installation diagram of heating radiators. After all, an insufficient number of sections will not allow you to warm up the room, and an excessive number will simply be installed in vain.
The size of the batteries is calculated using a very simple formula - 1 kW of radiator power is required per 1 m2. In some cases, the power indicator must be multiplied by a safety factor of 1.3. This is done when two walls in the room are external or there is more than 1 window.
Radiator installation

A process such as installation and installation of heating radiators can be divided into several points. First of all, it is necessary to correctly pack all the plugs, American plugs, and Mayevsky crane. Next, if necessary, the old radiator is dismantled. If, along with replacing radiators, the heating element is also being replaced, it is necessary to first remove water from the system. To do this, turn off the water and use a pump to try to drain the water as much as possible.
The finished battery must be installed on the wall. The number of fasteners directly depends on the type of radiator and the principle of its installation.
If you are planning to install cast iron heating radiators that will be welded into the system, then only two fasteners are enough. But if the radiator is connected to the system using polypropylene pipes, then there must be at least three fasteners. If the battery is small - 5-6 sections, then the fasteners should be positioned this way - 2 on top and one on the bottom. If the number of sections is 10 or more, then there should be more fasteners: at least 3 in the upper part, and 2 in the lower part.
Using a building level, we determine the correct location of the battery. Next, you need to mark the places where the plastic pipe will connect to the metal one. After this, you need to screw on all the elements. It is important to pay special attention to the quality and tightness of connections. If there is even the slightest error, expect leakage. To prevent this from happening, use torque wrenches of the required size. Be extremely careful - if you are installing bimetallic or aluminum radiators, carefully tighten the valve through which the air will bleed. A force greater than 12 kg cannot be applied to it. In order to tighten this tap correctly, torque wrenches will again be useful.

Features of installation of cast iron radiators
Despite the fact that there are a huge number of types of batteries on the modern market, many of us, when planning how to install a heating radiator, ignore new bimetallic and aluminum radiators, preferring the good old cast iron models.
Few people take into account that installing heating radiators made of cast iron is a more labor-intensive and complex process.
However, the result is worth the time and effort. When installing, you should pay attention to the following factors:
- Before installing a cast iron heating radiator, it is necessary to adjust the nipples. To do this, the radiator is untwisted, the nipples are adjusted, after which everything is put back together. The radiator is now ready for installation. It should be noted that disassembly should be carried out using special keys on a radiator workbench. In this case, it is advisable to unscrew both nipples at the same time - this will avoid distortion. Of course, it is most convenient to perform this action together. Please note that on different sides of the radiator the threads are directed in different directions. After the nipples are unscrewed, remove the section.
- All sections of the radiators are removed in a similar way. Next, we assemble the sections strictly in the reverse order. The assembled radiator requires pressure testing - this way you can determine if there are any leaks. And if it is, re-adjust the nipple.

- In brick and foam concrete houses, cast iron radiators are mounted on special supports in the wall without any problems. But if the battery is attached to a wooden wall, in addition to standard supports, you will also need floor supports.
- If the heating system is single-pipe, a bypass must be installed. In addition, the system must also contain a Mayevsky tap, as well as shut-off valves.
- To connect the radiator to the pipeline, it is necessary to use threaded fittings. It is important to remember that it is under no circumstances recommended to use a welding machine in a house with wooden walls.
Of course, whether to install heating radiators in an apartment yourself or to entrust it to professionals is a personal matter for each owner. Many people go for the installation of radiator heating for a trivial reason - replacing radiators is already too “expensive” for them and additional expenses for hiring specialists can result in ruin for the family budget. However, if you are really afraid to take on such work as installing a heating radiator, then it is better not to risk it. After all, specialists will be able to do everything really efficiently. But the only difficulty is that you need to actually find professionals who know the options for installing heating radiators and their subtleties, and not self-taught people who will install radiators for the second time in their lives. Hiring such a “master” can have very dire consequences.
At first glance, installing and replacing a heating radiator does not seem to be a very difficult task. However, this is not true - any mistakes made during the work process will inevitably cause consequences, probably quite severe. In order not to have to restore repairs in the apartment after flooding with hot water or other unforeseen problems, it is recommended to contact plumbers for the installation and replacement of heating system parts. However, this still does not mean that installing a heating radiator with your own hands is not feasible.
To succeed you need:
- Enough free time.
- Study the theoretical basis: methods of connecting batteries and rules.
- Measure the area carefully.
- Find the tools necessary to carry out such work.
Installing a heating radiator
First of all, of course, you need to select the radiator that you need in your specific apartment or private house. The choice of radiator should be determined by its technical characteristics and your needs. What battery qualities influence your choice? Mainly these are:
- Wear resistance.
- Price.
- Diameter of the lumen for water circulation.
- Resistance to aggressive environments.
Important! If you want to install heating radiators yourself, you also need to consider the materials from which they are made. Thus, aluminum radiators are easy to install and do not require special skills, knowledge or tools. And when installing cast iron batteries, welding will be required. It is worth deciding in advance on the resources available to you and objectively assessing your capabilities.

Checking the air release valve
When preparing for work, first of all, you need to find out the type of wiring of your heating system. It may be single-pipe or double-pipe.
- A single-pipe heating system is most often installed in apartments in multi-storey buildings. With this type of organization, hot water flows through pipes from the top floor to the bottom. Among the disadvantages of such wiring, it is worth noting that in this case you cannot regulate the temperature without installing additional devices. In addition, the water on the upper floors is much hotter than on the lower ones.
- The two-pipe heating system is more common in cottages and country houses. Water circulates through two systems: hot - through one, cooled - through the other. This wiring does not have the disadvantages of the single-pipe version: the temperature of the heating devices always remains constant and is also adjustable.
Heating system connection options
In addition to choosing the radiator itself, during installation you will also need to decide how to connect it to the centralized network. There are several different options available to you, each of which has its own scope of use:
- Diagonal connection. This scheme is the best choice for long multi-section heating batteries. It is distinguished by the fact that the water supply pipe is attached to the pipe from above on one edge of the radiator, and the outlet pipe is attached to the lower pipe on the other side. Among the disadvantages of such a system are difficult repairs in case of problems: the scheme does not imply removing the battery without completely turning off the heating.

Radiator connection options
Important! When supplying water from below, you will lose about 10% of the possible heat.
- Bottom connection. This wiring diagram looks the most inconspicuous. It is used if pipes are located inside the floor or hidden under baseboards. The supply and outlet pipes are directed perpendicular to the floor surface. The main disadvantage is that this system involves the greatest possible amount of heat loss.
- Lateral one-way connection. It is the most common and effective. Maximum heat transfer is ensured by connecting the inlet pipe from above, and the outlet pipe from below on the same side of the battery. When inverted, the heating power is significantly reduced, so it is not recommended to swap pipes.
Important! If the distant sections of the battery are not sufficiently heated, a water flow extension is used.
- Parallel connection. It occurs through a heat pipe built into the heating system. The withdrawal is implemented in the same way. This system allows you to replace batteries without turning off the central heating, but the main disadvantage is that if there is insufficient pressure in the system, the batteries do not warm up well.
Important! Connecting a heating radiator with your own hands in this way is quite difficult; it would be better to entrust this work to experienced installers.
- Serial connection. In this case, heat transfer through the system occurs due to air pressure in it. Excess air is drained using a Mayevsky tap. The main disadvantage of such a system is also the impossibility of repairs without shutting down the entire heating system.
Rules for connecting a radiator
There are no minor nuances in installing a heating system; you must follow all the rules to ensure that the work is effective and safe. So how to install heating radiators with your own hands? The following points are worth considering:
- the distance from the top of the battery to the window sill should be more than 5 cm;
- the distance from the bottom of the battery to the floor must be at least 10 cm;
- the distance from the wall to the battery should be from 2 to 5 cm. If the standard mounts are too short, you need to buy others of a suitable length.
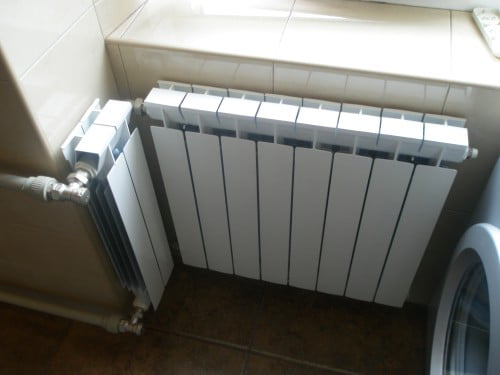
Radiator installation in confined spaces
These rules will allow air to circulate normally around the heating device, preventing unnecessary heat loss.
Important! The rules for installing the battery are the same for all their varieties, be it aluminum or cast iron radiators.
Before installing the radiator, you need to decide how many sections it should have. This can be done on the basis that in a standard room with a height of no more than 2.7 meters, one section heats two square meters of area. Of course, such a calculation is quite rough; to get the best result, you should entrust this to professionals.
Important! You can also use the formula: per 1 kW of radiator power there is 1 square meter of room. If there are several windows in it, you need to increase the resulting value by 1.3 times.
Required Tools
Installing heating radiators with your own hands in an apartment, as in a private house, requires a certain number of tools, without which this process is simply impossible.

Be sure to align the radiator vertically
To carry it out successfully you will need:
- impact drill with pobeditov drill bit;
- a set of torque wrenches;
- screwdriver or screwdriver;
- pliers;
- roulette;
- building level;
- pencil and ruler.
Installation process
The installation process is nothing overly complicated if it is carried out according to plan step by step and without errors.
- First, you need to turn off the heating system and drain the water from it. In a private house, this can be done using a pump; in an apartment building, you will have to contact the housing office. Then you need to dismantle the used radiators.
- Mark the wall for mounting new heating devices. In this case, it is advisable to use a level to install the battery as level as possible, eliminating distortions. It is important that the battery is installed strictly horizontally or with minimal deviation towards the pipe. This will allow the water to drain completely by the end of the heating season.
- Install the brackets, check their strength by pressing on them with all your weight. If they can stand it, hang up the battery. For cast iron and aluminum batteries, two fasteners are usually sufficient; for plastic pipes, a larger number is required. Before installing the fasteners, the walls should first be cleaned, leveled and plastered.
- Install shut-off valves, paying special attention to the reliability and water tightness of threaded connections. Connect the pipeline.
Important! To prevent the battery from leaking, it is advisable to use appropriate torque wrenches. Especially if you install an aluminum radiator, you will inevitably need to install an air valve with it, through which air will be released. The force of the torque wrench used during installation should not exceed 12 kg.
Rules for successfully installing batteries in the house. Having correctly chosen the power of heating radiators, we often do not get the desired heat in the house. What does their effective work depend on?
In order for the heating system to work correctly and efficiently, radiators must be correctly placed and mounted. Regardless of what heating system you use (autonomous or centralized), the rules for installing radiators are the same.
Location of heating radiators
The radiator must be installed so that it works with 100% efficiency. The optimal installation option is under the window. The greatest heat loss in the house occurs through the windows. The location of heating radiators under the window prevents heat loss and the appearance of condensation on the glass. For large windows, use radiators 30 cm high, or place them directly next to the window.
The recommended distance from the floor to the radiator is 5-10 cm, from the radiator to the window sill - 3-5 cm. From the wall to the back surface of the battery is 3-5 cm. If you plan to stick some kind of heat-reflecting material behind the radiator, you can reduce the distance between wall and battery to a minimum (3 cm).
The radiator must be installed strictly at right angles, both horizontally and vertically - any deviation leads to air accumulation, which leads to corrosion of the radiator.
Pipes in the heating system
Advice for those who have central heating in their home. Typically, metal pipes are used for heating systems in apartment buildings.
If the apartment has a metal riser pipe, you cannot switch to polypropylene heating pipes!
In central heating, changes in coolant temperature and pressure often occur - apartment wiring and radiators will fail within a year.
Also, under no circumstances use unreinforced polypropylene pipes - they are designed for use for water supply and are destroyed at a coolant temperature of +90°C.
Fittings for heating radiators
In order to make you comfortable during the heating season, you need to install thermostats on each radiator. This way you can save money by shutting off batteries in unused rooms and control the temperature in the house. You can purchase programmable thermostats - they will turn the radiator off/on, maintaining the required temperature.
Installation of thermostats on each radiator is possible in a two-pipe heating system. In a single-pipe system (in apartment buildings and high-rise buildings) for thermoregulation, a jumper is installed in front of the battery - a bypass. A bypass is a pipe installed perpendicularly between the supply and return. The bypass pipe must be smaller in diameter than the pipes used in the heating system wiring.
A Mayevsky valve is also installed on the battery - a valve for removing air from the system. These elements simplify radiator management and facilitate their repair.
Obstacles to room heating
Effective heat transfer is also affected by barriers that we ourselves create. This includes long curtains (70% of heat loss), protruding window sills (10%) and decorative grilles. Thick floor-length curtains prevent air circulation in the room - you simply heat the window and the flowers on the windowsill. The same effect, but with less consequences, is created by a window sill that completely covers the battery on top. A dense decorative screen (especially with a top panel) and placement of the battery in a niche reduce the efficiency of the radiator by 20%.
Correct installation of heating radiators– one of the main components of the high-quality functioning of the heating system as a whole. You should not be led by savings at the expense of comfortable heating.