There is, perhaps, no such yard, no matter where there is a bench - an invariable attribute of relaxation and communication. This item is convenient and useful, found everywhere both outdoors and indoors. There are countless forms of bench designs, however, they are all united by two basic principles of construction: stability and comfort. You should build on them when making a bench with a backrest with your own hands.
Types and features of bench designs
The classic design of a bench is a seat, back and supports. It can be supplemented with armrests, a built-in table, a canopy from rain and sun, and much more. The form can be simple, minimalistic or of unprecedented beauty and complexity, the main thing is that it harmoniously complements the surrounding space and is comfortable for relaxation.
The idea of what the shop will be like depends on the following points:
- Accommodation area:
- in the garden, near the house (they decorate the area, have a mostly stationary, convenient form);
- terrace (lightweight, convenient for tea drinking and socializing);
- barbecue or relaxation area (the form must be designed for a certain number of people);
- near water (corrosion- and rot-resistant material of the bench);
- The installation location is permanent or the bench needs to be moved, brought in/out;
- Shape: straight, round, semicircle, angular, curved;
- Materials of manufacture: wood, metal, stone/concrete, combination of materials.
At home, in the country, often the materials used to construct a bench are improvised materials, used things, such as a bed, a door, a closet, pallets (pallets), chairs, logs, driftwood, cinder blocks and much more. The result is original, interesting items in a vintage or rustic style. Pallets and furniture made from them have become an “untilled field” for ideas, a fairly common creative material.
You can include useful elements in the design of a bench, for example, make the seat folding, and use the sewn-in space underneath as a storage container. A folding table would be useful as part of the design of a bench or shoe rack under the seat of a bench in the hallway.
Designing a comfortable bench with a back
Let's start looking at the design with the support posts. They are often U- or X-shaped, and their stability has been tested by experience. The shape can also be solid (wooden beams, stone slabs), cast (formed from cast iron or concrete, the back goes into supports), in the form of legs, curved from metal or forged elements.
The seat is a part of the bench that should be comfortable and resistant to stress. It is made continuous or with intervals (wooden blocks, metal pipes, rods). The solid seat is comfortable, however, it is necessary to ensure that water does not stagnate on it after precipitation. The edges of the seat should be rounded to avoid injuring your legs. The optimal length is 1500 mm, width 400–450 mm, length of one seat 480 mm (of course, all sizes are selected individually). There are designs where the seat and back are made in one line (the back smoothly transitions into the seat by means of a bend), such benches are comfortable, often found in city parks, their supports are cast from cast iron or concrete, this shape can be repeated in wood or bent from a profile pipe .
A significant part in the convenience of the bench is given to the distance from the seat to the ground (floor) level; it should be 400–450 mm. It is necessary that the feet touch the base.
The backrest turns the bench into an object for long-term rest; it allows you to relax not only the leg muscles, but also the back muscles. An important role here is played by the angle of inclination relative to the seat and the height of the backrest. Based on human physiology, 10–20 degrees is considered the most comfortable. angle of deviation of the back from the perpendicular, height from 360 mm (since the human spine has an S-shaped bend, the height of the back is divided into two parts: 180–240 mm to the fulcrum - the place where the back does not fit and + another 180–240 mm - segment of contact with the back). The back should not be massive and outweigh the bottom of the structure.
Advice! The gap (clearance) between the back and the seat should not be made large, if a small child sits on the bench and will not have the opportunity to lean his back.
Choosing material for making a bench with a back
The most convenient and inexpensive material for manufacturing is wood. The wooden bench combines a balance of beauty and comfort and looks great in any space. Wood is a pliable material for the manufacture of various shapes and decorative elements, has a pleasant tactile sensation, does not overheat in the sun and does not overcool in the cold.
A simple wooden bench can be made quite quickly with your own hands; a minimal set of tools is needed. You can use inexpensive types of wood. Resistance to moisture, ultraviolet radiation, fungus and insects is provided by modern protective agents for impregnation and coating of wood surfaces. The weight of the product is optimal for moving.
The disadvantage of wooden benches is their fragility; wood tends to dry out over time and the joints become loose. The structure can be strengthened by various assembly elements and fastenings made of metal (corners, threaded ties, self-tapping screws instead of nails) and strengthening joints with glue. If supports need to be dug into the ground, they should be protected from rotting by soaking them in oil/resin-containing products.
Advice! Wood is a flammable material, so a bench located near a fire (fire, barbecue, stove) must be treated with a fire-resistant solution (fire retardant), which will help resist fire for some time.
Metal is a reliable and durable material with proper care and operating conditions. It produces sophisticated, “airy”, “lace” designs. The main disadvantage is corrosion, which is eliminated by protective coating of surfaces with primer, paint, enamel, repeated periodically as necessary. Flexible metal can be shaped into different shapes. The design of the bench from square profile pipes will be stable, solid and light. The square section is the most convenient to install. The most beautiful benches are made from forged elements.
The assembly of the metal product is very strong, carried out using welding seams and threaded fasteners. The need to have a welding machine and the ability to use it makes installation at home somewhat difficult.
The seat and back of a metal bench are almost always covered with pillows, covers, or a blanket, since tactile sensations are not always pleasant. The thermal conductivity of metal is higher than that of wood, so it is difficult to achieve a comfortable temperature balance between the body and the metal surface, and it is pointless to heat the bench with yourself.
The concrete bench is practically a sculpture. In this case, any shape can be achieved with a lot of effort and effort. A frame assembled from metal is placed in formwork and filled with concrete (the concrete hardening period is 1–2 months). Basically they make some parts of the structure and combine them with other materials. It is heavy and not intended to be moved. There is no doubt about immobility. Resistant to any weather conditions, durable.
Concrete complexes of benches and containers for planting plants with the installation of lighting elements look great. Practical for placement near the water.
Advice! For heavy benches, you should prepare a flat platform from layers of sand, gravel, and crushed stone so that it does not sink into the ground.
The most common type of bench is a design with a combination of materials. It is preferred in most cases, since here you can combine a reliable frame (metal), a comfortable seat with a back (wood), while achieving beauty, durability, convenience and lightness of form.
When buying material, make sure of its quality; you need to choose a dry tree so that it does not leak; remember the size of the parts. If there is a drawing with the specified dimensions, the material can be cut at the place of purchase, which will facilitate its transportation.
Drawing, material calculation, preparation for construction
A do-it-yourself bench begins with an idea, which is first embodied in a drawing. The drawing must be accurate and detailed and will need to be referred to throughout the work. You can make two drawings: a bench frame and a seat with a back, if the materials are different. The option when the supports are dug in (concreted) must provide for an additional length of the supports.
The drawing of the bench will show the number of parts, and the dimensions will help determine the amount of material consumed.
Tools: saw, plane, drill, tape measure, angle meter, wrench.
Materials: pine board 25x75 mm, 40x80 mm, 40x120 mm, 9 mm bolts and nuts - 8 pcs., self-tapping screws, sandpaper.
File the parts in the required quantity to size and sand them. Proceed with assembly.
How to make it yourself: the order of connecting parts
- Assembling the bench supports: mark and drill holes for the bolted connection, before fixing the parts with clamps. Tighten the connections of both sidewalls;
- Connecting supports with jumpers: attach power jumpers to the structures of the side supports using self-tapping screws according to the drawing;
- Assembling the backrest and seat: screw the strips to the side supports with self-tapping screws, maintaining an even gap between them. Recess the heads of the screws into the strips;
- Grinding joints and sharp corners;
- Application of decorative and protective coatings.
If there is a desire to emphasize the texture of the wood, then the surface is treated with a non-water-based stain (untreated wood swells with water) of the selected color, then the surface is varnished in several layers according to the instructions on the packaging (the varnish should be for external purposes with good wear resistance, for example, yachts). varnish). Between applying layers, the varnish must dry (dust stage - when dust does not stick to the surface and can be wiped off). Before applying the next layer, the previous one needs to be lightly sanded; this will not affect the transparency of the varnish.
If you decide to paint a bench, then before painting you need to apply a base (a product for protecting and reducing wood porosity) to the surface; it will give a good adhesive effect and the paint will last longer. Then apply paint for exterior purposes in several layers.
All painting work should be carried out outdoors; a respirator must be used indoors.
To make it more decorative, you can brush the surface; the structure of the wood will become more expressive. The naturalness of wood is emphasized by the application of impregnating oil-wax products with a water-repellent and protective effect.
Today, the choice of products for protecting wood, as well as all kinds of paint and varnish coatings, is very wide. It will not be difficult to find a product that will combine the necessary qualities.
Whatever material and design is chosen, the bench will be unique because it was made by hand. Remember about safety measures; all work must be accompanied by the use of protective equipment.
When you visit the Casino X official website for the first time, you will definitely remember this site for its unique design and large selection of promotional offers. Experienced gamblers who know a lot about gaming software are happy to become guests of the resource. It has everything you need for a comfortable game: licensed machines, bonuses, a high level of service. This is a serious long-term project that is successfully advertised on the Internet and provides a real opportunity not only to hit the jackpot, but also to withdraw your well-deserved winnings without any difficulties.
Virtual slot machines from Casino X of all genres
All professional resources that review Casino X note its very impressive range of games. More than 450 slots from more than 30 providers await you. The main part consists of developments from Netent and Microgaming. Basically, these are five-reel simulators of various genres: fantasy, history, stories from films and legends, fictional stories, sports, animals, treasures and, of course, fruit classics. For convenience, the top online slot machines are collected in a special section. Interesting game mechanics await you:
- free spins;
- cash bonuses;
- multiplication of rewards;
- special characters;
- accumulators and multipliers.
To the official website
The web resource also pays attention to tabletop entertainment and the Live category. To switch to paid bets, you need to create a profile in the system. Once the quick registration is completed, the player can top up his account. Immediately after this, you can start playing on the most popular slot machines. Most of the devices are adapted for gadgets with touch controls. On a smartphone, Casino X mobile version is slightly different from the format on a computer. There are no functional differences: you manage your bank and bets in the same way as on a personal computer.
Free game mode at Casino X online
Club clients do not have to look for where to download machines for constant access to demos. The browser version of the portal works around the clock, as does its technical support. The site is occasionally updated to better meet current quality standards. All guests of Casino X can play for free without registration under one condition - connecting a smartphone, tablet or computer to the Internet. Just click on the video slot you are interested in and start a test game in demo coins. The results of such spins or bets at the roulette or poker table will not affect the real balance in any way.
Unlimited access to Casino X official website
If for some reason the full version of Casino X does not open at your usual address, this problem can be easily solved thanks to alternative copies. For every client and ordinary guest, a mirror today serves as the most convenient way to enter your account and the page with slot machines. The same licensed software with a full guarantee of specific algorithms awaits you. You will never lose your status and balance, since additional addresses with a similar interface and bonus features are constantly being added to the network.
If, sitting on a bench, you want to relax and be inspired, then it is more logical to place it near something beautiful: a pond, a flower garden or an alpine slide.
Making a garden bench with your own hands is not an easy task, but you don’t need to be a professional in wood carving or welding. It is enough to have some skills in working with a hammer, saw or welding machine, materials and desire.
Soon you will have comfortable and beautiful hand-made garden benches.
Having the desire and the necessary materials, building benches for the garden is not difficult.
Required materials and tools
With a creative approach, a garden bench can be made from almost anything. The best and simplest option is a wooden bench, for which the materials you will need are boards and varnish with a primer, and the tools you will need are a screwdriver and a jigsaw.
If you want to see a metal bench on your site, there will be a completely different set of tools: a welding machine, metal pipes, a pipe bending device, a grinding machine.
If there is none of the above, and the desire to see a bench on the site is great, you can use any available materials. Bricks or car tires with a board in the middle, wooden boxes can also serve as a bench. You can even make a cute bench out of plastic bottles and cardboard.
Step-by-step instructions for making a bench with your own hands
Wooden garden benches with backs
Most often there are two types of wooden benches made by hand: an ordinary bench and a bench with a back.
For convenience, before starting work, it is better to draw a drawing, choose the size you are interested in and buy boards that fit the size. If this is not possible, you need to use an electric jigsaw or saw and prepare the bench elements yourself.
Read about the types of perennial fast-growing shrubs for hedges.You will need:
- 5 boards 1.5 m long and 15 cm wide, it is better to choose a thickness of 3-4 cm;
- 2 legs, which will also serve as a support for the back - 900 by 150 mm and thickness 3-4 cm;
- 2 front legs – 360 by 150 mm with a thickness similar to the rear legs;
- bars 40X40 mm;
- screwdriver and screws;
- varnish and impregnation;
- electric jigsaw;
- sandpaper.

The drawing will help you in making a garden bench
Having prepared all the necessary materials, you can get down to business.
Before fastening the boards together, they must be well processed so that relaxing on the bench will bring pleasure and not splinters. The longest boards that will go on the seat and back need to be sanded using sandpaper (or a sanding machine).
If you have an electric planer in your house, you need to use it to make the boards round.
The blanks for the rear legs need to be modified to give them the correct shape.

The legs, which also double as a support for the backrest, are processed with a grinding machine.
We take boards 90 cm long and mark a division of 40 cm - the height of the bench. From this division, at an angle of 20 degrees, we cut off the upper part of the board with a jigsaw, while the board should stand on its edge. We get the back leg and the angle of inclination of our future back.
The most difficult and important is the cut; it must be even on both workpieces in size and depth.
We cut the beam to the width of the bench - 50 cm. We connect the legs with it, preferably both from above and from below, so the bench will be more stable. The distance between the legs is 28 cm (front and back).
We screw three long boards with self-tapping screws and a screwdriver to the upper beams of the finished legs, with which we tied them together.
Assembling the back of the bench. We attach the two remaining boards to the previously prepared cut. The distance between the seat and the board is 20 cm, the boards are 2-3 cm.
The structure can be strengthened. To do this, you need to attach a board along the length of the bench to the lower frames of the legs. This will give even more reliability and stability.

We coat the bench with varnish to make it decorative and durable.
Wooden garden benches without backrest
Similar to the steps described, you can make a simpler bench without a backrest. For it we will need everything the same, except for 90cm boards going to the back legs, instead two more boards 36cm in length. It is assembled according to the same principle as a bench with a back.
Garden benches made of metal and wood
Making a bench from metal and wood is much more difficult than just making it from wood, but it is stronger and looks more solid.
You will need:
- metal grinder;
- welding machine;
- bench vice;
- metal pipes 30X30 mm;
- primer for metal;
- wooden boards for seating and varnish for processing.
Seat frame. We cut the pipe into 4 parts: 2 x 1500 mm, 2 x 400 mm. Weld in the shape of a rectangle.
Legs. We cut 4 identical pieces of 460 mm for the legs from the metal pipes and weld them using a welding machine to the corners of the rectangular workpiece.
Bench back. 440 mm tubes are welded to a pipe 1500 mm long on the sides in one direction. This blank is then welded to the rectangular part of the bench.
The structure is ready, it is necessary to rub the welds, polish and coat the bench with a primer.
To add rigidity between the legs, additional metal ribs can be welded to the back (inside diagonally) and to the seat.

The bench made of wood and metal is ready
Seat. For the seat, it is preferable to use wooden boards, which must be processed and sanded before screwing.
They are attached lengthwise or crosswise, depending on your desire, using bolts (preferably with rounded heads).
Using an electric drill, holes are drilled in the metal frame into which the bolts are screwed. You can also use metal staples, then you won't need a drill.
Upon completion of installation work, we treat the wooden covering with varnish.
Garden benches made of stone
Garden benches made of wood look beautiful, but they require careful maintenance. But stone benches are easy to maintain and easy to assemble.
If there are ownerless stones of different sizes on the site, you can build an almost exclusive bench from them.
We take large stones and lay out the seat and backrest from them. We lay out armrests from small stones. We put a few decorative pillows and you can sit down and relax.
Such benches are inconvenient to move around the site, but they look original.

Making a bench for the garden yourself
Description
Instructions for making a garden bench step by step, each step is described in detail and illustrated
Victor Sergeev
One of the attributes of a garden or recreation area in a suburban area is a bench, sitting on which you can read a book alone or, conversely, spend a few fun hours with friends. How can you make an ordinary bench comfortable and at the same time turn into an element of garden decor? The solution is simple - a DIY bench for your dacha. Only your own exclusive creation will fully satisfy your personal aesthetic needs.
Before you start sketching or drawing a product, you need to think about the location of its installation. The material of manufacture also depends on this. For example, in an old garden with large branchy trees, a wooden bench with a wrought iron frame looks good (as an option - a product made of logs on a stone base), and in a young garden - a light, even openwork bench in a romantic style.
A small white bench stands out in contrast against the dark green hedge
If you place it in a quiet secluded corner, near or surrounded by flowering flower beds, it will become a wonderful place of solitude and relaxation, where you can spend a few pleasant minutes alone after working out in the garden beds.

An old brick wall, a bench made of grayed wood and flowers look mysterious and romantic
Often benches are an integral part of verandas, gazebos, and summer picnic areas. In this case, there should be several products designed in the same style. One example is a garden table with two benches on the sides, where on a summer evening you can have a family tea party or play board games.

Deliberately rough and comfortable wooden structure - a table, two benches and an armchair
It is better to install the bench in such a way that it offers a view not of the neighbor’s fence or garage, but of a pond, flower garden, or. The surrounding picture should please the eye, and not remind you that you need to refuel your car or renew the paint on the gazebo. It is also appropriate to place benches on the playground, by the pool, near the front entrance to the house.

A bench by the pond surrounded by flowers and greenery is a great place for relaxation and reflection.
One of the best places is in the garden, near the beds. It is better if the bench stands in the shade, for example, under the spreading crown of a tree or under a canopy, since it is intended for rest from physical labor - digging, weeding, watering or harvesting.

Relaxing in the shade of a flowering bush is a real pleasure
You can think about a decorative frame: a DIY garden bench looks good surrounded by low flowering bushes, specially arranged flower beds, on a small hill or on a platform made of natural stone or.
Preparatory work is half the battle
First you need to take a piece of paper and make a sketch or drawing of the proposed product. Even at this stage, questions may arise: what is the optimal height or how many legs should the bench have? There are general standards that should be followed when drawing up a diagram:
- 400 mm – 500 mm – seat height;
- 500 mm – 550 mm – seat width;
- 350 mm – 500 mm – back height.
If you plan to create a product with a backrest, you should determine for yourself how the backrest will be attached to the seat. Depending on whether the bench is portable or not, the legs are planned: for a non-portable product, they are firmly fixed in the ground.

It is not difficult to fix the bench legs: you need to dig holes of the required size and fill them with cement mortar, lowering wooden parts into them
From the drawing you can estimate how much material is needed for the job. Typically, a product of this kind requires a minimum of financial investment: at the dacha there is always a lot of wooden blanks left over from the construction of a house or bathhouse, fasteners (screws, nails, bolts, staples), paints and varnishes for wood processing.

If you collect the remains of wooden products and blanks from around the dacha, you can come up with an unusual model
You will also find the necessary tools in the utility room. If the main material for production is wood, you should prepare: a plane, a saw, a jigsaw, a hammer, sandpaper, a tape measure and a pencil.
Making Benches: Six Easy Projects
You can never go wrong by choosing wood for work - a material that is soft, pliable in processing and at the same time durable, capable of serving for decades. From wood you can create elements of various shapes and sizes, shaped inserts, volumetric and miniature parts.
Project No. 1 – a simple bench with a backrest
If you have difficulty drawing up a sketch, you can use a ready-made drawing of a garden bench.

All parts are cut according to the dimensions in the drawing
This bench is traditional for city parks; similar examples can be found at river stations, near theaters or shopping centers - in those places where you have to spend some time waiting. The advantage of this option is the ease of preparation of parts and speed of assembly. To work, you will need thick beams for support (3 large and 3 smaller), bars or boards for the seat and back.

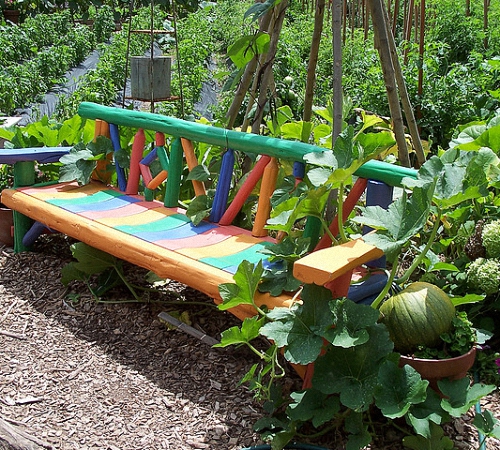
The color of the parts can be changed using impregnation or varnish of a darker shade
This model is portable - it can always be moved to another, more convenient place. To ensure that it always stands level and does not wobble, when installing supports it is necessary to ensure the exact location of the parts - even a slight discrepancy will cause the product to skew.
At the end of the work - and this applies to any wood product located outdoors - all wooden parts must be treated with a special anti-mold impregnation or coated with varnish, which also contains protective components. Treated wood is resistant to moisture, lasts longer and looks like new for a long time.
Project No. 2 – classic style bench
This option is more thorough than the previous one. A bench with a rectangular seat and the same back looks great against the background of a house built from any material - wood, brick, stone.

Assembly diagram of the armrests and backrest of a bench in a classic style
For variety, you can change the color, choose a shade that is closer to the country houses. The back of such a bench is a real find for those who like to imagine and translate their ideas into wood. Straight vertical bars can be replaced with slats arranged crosswise.

Several people can easily fit on this bench
The upper horizontal crossbar would look good if covered with elegant carvings or colored designs. Armrests and legs can also be figured - but it all depends on the desire and skill of the master. It only takes a few evenings to make such a bench for your dacha, but you can enjoy relaxing on it for more than one year.
Project No. 3 – table with benches
A garden set for relaxing with the whole family consists of a comfortable table and two fixed benches.

A convenient and practical table with a couple of benches will be useful in any country house
All large parts (table, benches) are assembled separately, and then assembled into a single whole using 4 lower bars - 2 on each side.

Assembly diagram of the entire kit
The table is a tabletop with legs mounted crosswise.

Table assembly diagram
The benches are assembled easily, from bars or boards of various lengths.

Bench assembly diagram
At the last stage, the benches are first fixed to give the structure stability, then the table is fixed exactly in the middle.

Initial assembly - connecting benches
A simple-looking but comfortable table will become a gathering place for family and friends in the evenings - for communication, evening tea, and relaxation.

This table with benches can be placed directly on the lawn
You can download more detailed drawings and photos of this project.
Project No. 5 – video master class
Variety of materials, shapes and styles
Wood is a traditional, “warm” material for making benches, which is why products made from it are so different. Instead of machine-processed bars, you can take natural material with natural shapes - and before us is not just a bench, but a real masterpiece.

The original bench is made from large pieces of sawn and processed logs
It turns out that there are also stone benches, but they are valued not for functionality, but for aesthetics. You only want to sit on a stone piece in the warm season, but you can admire it all the time.

A small stone bench fits harmoniously into the floral landscape
They look refined and elegant, but only a professional blacksmith can create a garden bench with his own hands from metal.

A wrought-iron bench among the riotous colors looks more than appropriate
Combined benches and benches, built of stone and wood or decorated with textile items - capes, pillows, look interesting.

Small pillows in pink and white, neatly laid out on a bench, make the garden corner cozy and homey.
That's all for today. We hope you found something useful. If you have any questions or suggestions, you are welcome to comment.
A bench in a garden or country house serves not only as a place to relax, but also as an element decorating the exterior. Therefore, the process of making a garden bench must be approached with special responsibility. We will learn further about how to make a bench with your own hands.
DIY benches photos and varieties
There are a large number of materials from which you can build a bench in the garden. The first of these is plastic; this material allows you to purchase a ready-made bench. Making a plastic product yourself is problematic. However, let’s still get acquainted with the advantages of this material.

First of all, we note the lightness of plastic products. Thanks to this quality, the bench can be easily moved from one place to another. In addition, plastic products are affordable, they are easy to care for, do not require additional painting, etc. Among the disadvantages of a plastic bench, we note: a tendency to mechanical damage, instability to ultraviolet radiation, cheap and unpresentable appearance.
Using plastic pipes and tools for soldering them, you can make your own bench for the garden. Liquid nails, which reliably connect plastic pipes together, will help replace the soldering iron.
The most popular, affordable material for creating a garden bench is wood. Wooden products are practical to use; they easily fit into any exterior, especially a garden, where there are already a lot of trees. However, the choice of wood must be approached with special responsibility; you should select types of wood that can withstand adverse weather conditions well. In addition, drying the wood should be optimal for working with it.
The next material for creating a bench in the garden is stone. Stone products are natural and stylish; they are perfect for any exterior. Stone compositions are stylish, unusual and noble. However, the stone is suitable for making bench legs; sitting on the stone for a long time can lead to health problems.

Therefore, a stone bench is either covered with additional covers and pillows, or is made not only from stone, but from a combination of several materials. Please note that a stone bench is stationary and does not move from place to place, unlike a plastic or wooden one.
If there are metal compositions or forgings in the garden or area, we recommend choosing a steel version of the bench. This bench will perfectly decorate the garden and become a good place to relax. The appearance of the structure is particularly attractive, especially when using additional steel elements. It is possible to combine metal with other materials, such as wood, stone.
When choosing a material to create a bench, you should first of all proceed from its combination with other objects located on the site. A garden bench should be original, attractive and practical.
Decide on the type of bench, whether it will be portable or stationary. In addition, there are folding versions of benches that are installed on the site in the spring and autumn and removed for the winter.
The most popular are benches made of wood. Wood is easy to process, so benches of various shapes and sizes are made from it. In order for a wooden bench to serve you for as long as possible, you need to properly care for it and choose certain types of wood that are resistant to adverse operating conditions.
The initial stage of creating a bench with your own hands
Before you start creating a bench in the garden, you should decide on the location of its installation. The size of the bench, its shape and appearance will depend on this. We recommend installing the bench in a place surrounded by plants so that it is always in the shade on a hot summer day. The view from the bench should be attractive and natural.
If there is a fountain, waterfall or other source of water in the garden, place the bench in such a way that you can watch them from it. It is possible to install a bench next to a flower bed or flower bed. This way, you will have the opportunity to enjoy previously planted plants. A bench surrounded by flowers or bushes is cozy; it’s comfortable and pleasant to sit on such a bench.
In any case, the bench should be located in a shady place, so you will be protected not only from the heat, but also from strong winds. It is possible to create a cap over the bench to protect it from precipitation, in which case you will be able to get a whole gazebo for relaxation. In any case, the bench should be located in such a place as to provide its owners with proper rest.

DIY wooden bench drawings
Before creating drawings for a garden bench, you need to determine the requirements that apply to it. A bench in the garden should be, first of all, comfortable. Having a backrest makes you feel more comfortable, especially if you are going to spend a lot of time sitting in the garden.
The second requirement is safety; all connections between the individual parts of the bench must be strong. The bench must withstand heavy loads from several people. Therefore, special attention should be paid to fittings and fasteners; they must be made of high-quality steel. If the bench is made of metal, then the welds must also be of high quality and well protected.
Since the furniture will be located in the garden, the material from which it is made must withstand moisture, solar radiation and temperature changes.
We suggest you familiarize yourself with the method of constructing a simple wooden bench using the backrest using your hands. The length of the seat with backrest will be about 145-150 cm. This bench seats three people. The back angle is about 22 degrees. The width of the seating area is about 40 cm.

When working on a garden seat you will need:
- wooden blanks, the dimensions of which are predetermined by drawings;
- blanks for making legs and holders;
- panties that reinforce the structure of the bench;
- self-tapping screws and various fasteners;
- an electric jigsaw, which is used to cut wood;
- grinding machine for processing material;
- screwdriver;
- brushes;
- antiseptic primer, paints and varnishes.
If possible, buy ready-made boards according to the size of the blanks. Otherwise, use an electric jigsaw to cut them.
After cutting the wood, it is carefully processed. Previously manufactured parts can be ground. To process the end sections, use an electric plane. It can also be used to round corners.

Next, the long legs holding the frame part of the back are processed. To do this, markings are first applied to them, and then they are processed in compliance with the slope. Initially, it should be noted that the seat height is 40 cm. This part of the board does not require additional processing. Next, on the next part, the part is cut at an angle of 18 degrees. Please note that the cuts on each leg must be the same. Otherwise, the bench will turn out asymmetrical.
Initially, in the design of the bench you need to assemble the support legs. The interval between them is 28 cm. Make sure that this interval is maintained between the two pairs of legs. Use a beam to connect the legs together. We recommend using the double strapping option, which will significantly improve the strength of the bench.
After assembling the two sides of the bench, they are connected using boards. Use self-tapping screws to secure the boards to the support legs. Please note that the interval between the boards is 20 mm, it must be equal in all areas of the bench. These gaps significantly increase the service life of the bench, as air circulates through them and moisture is removed.

Further actions are aimed at strengthening the structural features of the bench. In order to increase the level of stability of the bench, it is necessary to perform additional reinforcement. To do this, the lower harness is performed using a beam.
Next, you install the backrest on the wooden bench with your own hands. To make it you will need two boards. The first is fixed with an interval of 20 cm between it and the seat, and the second with an interval of 18 cm from the first.
At this point, making a bench with a backrest with your own hands is completed. Next, the wood should be treated with various compounds that will protect it from moisture and insects. In order to improve the attractiveness of the appearance of the bench, it is coated with varnish or paint. Special impregnations protect wood from the effects of fungus or mold. To achieve an ideal surface shine, wood can be polished.

Do-it-yourself bench for a summer house made of metal
In the process of working on a garden bench with your own hands, you will need:
- profile pipe, the diameter of which depends on the size and strength of the bench;
- boards that will serve as a seat;
- welding machine for connecting pipes to each other;
- Bulgarians;
- grinding machine;
- anti-corrosion composition;
- paints for working with wooden surfaces;
- fasteners;
- hammer and bolts.
To further decorate the benches, use forged elements that are installed on it using a welding machine.
Before starting work, prepare your own drawings for the bench. Decide on the cross-section of the pipes used in the work. The best option would be to use a pipe measuring 3x3 cm. When working on a middle bench without a back, you will need about eleven meters of pipe. To cut parts, use a grinder or a hacksaw.

While working, do not forget about the safety rules. To create the long parts of the seat, use two blanks measuring 230 cm. For the long parts of the rectangular structure, blanks of 60 cm will be used; six of them will be required. In addition, it is necessary to prepare six parts measuring 45 cm.
Wooden boards will become the basis for making eight bars. The connection of the bars to the metal frame is made with bolts and nuts. Please note that the fasteners must have a round and flattened cap, which in the future will not catch the clothes of people sitting on the bench.
To assemble a simple steel bench with your own hands, follow the recommendations below:
1. The long parts of the workpieces are located in a horizontal position, and the short parts - in a vertical position.
2. In the process of welding parts together, make sure that the angles at which they are connected to each other are straight.
3. It is possible to adjust the bench length. If the length of the bench increases, then the number of supporting components increases.
4. After welding the pipes, it is necessary to clean all connections and also arrange holes for fixing the fasteners.
5. The frame part of the bench must be coated with an anti-corrosion solution.
6. Before fixing wooden parts, it is necessary to cover them with paint or stain.
7. At the final stage of assembling the bench, the boards are fixed to the surface.

Wooden boards on the bench can be replaced with steel parts in the form of profile pipes. In order to improve the aesthetic appeal of the bench, the steel ends of the slats are equipped with a metal frame that hides the cuts. Duralumin pipes are not welded together. Bolts are used to connect them.
To make a bench with a back, you will need to use more material. In this case, the convenience and comfort of using such a bench will be higher.
In any case, when making a garden bench with your own hands, you should be guided primarily by the number of people who will relax on it and the materials that are available. Only in this case will it be possible to get a high-quality and optimal place for relaxation and free time.