The number of fans of soft roofing is growing like a snowball. And this is not surprising - just remember the visual appeal and operational advantages of one of the most modern coatings. But there could be even more supporters of flexible roofing materials if they knew that installation can be completed without the involvement of a team of roofers. Today we will try to fill this gap and share not only construction technology, but also the secrets of experienced craftsmen.
Soft roof structure
Before talking about the design of a roof with a soft roof covering, I would like to briefly mention the features of this unique material. In essence, it is a modified roofing felt. But the basis of flexible tiles (in the future we will call them shingles) is not banal cardboard, but stronger and more durable fiberglass or polyester fabric. Improvements also affected impregnation. Waterproofing of soft tiles is provided by a modified polymer-bitumen composition, thanks to which the critical temperature points have been shifted to higher values.
The multilayer structure makes the soft roof durable and absolutely waterproof
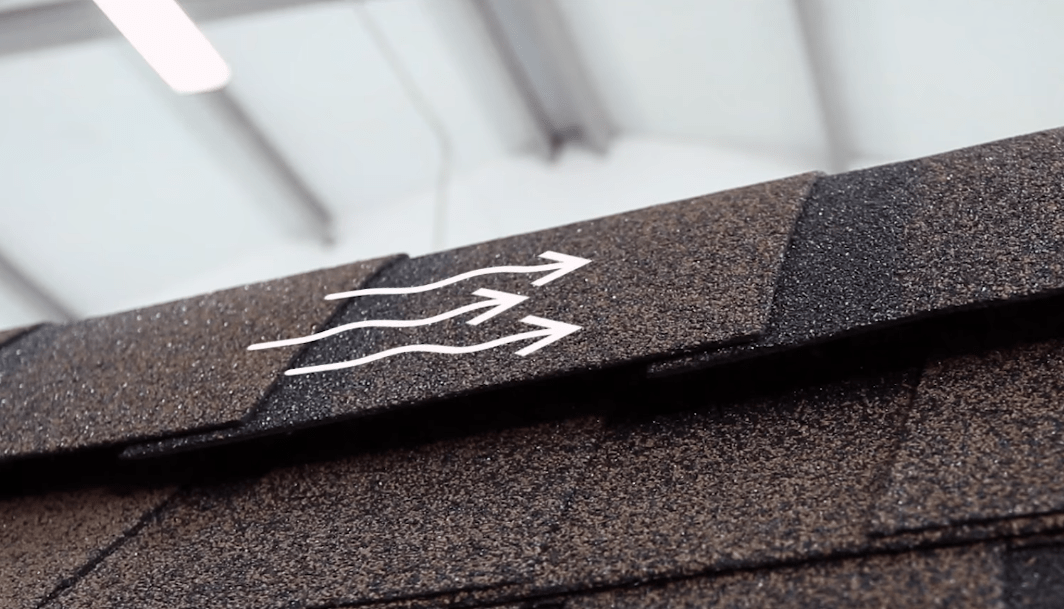
Basalt or slate chips are applied on top of the flexible tiles - it not only determines the design of the coating, but also makes it more resistant to mechanical stress, ultraviolet radiation and other external factors. The bottom of the tiles is covered with an adhesive layer, which is covered with a protective film. In some cases, a fine mineral coating is applied to the lower surface - then the adhesive part is a wide strip in the upper part of the shingles.
Roofing pie design
The multilayer structure makes flexible tiles not only strong, but also durable - some manufacturers provide a guarantee for their products for up to 25 years. As a rule, soft roofing materials easily overcome this threshold. Of course, we are talking about those cases when the base of a soft roof complies with accepted standards, and the material is laid strictly according to the prescribed technology.
Studying the structure of roofs covered with bitumen shingles, we will immediately divide them into two types:
- cold,
- warm.
The first ones are built for cold attics. Many websites and print publications sin by pointing out the inappropriateness of installing simplified roofing pies for residential buildings. Like, if a house is intended for year-round use, then its roof must be warm. This statement is fundamentally incorrect - most of the private houses of the old housing stock were cold. Moreover, a cold roof has its advantages. And the most significant of them is durability. In winter, ice practically does not form on such a roof, which, as you know, is one of the worst enemies of flexible tiles. In addition, the simplest roofing pie is perfectly ventilated, which means that the wooden frame will always be dry. As for energy efficiency, for thermal insulation you will only need to insulate the attic floor. As you yourself understand, its area will in any case be smaller than that of the roof.
 When using a cold roof on a residential building, it is necessary to insulate the attic floor, the area of which is noticeably smaller than that of the roofing structure
 So, the structure of the roofing pie for cold roofs includes:
- step (sparse) lathing made of wooden beams or steel profile pipes;
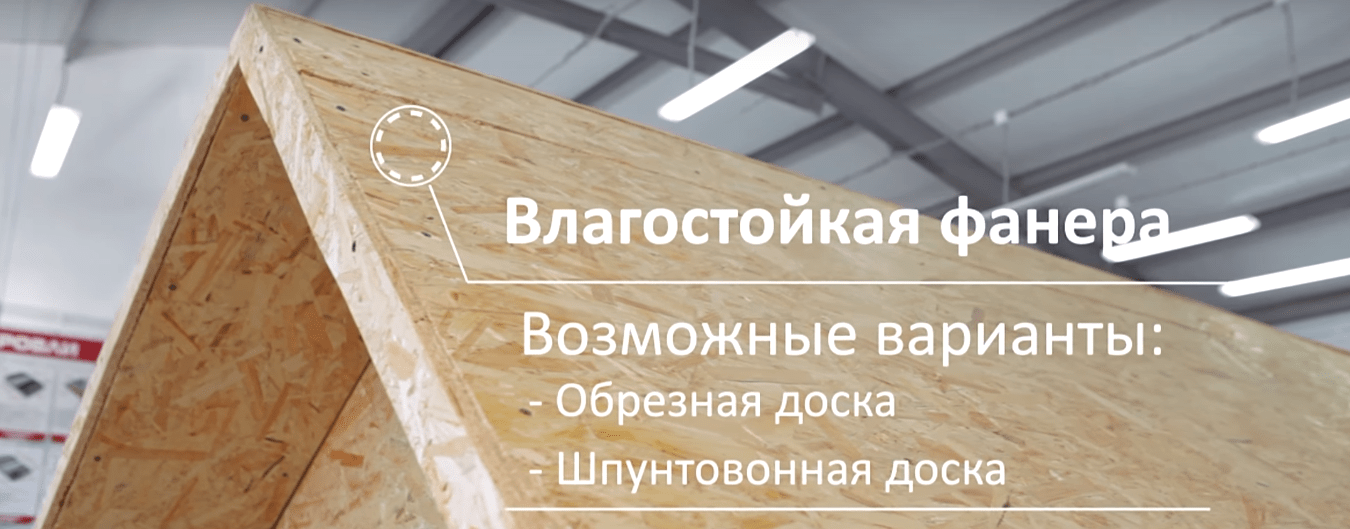
- solid flooring (made of plywood, OSB or shag boards);
- insulating lining;
- bitumen coating.
Roofers working as part of professional teams often recommend installing a super-diffusion membrane under the underlayment, arguing that the wooden base is more protected from moisture. This is a rather controversial statement, which I personally cannot call anything other than wastefulness. A regular waterproof lining leaves virtually no chance of the wooden frame getting wet due to snow or rain. Such actions on the part of specialists can only be explained by the desire to earn a certain amount for an operation that requires minimal labor costs. As for a warm roof, in this case the installation of moisture-resistant coatings is mandatory due to the use of thermal insulation.
 Warm roofing pie allows you to use any attic space for year-round use
 To insulate the attic, fibrous materials are most often used, which, when wet, can lose most of their unique abilities - this is what needs to be protected. From below - from moist air, and from above - from leaks. In this case, the roofing pie should have the following structure:
- slats for mounting cladding panels;
- vapor barrier waterproof film;
- thermal insulation layer;
- waterproofing windproof vapor-proof membrane;
- counterbeam;
- sparse sheathing;
- continuous flooring;
- lining base;
- flexible bitumen coating.
You may argue that the slats installed from the attic side have nothing to do with the roofing pie, and you will be absolutely right. However, we still indicated them due to the fact that in our case they also act as fasteners for the lower layer of vapor barrier.
Video: correct installation of a roofing pie is easy
Technology of laying roofs from soft tiles
A roof covering made of soft bitumen tiles is similar to tile only visually. Not only the installation technology differs, but also the operational characteristics, service life, maintenance and repair procedures. And although the work on constructing a roof made of flexible tiles cannot be called too complicated, you will have to carefully follow the manufacturer’s recommendations. It is best to divide the construction process into several stages:
- Purchase of materials and preparation of tools.
- Preparatory work.
- Laying insulating materials.
- Arrangement of counter-lattice and sheathing.
- Construction of a solid foundation.
- Laying the top layers of the roof.
- Installation of additional elements and arrangement of passages.
By organizing your work time in this way, you will not only minimize the number of possible errors, but will also be able to make the most informed decisions about hiring outside help.
How to calculate how much and what materials you will need
The first thing you need to do when starting mathematical calculations is to draw up a detailed drawing of the roof or create at least a basic sketch indicating the exact dimensions and features of each slope. The calculation itself includes determining the geometric dimensions and number of main parts of the structure:
- additional elements;
- valley carpet;
- lining layer;
- ventilated ridge or roof aerators;
- timber for step lathing and counter lathing;
- boardwalk;
- soft covering.
It must be said that the accuracy of the calculations affects not only the cost of the roof, but also the timing of the work. For this reason, we will understand the features of calculating all components of the roof in as much detail as possible.
Additional moldings
To finish and protect various parts of a soft roof, several types of extensions are used:

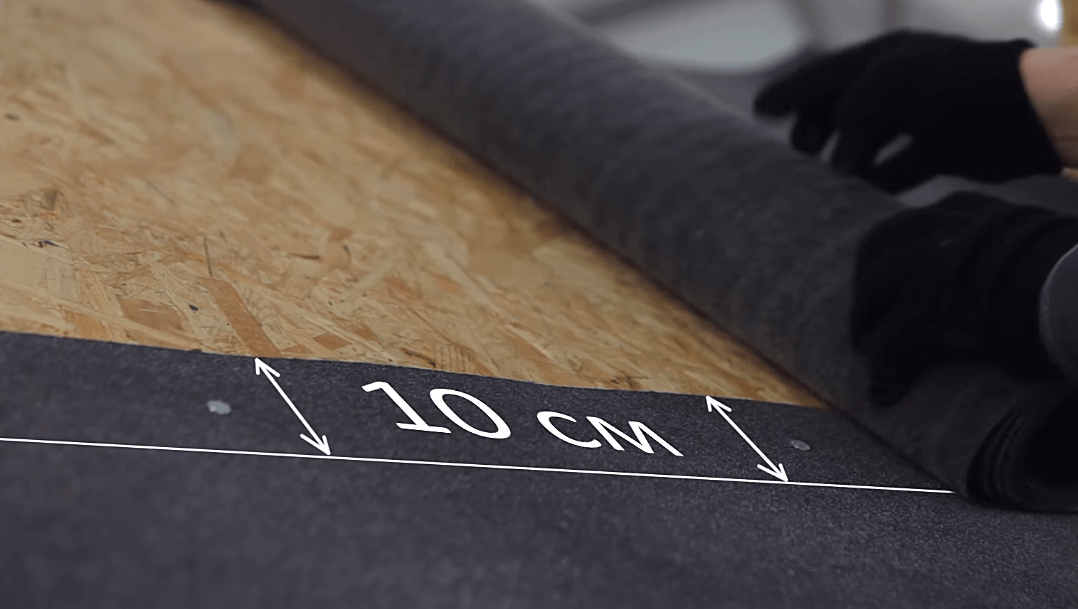
The presented additional moldings are produced in the form of strips of a standard length of 2 m. However, in order to determine the number of certain strips, the length of the area in need of protection should be divided by 1.9 or 1.85. This is due to the fact that aprons and strips are not mounted end-to-end, but with an overlap of 10–15 cm wide.
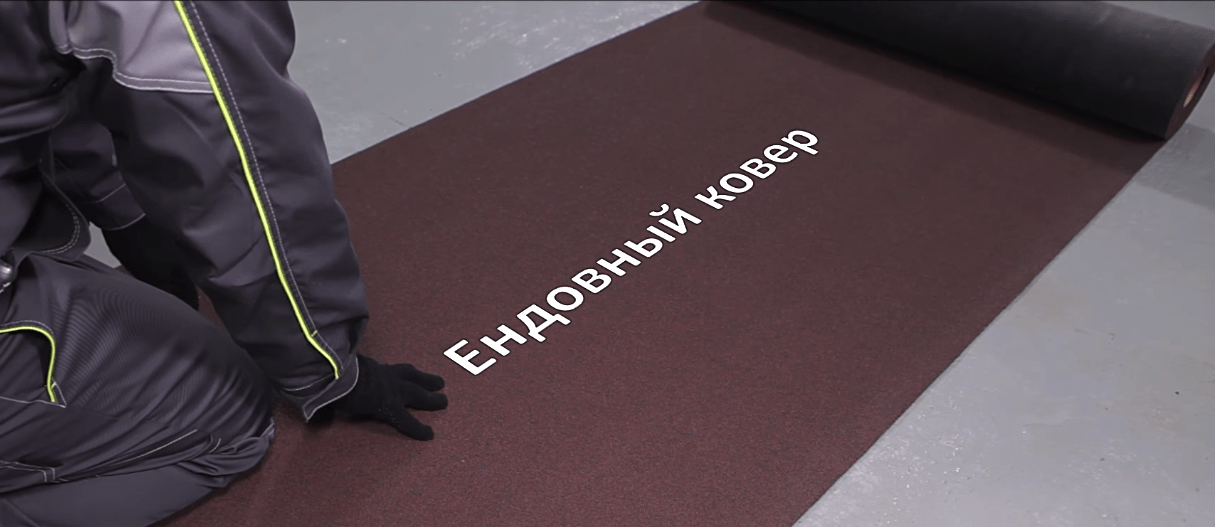
If the roof structure includes grooves and junctions with vertical surfaces, then their waterproofing is ensured by a special valley carpet. Manufacturers produce it in the form of 1×10 m rolls, presenting a choice of several color solutions to match the tiled covering.
 When choosing a valley carpet by color, it is not at all necessary to get the exact color - a slight mismatch of tones will be a plus, making an ordinary roof extremely stylish and expressive
 When calculating the total length of the carpet, you should make a 20-centimeter reserve for each valley - it will be needed for proper installation of the lower part of the joints.
The lining layer is installed both over the entire area of each slope, and partially - it all depends on the steepness of the surface. If the roof slope is more than 1:3 (18 degrees), then only areas susceptible to leaks are protected with a roofing carpet:
- internal corners of junctions of adjacent slopes;
- ridge part;
- ribs;
- areas with clivus fractures;
- edges at gables and cornices;
- ventilation outlets.
When laying the insulating carpet, it is necessary to make an overlap of 10–15 cm. For this reason, its calculated quadrature should be 1.1 - 1.15 times greater than the total area of the slopes. If the lining is partially installed, then the length of the strips of the roofing carpet corresponds to the length of the parts of the roof that are prone to leaks.
 The underlayment can be laid both along and across the slope
 The width of the lining for partial waterproofing should be 40–50 cm. An exception can be made only for ridges and external corners, reducing this value to 25 cm.
Ridge aeroelements
When calculating the number of ridge aerators, it is assumed that one element 1.2 m long is capable of providing ventilation for about 25 m 2 of the under-roof space. If point aeroelements are used, then the total area of adjacent slopes should be divided by 5 - that is how many square meters of roofing pie are “served” by one such element.
 The design of the ridge aerator allows for ventilation of the roofing pie on roofs of any configuration
 Please note that point aero elements vary in height. Short ones are used on steep roof slopes, and long ones on flat surfaces.
Lumber for sheathing
To arrange the sheathing, a wooden beam with a cross-section of at least 40x40 mm is used, as well as a board 25 mm thick. The length of the counter beam is easiest to determine - it is equal to the length of the rafter legs. As for the sparse sheathing, the total length of the wooden elements is determined based on the standard step width for bitumen shingles - 37 cm for rafters located at a distance of 0.9 m from each other. Therefore, the length of the rafter leg in centimeters should be divided by 37 and multiplied by the width of the roof - this will be the required length of the beam that will be needed to sheath one slope.
Solid base
Sheets of plywood or OSB used to construct a solid base must be installed staggered, that is, with overlapping seams. For this reason, when determining the area of the material, it is necessary to make an amendment:

When determining the amount of plywood or OSB in sheets, it is recommended to sketch their location on paper with the most dense laying - in this way it will be possible to avoid waste of material during installation.
Covering and roll materials
During the installation process, two types of tile shingles are used - ridge-eaves and ordinary. The first ones are produced in the form of packages designed for 12 linear meters. m of ridge and 20 linear. m cornice. When calculating the latter, the same correction factors are used as for a solid base (simple roofs 3–5%, combined roofs - up to 10%). To determine the number of sheets of flexible shingles, the total square footage of ordinary shingles is divided by the area of one bitumen strip. One pack of soft tiles is usually designed for 3.5 m 2 of roofing - knowing this number, it will not be difficult to calculate how many packages you will need to buy.
 Before installation, tile shingles from different packs must be mixed - this will eliminate the appearance of areas of the roof that are not uniform in color.
 The amount of materials that will be needed for a warm roofing cake is calculated with the following tolerances:
- waterproofing and vapor barrier - at least 4%;
- roll thermal insulation - according to the area of the slope;
- slab insulation - up to 4%.
It is easy to notice that the amount of roll and slab insulation practically does not depend on the complexity of the roof. This is due to the fact that such materials are easily joined together and do not affect the appearance of the structure.
What tools and supplies will be needed
In addition to roofing and wood materials, the following equipment and tools will be required during the work:
- saw;
- hammer;
- scissors for cutting metal accessories;
- metal spatula for mastic;
- roofer's knife (differs from the usual one with a hook-shaped cutting part).
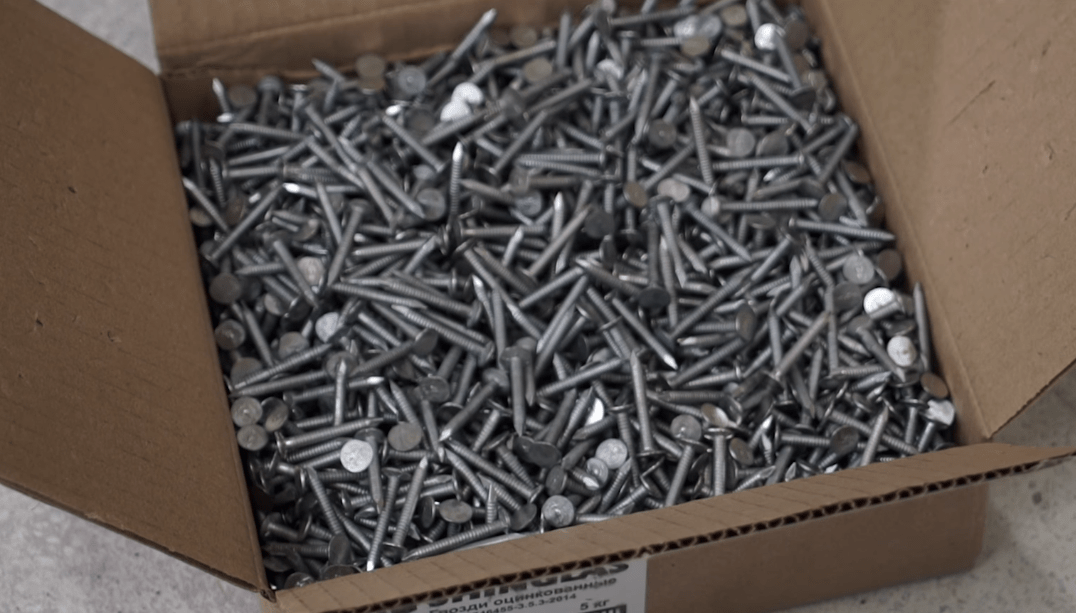
In addition, you should purchase regular nails, which will be needed for the construction of a wooden base, and special ones for attaching a soft roof. The latter are distinguished by a wider cap (diameter 8–10 mm) and have a length of 25–30 mm. Fasteners that are used in automatic pistols are also suitable - such hardware has a length of 40 mm. The number of nails is calculated based on the consumption of 4 pieces. per shingle or 500 grams per 10 m 2 of roofing.
 For one-time use, it is not necessary to buy a special tool - you can get by with replaceable hook-shaped blades for a regular construction knife
 During the installation of flexible tiles, bitumen mastic will be needed, intended for waterproofing building structures. Its volume can be determined by the area of the roof - for every 10 m2 of coverage, up to 1 liter of liquid mixture will be required.
The price of bitumen mastic is affected by both the type of material (cold or hot application) and composition. The cheapest is bitumen-polymer waterproofing, while the most expensive is bitumen-polymer-aluminum coating. The latter is highly resistant to thermal aging and UV radiation. In our conditions, bitumen-rubber mastic will be sufficient - it has an average cost and has good installation and operational characteristics.
Preparatory work
The preparatory stage includes several steps:
- dismantling the old roof (if necessary);
- installation of lathing frame;
- installation of thermal insulation and accompanying layers;
- construction of a solid foundation.
The installation of a warm roofing pie is carried out in the following sequence:

Table: determining the thickness of a solid base for a soft roof
Previously, we have already talked about the need to lay the slab material staggered. In addition, thermal gaps of about 5 mm should be left, otherwise in the summer heat sections of the roof will arch. Gaps of 70–80 mm are left on each side of the ridge to create effective ventilation of the roofing pie.
It should be noted that for a cold roof it is enough to build a sheathing and a boardwalk - the need for other elements disappears due to the maximum simplification of the design.
Video: how to build a solid base for bitumen shingles
Step-by-step instruction
The manufacturer provides for laying bitumen shingles at outdoor temperatures down to -15 °C. Since installation in the cold season requires additional thermal equipment and costs for heating materials, it is best to start work in the warm season, choosing days when the temperature rises above 20 ° C. In this case, the bitumen component will be heated due to solar heat, which will allow for a strong connection of all layers of the roof.
 Laying soft roofing can be done in winter - the main thing is that the temperature does not drop below -15 degrees
 In order to properly distribute time and effort, we suggest using step-by-step instructions for laying a soft roof on your own.
Formation of the lining carpet
Rolled materials made of fiberglass impregnated with a bitumen-polymer mixture are used as a substrate. There is no point in giving up the soft base - the lining is needed for additional leveling of the surface, waterproofing, insulation and sound absorption.
Strips of rolled waterproofing can be laid parallel or perpendicular to the horizon line - the main thing is to ensure an overlap of 10 cm along the long side of the insulation and 15 cm at the joints.
From my own experience, I can say that on steep roof slopes it is best to lay the lining in a vertical direction. And not at all because in this case the likelihood of leaks during heavy rainfalls is reduced. The fact is that under the influence of gravity, the waterproofing panels sag, and folds form on the surface. In order to level them well and secure them correctly, additional time and effort is required - you cannot do this without assistants. As for flat slopes, here, of course, the horizontal method of fixation wins, as it is simpler and more reliable. It is only important to start working from the overhang and move towards the ridge. In this case, each subsequent strip of waterproofing will cover the edge of the previous one and water will not have a single chance to get under the upper layers of the roofing pie.
 Partial laying of the underlayment is only possible on roofs with steep slopes
 When deciding to partially lay the underlayment on steep slopes, you should ensure that the most important areas are protected. So, on both sides of the valley and at the edge of the slope (eaves line), the width of the bitumen waterproofing should be at least 50 cm, while for ridges a strip of this size is divided in half.
To fix the lining layer, nails or fastening with construction staples are used in increments of 25 cm. In areas prone to leakage (valleys, abutments, etc.), the lining should be glued with a bituminous compound.
The manufacturer indicates a list of materials that are suitable for use as a bitumen base in the installation instructions for flexible tiles. Replacing them with available coatings such as roofing felt or polyethylene film is irrational due to their short service life, rapid thermal aging and other factors.
Installation of valley carpets and additional strips
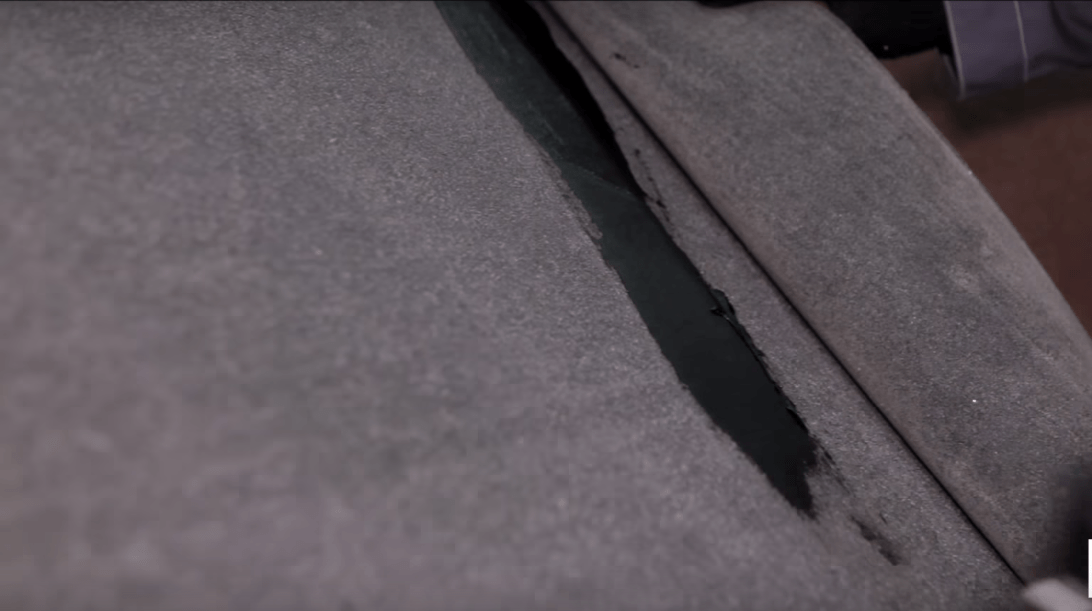
When choosing a bitumen-polymer carpet for arranging valleys, they are guided by the color of the main coating. For decorative purposes, you can choose a material that differs in tone - this will emphasize the line of each valley and make the roof more expressive. Experts recommend covering the valley with a continuous panel 1 m wide, always gluing it with mastic to the board base. If you need to join two pieces, then the joint is located as close as possible to the peak of the roof. The overlap of the top sheet on the bottom sheet must be at least 20 cm with mandatory fixation using liquid bitumen waterproofing.
 The valley carpet material is laid over the entire surface of the valley and glued to the base with mastic
 To protect the edge of the sheathing from draining condensation and sedimentary moisture, a cornice and gable trim should be installed on top of the insulating carpet. To fix the planks, roofing nails are used, which are driven in in a zigzag pattern at intervals of 10–15 cm (at joints - up to 5 cm). It is necessary to maintain an overlap of adjacent additional elements of 3–5 cm, placing the edges of the planks along the contour of the cornice or end protrusion. It is advisable to attach the drip edges first - in this case, at the corners of the slopes they will be covered by gable strips.
 The joints of the eaves and gable strips are overlapped and reinforced with roofing nails.
 Before installing the cornice and end protection, it is recommended to frame the perimeter of the solid flooring with a batten with a cross-section of 20x40 mm. If there is an edge along the edges of the slope, then the waterproofing is installed on top of it and cut off behind the perimeter line. After this, additional elements are attached.
Laying cornice tiles
Horizontal marking lines applied to the backing simplify installation and allow the tiles to be laid in even rows. It is best to form them using linen twine rubbed with chalk. The cord is pulled in the right place and released like a bowstring to leave a mark on the dark surface of the substrate.
 For even laying of eaves tiles, it is necessary to apply chalk markings to the lining layer
 Starter shingles are laid at a distance of 1 cm from the eaves line and secured with roofing nails. To prevent the tiles from coming off under strong wind loads, the fasteners are driven in at a distance of 25 mm from the edge. Each subsequent strip is laid end-to-end, and the joints are protected with bitumen mastic.
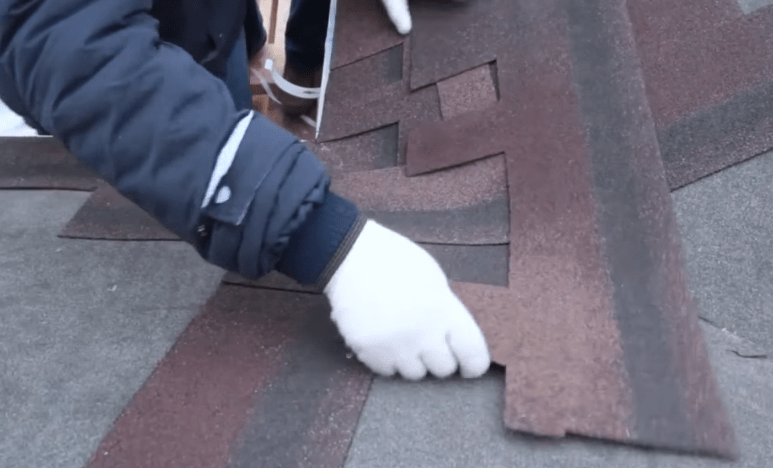
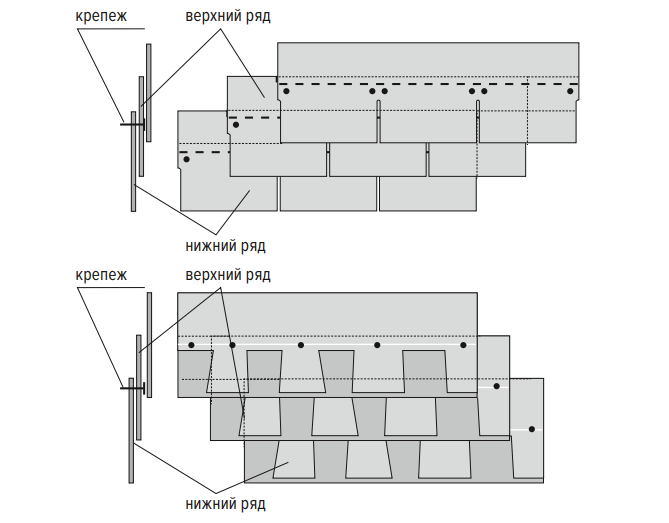
Installation of ordinary tiles
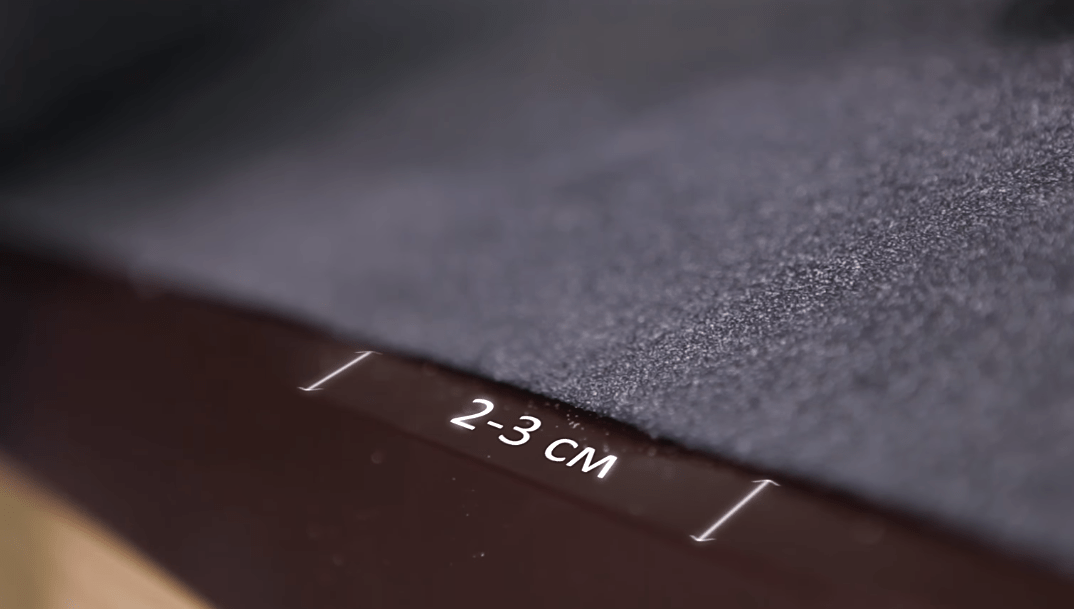
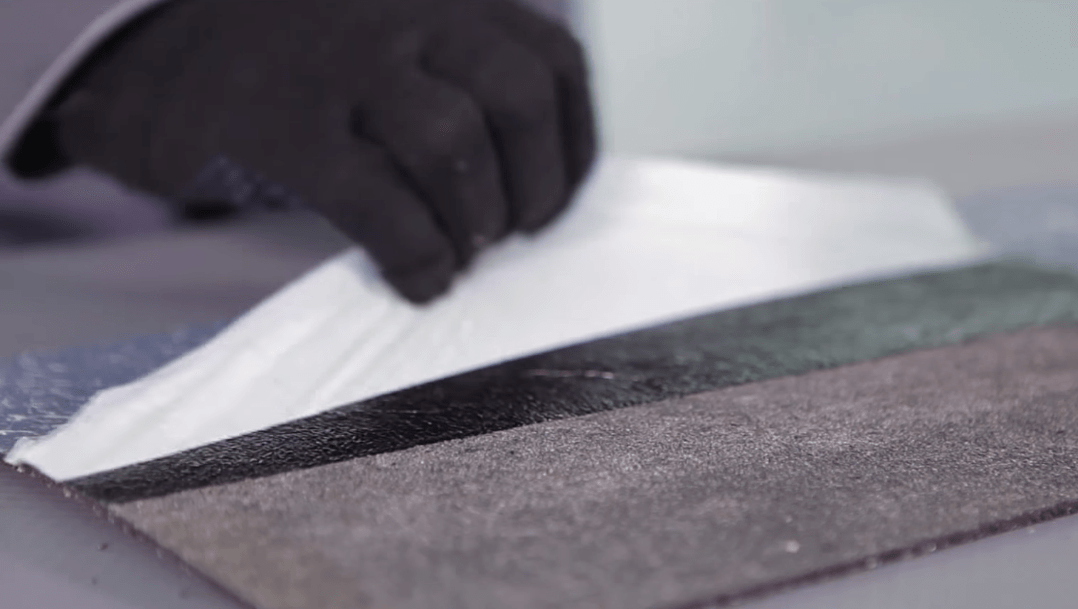
The main covering is installed in the direction from the center of the slope, placing the first row of shingles at a distance of 2–3 cm from the edge of the eaves strip. To fix soft tiles, it is enough to remove the protective film from the adhesive layer and press the shingles tightly to the substrate.
 When laying the bottom tiles of ordinary tiles, make a small indentation from the edge of the eaves sheets
 The final fastening is carried out with nails at four points - along the edges of the strip, as well as above the depressions between the inner petals. The top sheets are offset by 1 petal. Thanks to this, the same “tiled” texture appears, and in addition, the joints and places where the soft roof is fixed are closed.
 The soft roof installation diagram provided by the manufacturer makes it easy to understand the nuances of the technology.
 The tiles protruding beyond the edges of the slopes are cut off, after which the cut is treated with bitumen mastic.
Video: soft roof installation technology from the material manufacturer
Arrangement of the ridge and sealing of penetrations and junctions
Ventilation of the under-roof space is provided by aeroelements installed on top of the ridge. They are attached to the wooden frame with self-tapping screws or nails. After this, the ridge part is covered with flexible tiles. There are no special strips of soft bitumen coating for external corners - they can be made by cutting the eaves tiles.
 The petals cut along the perforation are placed across the ridge and secured with a nail at each edge. The next element is placed with a 5-centimeter overlap, and for additional sealing, the contact area is treated with bitumen mastic.
 Places where pipes, cables and other communication elements pass through the roof slope must be closed with special passage units. They are attached directly to the base even before installing the underlayment.
 The junctions with walls and chimneys require special attention, otherwise moisture flowing down the vertical surface will penetrate inside the roofing pie
 During the installation process, the upper layers of the roof are placed over the penetration, impregnated with mastic and trimmed in place. In the same place where the slope comes into contact with a brick chimney or wall, roofing materials are placed on the surface of the vertical structure. For additional protection, a piece of valley carpet and a shaped metal apron (junction strip) are used.
Video: arrangement of a passage unit for a soft roof
Cost of asphalt shingle roofing
By doing all the work yourself, you can save a lot of money, because the total cost of the roof will consist only of the costs of the necessary materials. Depending on the manufacturer, the price per square meter of budget and mid-level soft roofing varies between 800–1,500 rubles. If we talk about the premium segment, then certain types of flexible tiles are sold at prices up to 4,000 rubles. Of course, in this case, there can be no question of any independent installation - anyone who can fork out for such expensive material will also find money for a professional team. The services of the latter, by the way, are not cheap - from 600 rubles per square meter of finished coating.
As you can see, building a soft roof with your own hands is not at all difficult, which, however, does not exclude due care and following the technology developed by the manufacturer. If you do everything efficiently, the roof will delight you with its appearance and trouble-free operation for many years. Otherwise, it is better not to take on the work at all, otherwise the roof will constantly remind you of its existence with leaks and other unpleasant moments.
Soft roofs include roll materials based on bitumen, as well as piece coverings that externally imitate tiles. Soft roofs are widespread due to reasonable prices and the ability to do the work from start to finish with your own hands. Another important advantage is the low weight of soft roofs, which significantly reduces the load on the rafter system and the foundation of the bathhouse.
It is worth choosing the type of soft roof based not only on the external design of the bathhouse, but also on the angle of inclination of the slopes.
Roll roofs
Laying of roll materials is most often done on flat roofs and pitched roofs with a slight slope. Roofs with a large slope are usually not covered with rolled materials, since the appearance of the bathhouse will be unpresentable.
| Material | Description |
|---|---|
| The most famous roll coating is roofing felt. It is glued to the base with bitumen mastic. The material is as inexpensive as possible, easy to install, but the service life of a roofing felt roof does not exceed ten years. | |
| Fused roofing felt is a material of better quality compared to its “predecessor”. A layer of bitumen has already been applied to the base of the built-up roofing material. During the installation process, the material is heated with a burner and rolled out into several layers. | |
| Fiberglass rubber is a material with a fiberglass base that is resistant to temperature changes and UV rays. Coarse or fine powder is applied to the surface of the material. So, for example, glass roofing felt S-RK, which is laid as the top layer, has a coarse fraction sprinkled on the front side, and a fine, dust-like fraction on the back side. The glass roofing material S-RF, which is also laid as a top layer, has a scaly coating. And the finest fraction is sprinkled on both sides with S-RM glass roofing material, which is laid as the bottom layer of coating. Laying is done by fusing or mechanically fixing the material. The service life of glass roofing felt roofs does not exceed 10-12 years. | |
| Membrane materials are the most modern of all of the above, characterized by a much longer service life and high waterproofing properties. Membrane materials are not susceptible to climatic factors and the effects of sunlight, are mechanically strong, light and elastic. In addition, you can choose the shade of the material yourself. |
Bitumen roofs
Piece bitumen shingles are an economical material with high decorative and sound-proofing properties.

Flexible multilayer tile TechnoNIKOL SHINGLAS “Dragon tooth”
The rich color palette of shingles allows you to implement many design solutions and create your own unique roof design.

Flexible tile TechnoNIKOL SHINGLAS “Modern Brix”
Small soft shingles can be laid on roofs of any configuration, including hipped and domed, while the amount of waste is always minimal. Caring for a bitumen roof is not difficult - it must sometimes be cleared of snow and accumulated fallen leaves. And roof repairs are carried out as simply and quickly as possible - you just need to remove the hardware and replace the defective element.

The top layer of bitumen shingles is a topping made from natural materials, such as basalt. The rough surface of the shingles allows snow to be retained on the roof and prevents its avalanche. In addition, the coarse coating provides mechanical strength to the coating.

Flexible tiles Docke, “Cologne” collection
The roofing covering must comply with the quality of GOST 32806-2014.
Installation can be done independently, having a minimum set of tools and following the instructions.
Prices for flexible bitumen shingles
bitumen shingles
Step-by-step guide to laying bituminous shingles
Soft shingles are laid only on a solid base, which must be hard and dry. As a base, it is recommended to use plywood sheets of increased moisture resistance or OSB-3 with a thickness of 11 or 12 mm (for some types of tiles, the use of slabs with a thickness of 9 mm is acceptable). Recommended dimensions of the slabs are 1.25 x 2.5 m.

It is also permissible to make a continuous sheathing from tongue-and-groove or edged boards with a relative humidity of less than 20%.


The slabs are mounted on top of the sheathing made of “inch” boards, mounted at intervals of 100 mm. A prerequisite for installing continuous sheathing is maintaining the spacing, that is, 4 corners should not converge at once at one point on the roof.
Stage 1. Before laying flexible tiles, it is necessary to secure additional elements, the first of which is the eaves strip. The element is necessary to drain water and strengthen the roof structure.

The plank is laid edgewise on the edge of the continuous sheathing and secured with roofing screws. The hardware is driven in in a checkerboard pattern, maintaining a pitch of approximately fifteen centimeters. The overlap of the ends of adjacent planks is no more than five centimeters.


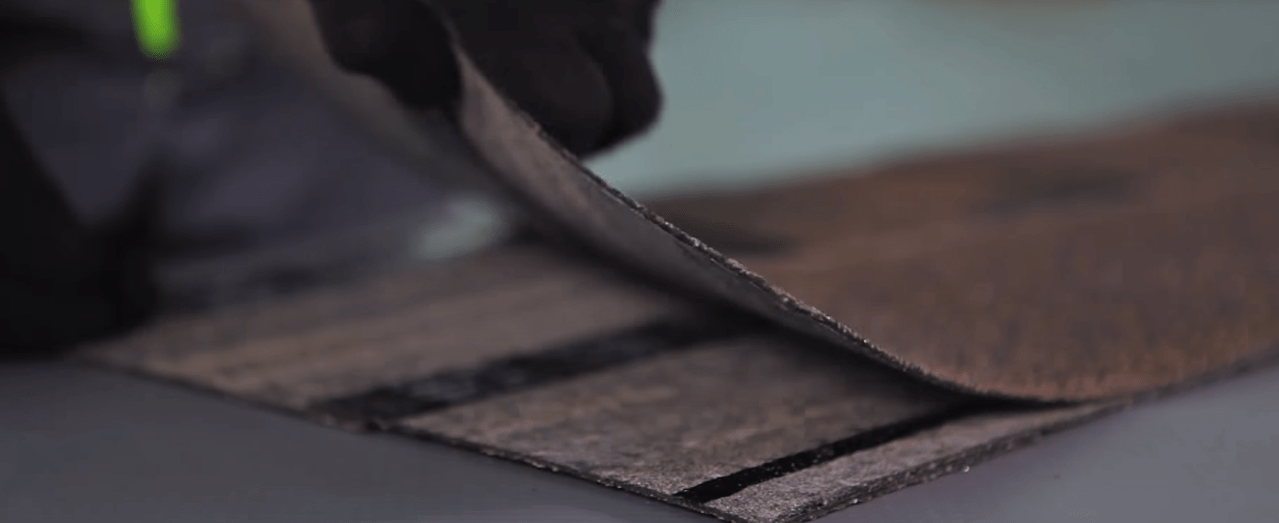
Stage 2. To ensure additional roof tightness, underlay carpets are used.


The first roll is rolled out parallel to the cornice strip, and the lower edge of the carpet should not reach 2-3 mm from the bend of the strip. Fix the lining layer with roofing screws along the edges at the top and bottom. It is important that the carpet is laid with slight tension to avoid the appearance of folds and waves on the surface of the material.
The second row of material is laid with an overlap of the first 10 cm and fixed along the upper edge with nails, maintaining a distance between them of 20 to 25 cm.

Between the canvases (in the place of overlap) a fixing mastic is applied with a spatula in a layer 1 mm thick. If you apply the mastic in a layer that is too thick or dilute it excessively with a solvent, then swelling and smudges may appear on the roof.

If the underlay carpet has adhesive strips along the edges, then there is no need to apply additional mastic.
On a note! If there is a junction of slopes (valley) on the roof of the bathhouse, then the lining carpet is first laid out along the joint, and only after that the rolls are rolled out parallel to the eaves strip.
The total width of the lining carpet on the valley should not be less than 1 meter, that is, 50 cm in each direction from the junction line of the slopes. It is desirable that the lining carpet on the valley does not have joints, but if this cannot be avoided, then the layers are laid from bottom to top with an overlap of 30 cm and be sure to coat the joint with mastic.

Stage 3. On top of the lining layer, pediment strips, which are also called wind strips, are attached. Fixation is carried out with nails. The hardware is hammered in in a checkerboard pattern, step 12-15 cm. The end overlaps of the planks are 3 cm.

Stage 4. Decoration of valleys.
Prices for moisture-resistant plywood
moisture resistant plywood
Method 1. Open
A valley is laid on top of the lining carpet.
The width of the valley carpet should also not be less than 50 cm in each direction from the axis of the joints of the slopes. Bituminous adhesive mastic is applied to the underside of the carpet (strips 10 cm wide along the edges of the material).

Fix the material around the perimeter with nails in increments of no more than 25 cm and a distance of 3 cm from the edge of the carpet.

Method 2. With trimming
The valley design option does not involve laying carpet. The shingles are cut and overlapped directly at the junction of the slopes.

Stage 5. You can proceed directly to laying bitumen shingles.


The first row is the starting row. A distinctive feature of the starter row shingles is the absence of slots. Solid strips are glued, moving 2 cm away from the bend of the eaves strip. Additionally, the shingles are secured with twelve nails each (6 nails along the upper and lower edges).


On a note! If you have not additionally purchased bitumen shingles for the starting row, simply take a sharp mounting knife, a strip of ordinary shingles, lay it on a board of suitable size and cut off the petals (teeth, triangles, etc., depending on the shape of the shingle cut). Asphalt shingles with a “dragon tooth” shape do not need to be trimmed.
Flexible tiles can be installed in any weather conditions, but if the air temperature outside is below zero, then it is advisable to supply the roofing material in small batches from a warm room to the roof.
Important! Be sure to remove the shingles from the cardboard boxes and mix them together. This way the roof covering will be more uniform in color. You need to mix at least 5 packages at a time.
The second row begins to be laid by moving the shingles of the second row relative to the shingles of the first row by half a blade horizontally and retreating 2 cm from the bottom edge of the starting row.

The edge of the shingle that will be laid on the wind strip is cut at an angle of 45 degrees. The wind strip is lubricated with mastic before laying the tiles.

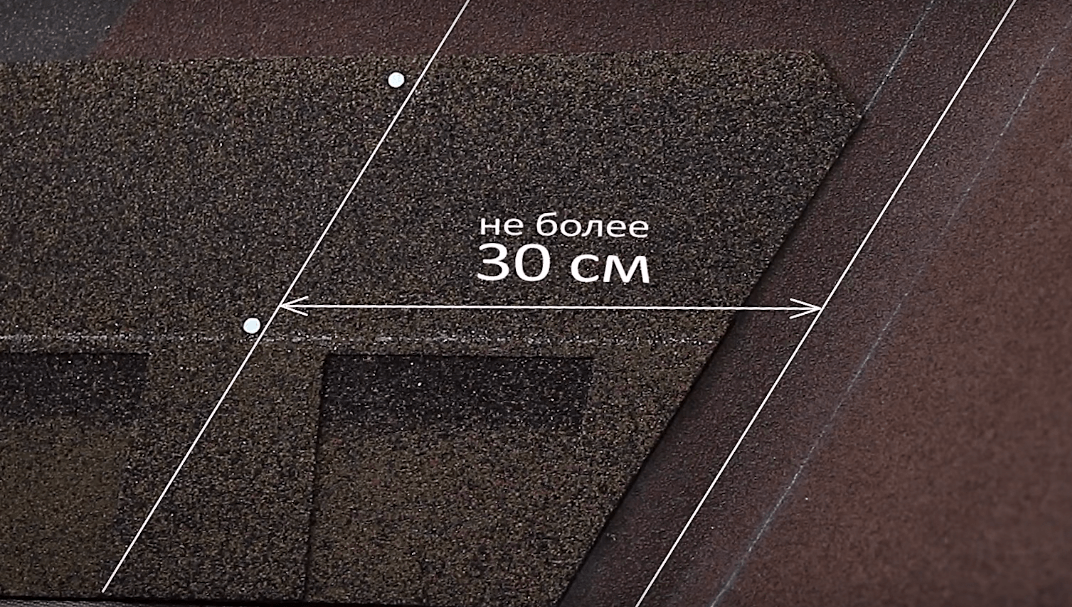
The “dragon tooth” shingles are offset by 15 cm. That is, the fastening of the lower row must be covered by the petals of the overlying row.
If the shingles have a protective film on the back, remove it by pulling from the top edge of the shingle to the bottom.
Some collections of tiles do not have a protective film; the shingles are simply folded into packages with the wrong sides facing each other. If the strips are difficult to unravel, they can be slightly heated with a hair dryer and carefully bent in different directions.
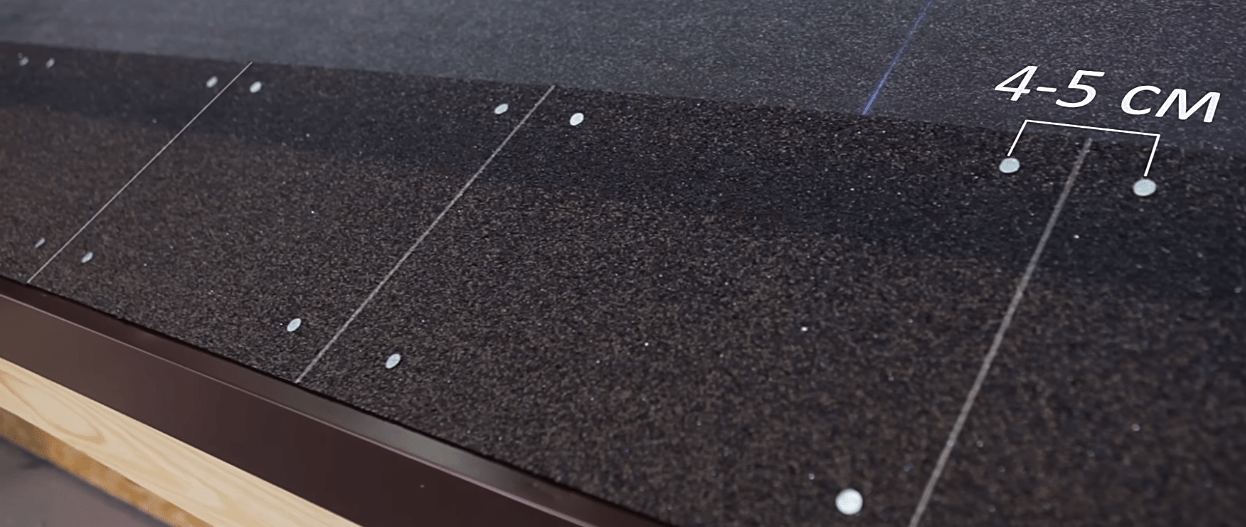
Nails for fastening tiles are galvanized with wide heads, the length of the hardware is 30-45 mm, the thickness is 3 mm. The hardware is hammered in in a strictly defined order, which is recommended by the manufacturer depending on the shape of the shingles and the angle of the roof. The greater the angle of the roof, the more nails are used to secure the covering.

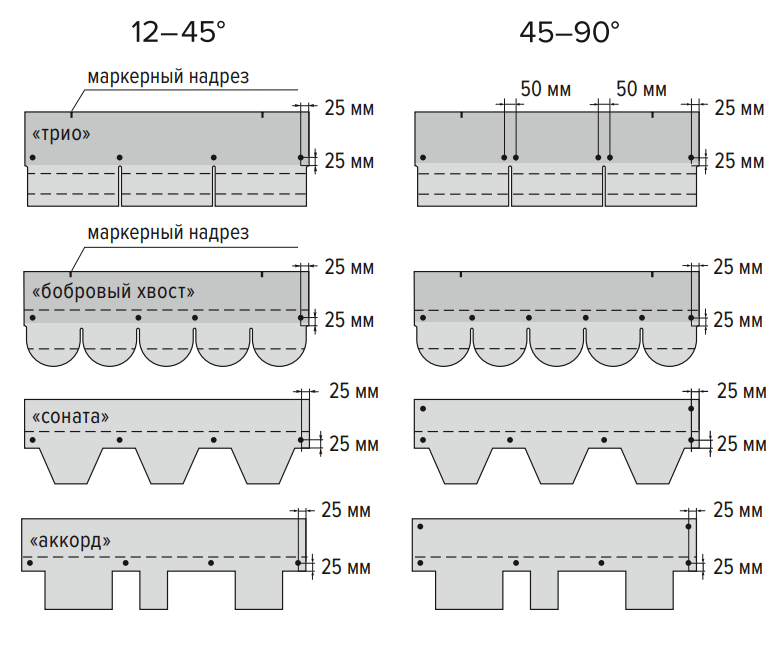
Layout of hardware depending on the angle of the slope
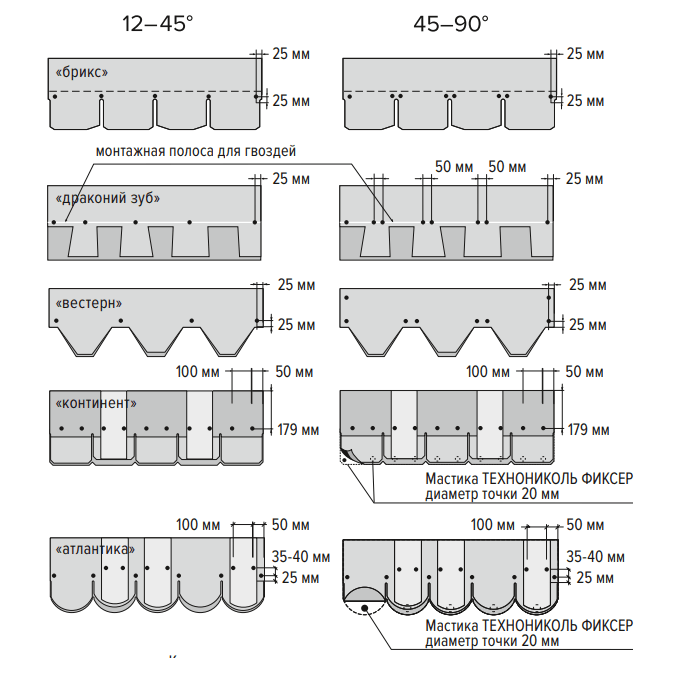
It is important to drive the nails perpendicular to the sheathing so that the head is flush with the roofing material, not too recessed into it, but not higher than the surface of the shingles.

The nails in the overlying row must simultaneously secure the underlying shingles. This is necessary for the durability and reliability of the roofing.
The tiles are laid on top of the valley carpet by trimming the corners of the shingles and coating the underside with bitumen mastic. It is recommended to drive nails into the shingles at a distance of 30 cm from the central axis of the valley.


Stage 6. When the bitumen shingles are laid right up to the ridge, they proceed to the design of the junction with the pipe.
Be sure to keep in mind that walking in shoes on the laid roofing in hot sunny weather and negative air temperatures is prohibited. To move along the roof, scaffolds and other devices are used.
The connection is made using a valley carpet.
- A pattern is cut out from the strip for the front side of the pipe (the tiles should be covered with a carpet by 20 cm, and the material should extend onto the pipe by 30 cm). A thin layer of adhesive mastic is applied to the reverse side of the pattern with a spatula. The pattern is pressed tightly and smoothed so that there are no bubbles or unevenness.


- Next, cut out the right and left patterns, grease them with mastic, glue them in place, bringing the edges under the ordinary tiles.
- Lastly, the back part of the pipe is closed, the canvas along the upper edge is fixed with metal strips.

If the pipe is more than 50 cm wide, it is recommended to make a slope behind its rear wall to prevent rainwater from stagnating.

Instead of a valley carpet, the junction can be formed using metal elements.
Video - Finishing the chimney
Stage 7. To decorate the ridge, ridge-eaves tiles are used.

Each shingle is cut into 3 pieces before installation. Ridge elements are laid from bottom to top (for hipped roofs) and secured with four nails at the corners. The overlap of the elements is 3-5 cm, sufficient for the heads of the hammered hardware to become invisible.

It is recommended to install an aerator on a ridge with a 3-8 cm wide slot along it and located horizontally.

This is a plastic element necessary to ensure ventilation of the under-roof space.
Each element is bent along the central axis, applied to the roof ridge and fixed with nails, which are driven through the factory holes of the element. The connection of adjacent elements is carried out similarly to the constructor, by snapping the existing fasteners into place.


The tiles are laid on top of the aerator, taking into account the prevailing wind direction for the area.
Attach the ridge-eaves tiles starting from the side from which the wind most often blows. The roofing material is fixed using roofing nails of increased length.

Video - Installation of soft roofing
Answers on questions
How to design the connection of the bathhouse porch canopy to the facade?
If the roof is adjacent to a wall (this may include the abutment of the roof of a bathhouse to the wall of a residential building), regardless of its shape, it is necessary to waterproof the joint using a valley carpet.

Procedure:
- place the lining carpet on the wall 5 cm, coat the reverse side with fixing mastic, press firmly;
- if the adjacent roof is located at an angle, then secure a plastic wall-turning ebb in the lower part with self-tapping screws. If the connection is horizontal, the low tide is not installed;
- lay the valley carpet so that it extends 30 cm onto the wall and 20 cm onto the lining carpet;
- coat the back of the valley carpet with mastic, glue and level it so that there are no bubbles or folds;
- fix the upper edge of the valley carpet with a metal strip with holes into which screw screws;
- lay flexible tiles, coating the edges of the shingles with fixing mastic (at least 10 cm from the edge).
Prices for valley carpets
valley carpet
How to move along the roof slope during installation of the covering?
For safe and convenient work at height, scaffolding brackets are installed. The brackets have holes through which nails are driven for fixation. A board is placed on top of the bracket and secured with self-tapping screws. The length of the board is selected so that the free ends extend beyond the brackets by no less than 150 mm and no more than 300 mm. The cross-section of the boards for work on the roof is 200 x 40 mm.
The upper part of the bracket is installed under the blades of the bitumen shingles. For fastening, it is recommended to use nails 10 cm long and 5 mm thick, 3 nails for each element. The nails should be driven through the sheathing and into the rafters.

One bracket can support 140 kg. The distance between the brackets should be no more than one and a half meters (only one roofer can be on this one and a half meters).


To remove the brackets, simply bend back the shingle tabs and remove the nails, then return the shingles to their place and secure them again. The brackets must be lowered from the roof carefully, without throwing them down.
Important! Moving on wet, icy boards is prohibited. Working on a roof in extreme heat or cold is strongly discouraged.
How to install a roof penetration?
Roof penetrations are installed to allow ventilation pipes and antennas to pass through the roof.
General installation principle:
- mark the installation location of the element on the roofing;
- bitumen shingles are cut according to the markings, the cut out part is removed;
- a hole is cut out in the sheathing to the size of the passage element;
- if necessary, close the hole with a fine mesh;
- the penetration contour is lubricated with fixing mastic and pressed to the installation site;
- screws are screwed into the holes of the element contour;
- install the upper element of the penetration.

There are also penetrations that are installed with a slight difference - the edge of the passage element is covered with petals of tiles, coated with bitumen on the reverse side.
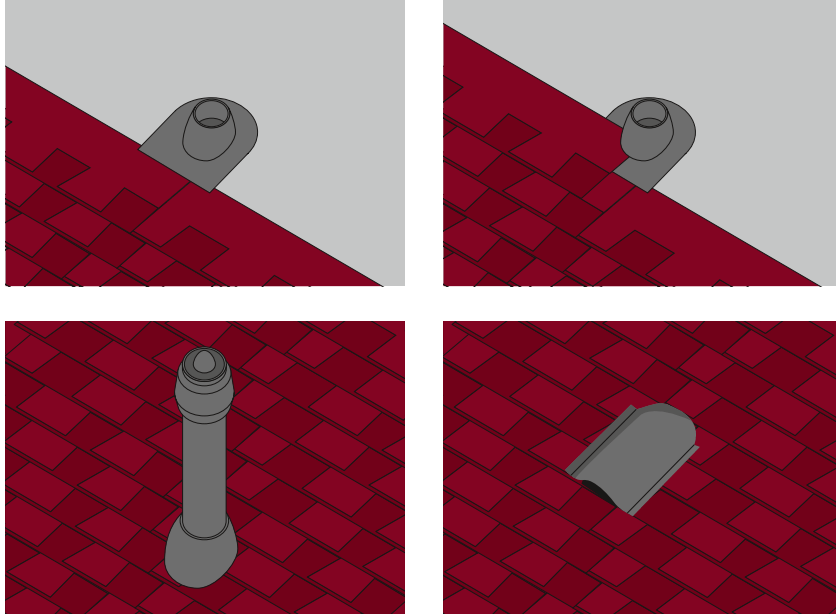
Option for installed ventilation pipe penetration. The base is covered with bitumen shingles
What snow guards should be installed on a soft roof?
To prevent uncontrolled snow falling off a soft roof, the simplest snow stops are installed in the form of corners on a long leg. Snow guards come in metal and plastic; it is recommended to choose the former due to their greater durability.
The installation of snow stops is carried out simultaneously with the laying of shingles. The hooks are attached with self-tapping screws to the sheathing, treating the attachment point with mastic. From above, the leg of the snow retainer is covered with petals of bitumen shingles.

The distance between the corners is approximately 60 cm. The minimum number of rows of snow stops is 3. On steep roofs, it is advisable to increase the number of rows or even attach corners over the entire area of the slope.

How to care for your roof
Care rules are very simple:
- it is necessary to periodically visually inspect the coating;
- The roof is cleared of snow using a wooden shovel. Moreover, not all the snow needs to be removed; a layer about 10 cm thick should remain on the roof;
- it is necessary to clean gutters and pipes in a timely manner and remove blockages;
- If moss or lichen begins to grow on the roof, it is removed and an antiseptic with an algaecide composition is applied to the coating.


Manufacturers of soft tiles usually provide a minimum 10-year warranty on the coating. The coating is ideal for both hot southern regions and cold northern regions. The coating is environmentally friendly, does not require maintenance, and is ideal for any bathhouse façade. Soft roofing is an excellent solution for baths and saunas!

The number of fans of soft roofing is growing like a snowball. And this is not surprising - just remember the visual appeal and operational advantages of one of the most modern coatings. But there could be even more supporters of flexible roofing materials if they knew that installation can be completed without the involvement of a team of roofers. Today we will try to fill this gap and share not only construction technology, but also the secrets of experienced craftsmen.
Soft roof structure
Before talking about the design of a roof with a soft roof covering, I would like to briefly mention the features of this unique material. In essence, it is a modified roofing felt. But the basis of flexible tiles (in the future we will call them shingles) is not banal cardboard, but stronger and more durable fiberglass or polyester fabric. Improvements also affected impregnation. Waterproofing of soft tiles is provided by a modified polymer-bitumen composition, thanks to which the critical temperature points have been shifted to higher values.
The multilayer structure makes the soft roof durable and absolutely waterproof
Basalt or slate chips are applied on top of the flexible tiles - it not only determines the design of the coating, but also makes it more resistant to mechanical stress, ultraviolet radiation and other external factors. The bottom of the tiles is covered with an adhesive layer, which is covered with a protective film. In some cases, a fine mineral coating is applied to the lower surface - then the adhesive part is a wide strip in the upper part of the shingles.
Roofing pie design
The multilayer structure makes flexible tiles not only strong, but also durable - some manufacturers provide a guarantee for their products for up to 25 years. As a rule, soft roofing materials easily overcome this threshold. Of course, we are talking about those cases when the base of a soft roof complies with accepted standards, and the material is laid strictly according to the prescribed technology.
Studying the structure of roofs covered with bitumen shingles, we will immediately divide them into two types:
- cold,
- warm.
The first ones are built for cold attics. Many websites and print publications sin by pointing out the inappropriateness of installing simplified roofing pies for residential buildings. Like, if a house is intended for year-round use, then its roof must be warm. This statement is fundamentally incorrect - most of the private houses of the old housing stock were cold. Moreover, a cold roof has its advantages. And the most significant of them is durability. In winter, ice practically does not form on such a roof, which, as you know, is one of the worst enemies of flexible tiles. In addition, the simplest roofing pie is perfectly ventilated, which means that the wooden frame will always be dry. As for energy efficiency, for thermal insulation you will only need to insulate the attic floor. As you yourself understand, its area will in any case be smaller than that of the roof.
When using a cold roof on a residential building, it is necessary to insulate the attic floor, the area of which is noticeably smaller than that of the roofing structure
So, the structure of the roofing pie for cold roofs includes:
- step (sparse) lathing made of wooden beams or steel profile pipes;
- solid flooring (made of plywood, OSB or shag boards);
- insulating lining;
- bitumen coating.
Roofers working as part of professional teams often recommend installing a super-diffusion membrane under the underlayment, arguing that the wooden base is more protected from moisture. This is a rather controversial statement, which I personally cannot call anything other than wastefulness. A regular waterproof lining leaves virtually no chance of the wooden frame getting wet due to snow or rain. Such actions on the part of specialists can only be explained by the desire to earn a certain amount for an operation that requires minimal labor costs. As for a warm roof, in this case the installation of moisture-resistant coatings is mandatory due to the use of thermal insulation.
Warm roofing pie allows you to use any attic space for year-round use
To insulate the attic, fibrous materials are most often used, which, when wet, can lose most of their unique abilities - this is what needs to be protected. From below - from moist air, and from above - from leaks. In this case, the roofing pie should have the following structure:
- slats for mounting cladding panels;
- vapor barrier waterproof film;
- thermal insulation layer;
- waterproofing windproof vapor-proof membrane;
- counterbeam;
- sparse sheathing;
- continuous flooring;
- lining base;
- flexible bitumen coating.
You may argue that the slats installed from the attic side have nothing to do with the roofing pie, and you will be absolutely right. However, we still indicated them due to the fact that in our case they also act as fasteners for the lower layer of vapor barrier.
Video: correct installation of a roofing pie is easy
Technology of laying roofs from soft tiles
A roof covering made of soft bitumen tiles is similar to tile only visually. Not only the installation technology differs, but also the operational characteristics, service life, maintenance and repair procedures. And although the work on constructing a roof made of flexible tiles cannot be called too complicated, you will have to carefully follow the manufacturer’s recommendations. It is best to divide the construction process into several stages:
- Purchase of materials and preparation of tools.
- Preparatory work.
- Laying insulating materials.
- Arrangement of counter-lattice and sheathing.
- Construction of a solid foundation.
- Laying the top layers of the roof.
- Installation of additional elements and arrangement of passages.
By organizing your work time in this way, you will not only minimize the number of possible errors, but will also be able to make the most informed decisions about hiring outside help.
How to calculate how much and what materials you will need
The first thing you need to do when starting mathematical calculations is to draw up a detailed drawing of the roof or create at least a basic sketch indicating the exact dimensions and features of each slope. The calculation itself includes determining the geometric dimensions and number of main parts of the structure:
- additional elements;
- valley carpet;
- lining layer;
- ventilated ridge or roof aerators;
- timber for step lathing and counter lathing;
- boardwalk;
- soft covering.
It must be said that the accuracy of the calculations affects not only the cost of the roof, but also the timing of the work. For this reason, we will understand the features of calculating all components of the roof in as much detail as possible.
Additional moldings
To finish and protect various parts of a soft roof, several types of extensions are used:

The presented additional moldings are produced in the form of strips of a standard length of 2 m. However, in order to determine the number of certain strips, the length of the area in need of protection should be divided by 1.9 or 1.85. This is due to the fact that aprons and strips are not mounted end-to-end, but with an overlap of 10–15 cm wide.
If the roof structure includes grooves and junctions with vertical surfaces, then their waterproofing is ensured by a special valley carpet. Manufacturers produce it in the form of 1×10 m rolls, presenting a choice of several color solutions to match the tiled covering.
When choosing a valley carpet by color, it is not at all necessary to get the exact color - a slight mismatch of tones will be a plus, making an ordinary roof extremely stylish and expressive
When calculating the total length of the carpet, you should make a 20-centimeter reserve for each valley - it will be needed for proper installation of the lower part of the joints.
The lining layer is installed both over the entire area of each slope, and partially - it all depends on the steepness of the surface. If the roof slope is more than 1:3 (18 degrees), then only areas susceptible to leaks are protected with a roofing carpet:
- internal corners of junctions of adjacent slopes;
- ridge part;
- ribs;
- areas with clivus fractures;
- edges at gables and cornices;
- ventilation outlets.
When laying the insulating carpet, it is necessary to make an overlap of 10–15 cm. For this reason, its calculated quadrature should be 1.1 - 1.15 times greater than the total area of the slopes. If the lining is partially installed, then the length of the strips of the roofing carpet corresponds to the length of the parts of the roof that are prone to leaks.
The underlayment can be laid both along and across the slope
The width of the lining for partial waterproofing should be 40–50 cm. An exception can be made only for ridges and external corners, reducing this value to 25 cm.
Ridge aeroelements
When calculating the number of ridge aerators, it is assumed that one element 1.2 m long is capable of providing ventilation for about 25 m 2 of the under-roof space. If point aeroelements are used, then the total area of adjacent slopes should be divided by 5 - that is how many square meters of roofing pie are “served” by one such element.
The design of the ridge aerator allows for ventilation of the roofing pie on roofs of any configuration
Please note that point aero elements vary in height. Short ones are used on steep roof slopes, and long ones on flat surfaces.
Lumber for sheathing
To arrange the sheathing, a wooden beam with a cross-section of at least 40x40 mm is used, as well as a board 25 mm thick. The length of the counter beam is easiest to determine - it is equal to the length of the rafter legs. As for the sparse sheathing, the total length of the wooden elements is determined based on the standard step width for bitumen shingles - 37 cm for rafters located at a distance of 0.9 m from each other. Therefore, the length of the rafter leg in centimeters should be divided by 37 and multiplied by the width of the roof - this will be the required length of the beam that will be needed to sheath one slope.
Solid base
Sheets of plywood or OSB used to construct a solid base must be installed staggered, that is, with overlapping seams. For this reason, when determining the area of the material, it is necessary to make an amendment:

When determining the amount of plywood or OSB in sheets, it is recommended to sketch their location on paper with the most dense laying - in this way it will be possible to avoid waste of material during installation.
Covering and roll materials
During the installation process, two types of tile shingles are used - ridge-eaves and ordinary. The first ones are produced in the form of packages designed for 12 linear meters. m of ridge and 20 linear. m cornice. When calculating the latter, the same correction factors are used as for a solid base (simple roofs 3–5%, combined roofs - up to 10%). To determine the number of sheets of flexible shingles, the total square footage of ordinary shingles is divided by the area of one bitumen strip. One pack of soft tiles is usually designed for 3.5 m 2 of roofing - knowing this number, it will not be difficult to calculate how many packages you will need to buy.
Before installation, tile shingles from different packs must be mixed - this will eliminate the appearance of areas of the roof that are not uniform in color.
The amount of materials that will be needed for a warm roofing cake is calculated with the following tolerances:
- waterproofing and vapor barrier - at least 4%;
- roll thermal insulation - according to the area of the slope;
- slab insulation - up to 4%.
It is easy to notice that the amount of roll and slab insulation practically does not depend on the complexity of the roof. This is due to the fact that such materials are easily joined together and do not affect the appearance of the structure.
What tools and supplies will be needed
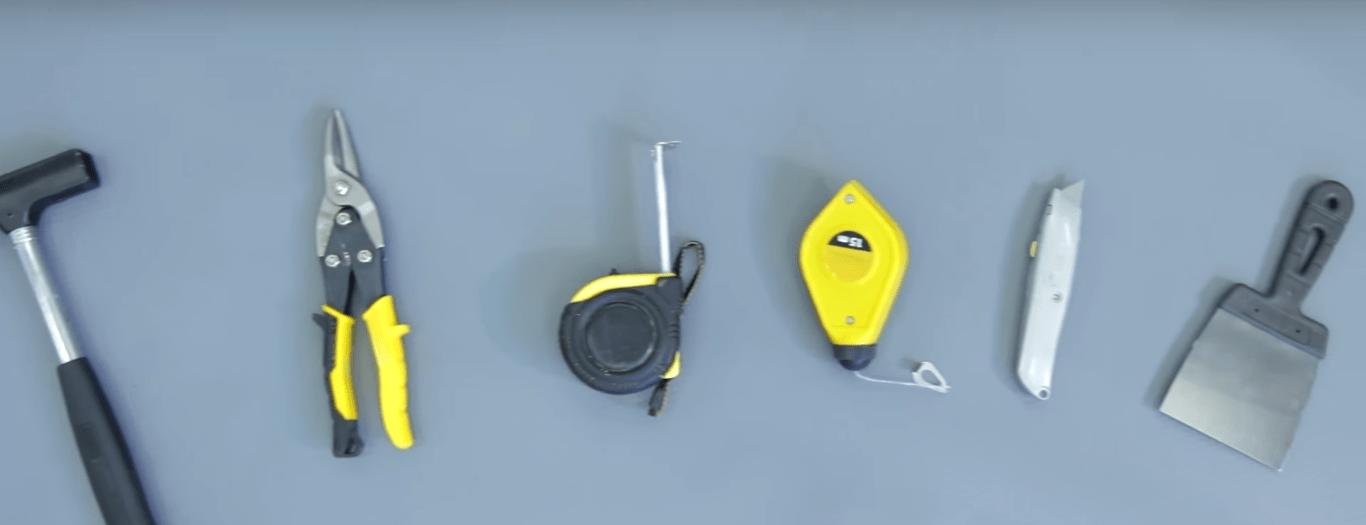
In addition to roofing and wood materials, the following equipment and tools will be required during the work:
- saw;
- hammer;
- scissors for cutting metal accessories;
- metal spatula for mastic;
- roofer's knife (differs from the usual one with a hook-shaped cutting part).
In addition, you should purchase regular nails, which will be needed for the construction of a wooden base, and special ones for attaching a soft roof. The latter are distinguished by a wider cap (diameter 8–10 mm) and have a length of 25–30 mm. Fasteners that are used in automatic pistols are also suitable - such hardware has a length of 40 mm. The number of nails is calculated based on the consumption of 4 pieces. per shingle or 500 grams per 10 m 2 of roofing.
For one-time use, it is not necessary to buy a special tool - you can get by with replaceable hook-shaped blades for a regular construction knife
During the installation of flexible tiles, bitumen mastic will be needed, intended for waterproofing building structures. Its volume can be determined by the area of the roof - for every 10 m2 of coverage, up to 1 liter of liquid mixture will be required.
The price of bitumen mastic is affected by both the type of material (cold or hot application) and composition. The cheapest is bitumen-polymer waterproofing, while the most expensive is bitumen-polymer-aluminum coating. The latter is highly resistant to thermal aging and UV radiation. In our conditions, bitumen-rubber mastic will be sufficient - it has an average cost and has good installation and operational characteristics.
Preparatory work
The preparatory stage includes several steps:
- dismantling the old roof (if necessary);
- installation of lathing frame;
- installation of thermal insulation and accompanying layers;
- construction of a solid foundation.
The installation of a warm roofing pie is carried out in the following sequence:

Table: determining the thickness of a solid base for a soft roof
Previously, we have already talked about the need to lay the slab material staggered. In addition, thermal gaps of about 5 mm should be left, otherwise in the summer heat sections of the roof will arch. Gaps of 70–80 mm are left on each side of the ridge to create effective ventilation of the roofing pie.
It should be noted that for a cold roof it is enough to build a sheathing and a boardwalk - the need for other elements disappears due to the maximum simplification of the design.
Video: how to build a solid base for bitumen shingles
Step-by-step instruction
The manufacturer provides for laying bitumen shingles at outdoor temperatures down to -15 °C. Since installation in the cold season requires additional thermal equipment and costs for heating materials, it is best to start work in the warm season, choosing days when the temperature rises above 20 ° C. In this case, the bitumen component will be heated due to solar heat, which will allow for a strong connection of all layers of the roof.
Laying soft roofing can be done in winter - the main thing is that the temperature does not drop below -15 degrees
In order to properly distribute time and effort, we suggest using step-by-step instructions for laying a soft roof on your own.
Formation of the lining carpet
Rolled materials made of fiberglass impregnated with a bitumen-polymer mixture are used as a substrate. There is no point in giving up the soft base - the lining is needed for additional leveling of the surface, waterproofing, insulation and sound absorption.
Strips of rolled waterproofing can be laid parallel or perpendicular to the horizon line - the main thing is to ensure an overlap of 10 cm along the long side of the insulation and 15 cm at the joints.
From my own experience, I can say that on steep roof slopes it is best to lay the lining in a vertical direction. And not at all because in this case the likelihood of leaks during heavy rainfalls is reduced. The fact is that under the influence of gravity, the waterproofing panels sag, and folds form on the surface. In order to level them well and secure them correctly, additional time and effort is required - you cannot do this without assistants. As for flat slopes, here, of course, the horizontal method of fixation wins, as it is simpler and more reliable. It is only important to start working from the overhang and move towards the ridge. In this case, each subsequent strip of waterproofing will cover the edge of the previous one and water will not have a single chance to get under the upper layers of the roofing pie.
Partial laying of the underlayment is only possible on roofs with steep slopes
When deciding to partially lay the underlayment on steep slopes, you should ensure that the most important areas are protected. So, on both sides of the valley and at the edge of the slope (eaves line), the width of the bitumen waterproofing should be at least 50 cm, while for ridges a strip of this size is divided in half.
To fix the lining layer, nails or fastening with construction staples are used in increments of 25 cm. In areas prone to leakage (valleys, abutments, etc.), the lining should be glued with a bituminous compound.
The manufacturer indicates a list of materials that are suitable for use as a bitumen base in the installation instructions for flexible tiles. Replacing them with available coatings such as roofing felt or polyethylene film is irrational due to their short service life, rapid thermal aging and other factors.
Installation of valley carpets and additional strips
When choosing a bitumen-polymer carpet for arranging valleys, they are guided by the color of the main coating. For decorative purposes, you can choose a material that differs in tone - this will emphasize the line of each valley and make the roof more expressive. Experts recommend covering the valley with a continuous panel 1 m wide, always gluing it with mastic to the board base. If you need to join two pieces, then the joint is located as close as possible to the peak of the roof. The overlap of the top sheet on the bottom sheet must be at least 20 cm with mandatory fixation using liquid bitumen waterproofing.
The valley carpet material is laid over the entire surface of the valley and glued to the base with mastic
To protect the edge of the sheathing from draining condensation and sedimentary moisture, a cornice and gable trim should be installed on top of the insulating carpet. To fix the planks, roofing nails are used, which are driven in in a zigzag pattern at intervals of 10–15 cm (at joints - up to 5 cm). It is necessary to maintain an overlap of adjacent additional elements of 3–5 cm, placing the edges of the planks along the contour of the cornice or end protrusion. It is advisable to attach the drip edges first - in this case, at the corners of the slopes they will be covered by gable strips.
The joints of the eaves and gable strips are overlapped and reinforced with roofing nails.
Before installing the cornice and end protection, it is recommended to frame the perimeter of the solid flooring with a batten with a cross-section of 20x40 mm. If there is an edge along the edges of the slope, then the waterproofing is installed on top of it and cut off behind the perimeter line. After this, additional elements are attached.
Laying cornice tiles
Horizontal marking lines applied to the backing simplify installation and allow the tiles to be laid in even rows. It is best to form them using linen twine rubbed with chalk. The cord is pulled in the right place and released like a bowstring to leave a mark on the dark surface of the substrate.
For even laying of eaves tiles, it is necessary to apply chalk markings to the lining layer
Starter shingles are laid at a distance of 1 cm from the eaves line and secured with roofing nails. To prevent the tiles from coming off under strong wind loads, the fasteners are driven in at a distance of 25 mm from the edge. Each subsequent strip is laid end-to-end, and the joints are protected with bitumen mastic.
Installation of ordinary tiles
The main covering is installed in the direction from the center of the slope, placing the first row of shingles at a distance of 2–3 cm from the edge of the eaves strip. To fix soft tiles, it is enough to remove the protective film from the adhesive layer and press the shingles tightly to the substrate.
When laying the bottom tiles of ordinary tiles, make a small indentation from the edge of the eaves sheets
The final fastening is carried out with nails at four points - along the edges of the strip, as well as above the depressions between the inner petals. The top sheets are offset by 1 petal. Thanks to this, the same “tiled” texture appears, and in addition, the joints and places where the soft roof is fixed are closed.
The soft roof installation diagram provided by the manufacturer makes it easy to understand the nuances of the technology.
The tiles protruding beyond the edges of the slopes are cut off, after which the cut is treated with bitumen mastic.
Video: soft roof installation technology from the material manufacturer
Arrangement of the ridge and sealing of penetrations and junctions
Ventilation of the under-roof space is provided by aeroelements installed on top of the ridge. They are attached to the wooden frame with self-tapping screws or nails. After this, the ridge part is covered with flexible tiles. There are no special strips of soft bitumen coating for external corners - they can be made by cutting the eaves tiles.
The ridge aero element must be covered with a layer of bitumen tiles, otherwise precipitation will quickly render it unusable
Places where pipes, cables and other communication elements pass through the roof slope must be closed with special passage units. They are attached directly to the base even before installing the underlayment.
The junctions with walls and chimneys require special attention, otherwise moisture flowing down the vertical surface will penetrate inside the roofing pie
During the installation process, the upper layers of the roof are placed over the penetration, impregnated with mastic and trimmed in place. In the same place where the slope comes into contact with a brick chimney or wall, roofing materials are placed on the surface of the vertical structure. For additional protection, a piece of valley carpet and a shaped metal apron (junction strip) are used.
Video: arrangement of a passage unit for a soft roof
Cost of asphalt shingle roofing
By doing all the work yourself, you can save a lot of money, because the total cost of the roof will consist only of the costs of the necessary materials. Depending on the manufacturer, the price per square meter of budget and mid-level soft roofing varies between 800–1,500 rubles. If we talk about the premium segment, then certain types of flexible tiles are sold at prices up to 4,000 rubles. Of course, in this case, there can be no question of any independent installation - anyone who can fork out for such expensive material will also find money for a professional team. The services of the latter, by the way, are not cheap - from 600 rubles per square meter of finished coating.
As you can see, building a soft roof with your own hands is not at all difficult, which, however, does not exclude due care and following the technology developed by the manufacturer. If you do everything efficiently, the roof will delight you with its appearance and trouble-free operation for many years. Otherwise, it is better not to take on the work at all, otherwise the roof will constantly remind you of its existence with leaks and other unpleasant moments.
A reliable, inexpensive and easy-to-install roof is one of the most cherished wishes of the developer. Simplicity, the possibility of arrangement with your own hands without the help of third parties - all the parameters distinguish the laying of soft tiles. Available technology, affordable material costs, and no need to use special skills and tools make laying out easier. And we will tell you how to install soft tiles with your own hands.
Preliminary calculation of the material, additional elements, and fasteners is the key to high-quality installation of the roofing carpet. Approximate costs are:
- The number of shingles in a box can vary: from 1.5 to 3 m2. It all depends on the size of the elements (including overlap). All parameters are indicated on the box; the material should be purchased with a margin of 5-7%.
- Mastic in quantity: 200 g/m2 for the valley carpet, 100 g/m2 for the ends, 750 g/m2 for junctions, nodes.
- Nails 30 mm long, galvanized with a 3 mm shaft and a 9 mm head in an amount of 80 g/m2.
All calculations are averaged standard. Tools you will also need:
- Knife for edging bitumen shingles, substrate;
- Tin scissors (or others) for cutting planks;
- Hammer for fasteners;
- Brush for bitumen mastic.
Advice! If laying flexible tiles with your own hands is done in the cold season, a burner will be useful for heating the bitumen layer. Despite the possibility of carrying out work down to -5..-7 degrees, it is better to install the roofing carpet in warm, dry, not very hot and windless weather. In cold weather, the flexibility of shingles decreases, the risk of cracking increases, and in extreme heat, bituminous materials heat up excessively and melt.
Roofing pie for flexible tiles

A large stage of work begins with the installation of a roofing pie for soft tiles. Depending on its purpose, the attic can be warm or cold. The purpose of the roof space affects the arrangement of the roofing pie, however, the part above the rafters is always the same:
- layer of waterproofing material;
- bars with a thickness of 30 mm;
- sheathing in the form of a continuous flooring.
Important! Additional elements: junction strips, eaves overhangs, pediment strips are made of special steel.
Laying out waterproofing

Membrane materials can be one-, two-, three-layer.
- Single layer waterproofing- an affordable and cheap option that fulfills the task of preventing moisture from entering the room and not preventing fumes from escaping outside.
- Two- and three-layer materials– more durable and practical. They have an absorbent layer that absorbs condensation, as well as a layer that strengthens the material, which gives greater tensile strength.
Advice! Three-layer waterproofing membranes are indicated in the case of mineral wool insulation. The material is afraid of getting wet and with an increase in humidity even by 10% it loses 56-60% of its quality characteristics. In the case of arranging a cold attic, it is better to use a two-layer membrane fabric: the price is slightly more expensive than a single-layer one, but the strength is much higher.
Advice! If the slope angle is more than 18 °, waterproofing membranes should be placed parallel to the end and eaves planes. Connection points have an increased risk of leaks, so the laying is carried out with an overlap. The same is true in the ridge area. If necessary, the ridge area is covered with another lining carpet. The work is carried out from the bottom up, fastening is carried out with nails with an increased head size. The fastening pitch is 20 cm.
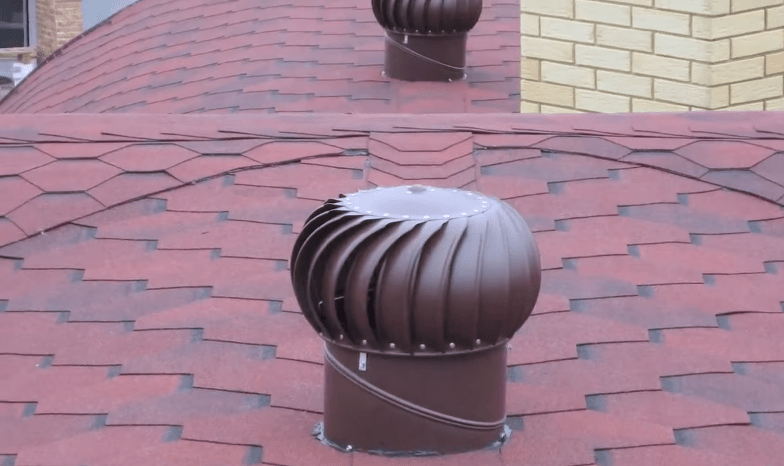
Ventilation
Ventilation of a roof made of soft tiles is usually arranged using a ridge. It is laid out on a ribbed profile. If this method is insufficient, ventilation elements are laid on the roof surface. This is the name given to profiles with ribs located at a distance of 20 mm from each other. The structures are attached to the base with nails.
Lathing and flooring

Immediately after laying the waterproofing, sheathing strips are placed on top. Thick timber elements create the necessary ventilation gap. The sheathing is made from softwood timber. The thickness of the elements is at least 30 mm; before installation, the wood is treated with impregnations against rotting and fire.
Important! The length of the boards for sheathing is a distance equal to two spans of rafters. Fastening is carried out above the rafter legs.
Do-it-yourself installation of flexible tiles is carried out on a continuous flooring. It is made from OSB3, sheets of moisture-resistant plywood, tongue-and-groove or edged boards 25 mm thick, with a moisture content not exceeding 20%.
Important! The laying out of solid elements is carried out with gaps - compensators for thermal expansion of the material. For plywood or OSB the gap width is 3 mm, for boards 1-5 mm. Sheet dies are attached using the method of spacing the seams so that the joints are not continuous. Fastening with self-tapping screws or rough nails.
Arranging a deck next to chimneys more than 0.5 m wide often requires the construction of a mini-roof. After installing the flooring, it is necessary to check the evenness of the surface of the covering, the dimensional parameters - the slope must be perfectly adjusted.
Laying flexible tiles

When purchasing a product, you should carefully review the instructions from the manufacturer. It must indicate how to lay flexible tiles. Often it is enough to follow step-by-step instructions to perform roofing work correctly, but familiarizing yourself with the procedure in advance helps to manage time.
Advice! Installation of bitumen shingles requires caution: no bending or creasing. You should not walk on the surface unless necessary.
Now the installation technology:
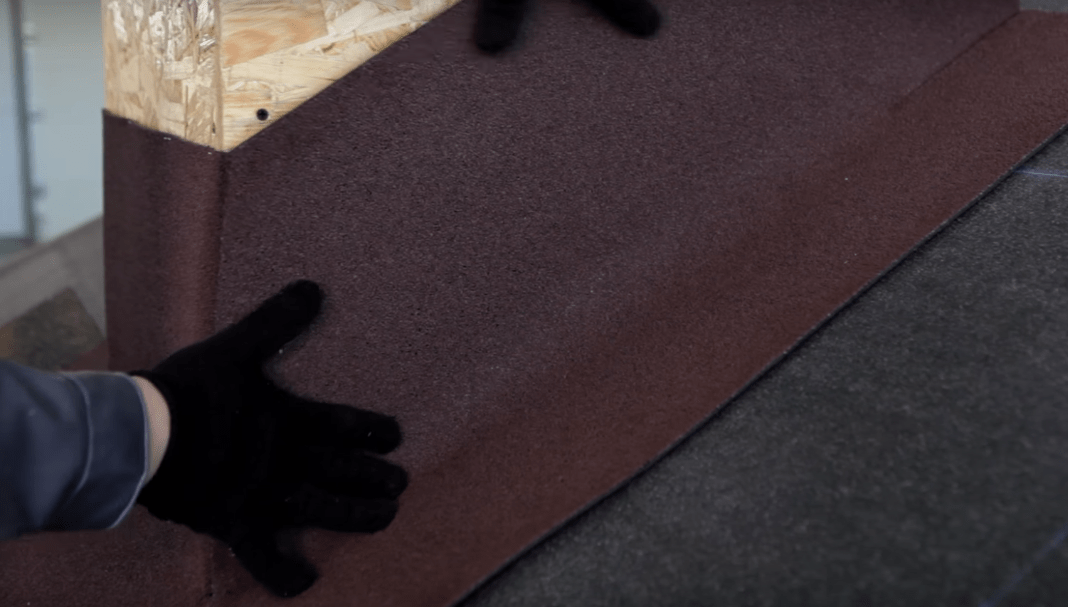
- Strengthen the overhang. A drip strip is installed to protect the structure of the rafters and sheathing from moisture. Place one edge of the drip line on the flooring, and cover the overhang with the other. Fastening with galvanized nails. Step 200-250 mm, checkerboard order, laying with an overlap of 30 mm. The gaps are coated with bitumen mastic and sealant.
- Attach hooks for drainage pipes.
- Lay a waterproofing carpet. The adhesive bottom side facilitates the installation process. Start from the valley section. An overlap of at least 0.5 m is left from the point of inflection in both directions. It is better to do without joints, but if necessary, leave an overlap of 150 mm. Laying from bottom to top, the joint is pre-treated with bitumen-based mastic. Along the eaves overhang there is a free remainder of waterproofing material of 0.6 m.
Advice! Before laying, the waterproofing carpet is rolled out, trimmed, then the protective film is removed and only then glued to the backing. Additional fixation along the edges with stainless steel nails will help secure the sheet of material more firmly. The points of joints and overlaps are additionally sealed with bitumen mastic and crimped.
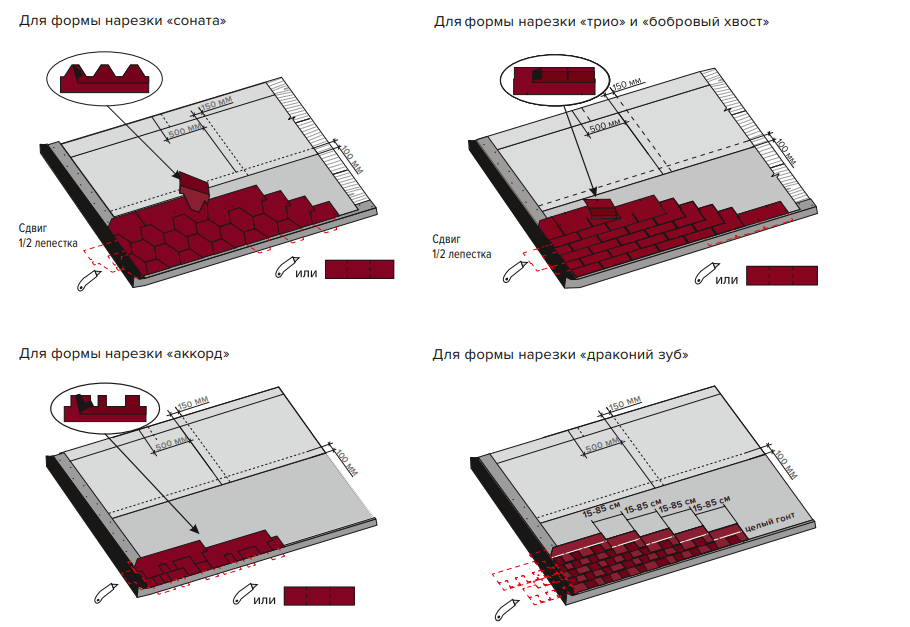
- Carpet lining. The product also comes in the form of a roll with an adhesive backing protected by a paper layer. The layout option depends on the profile of the selected shingles, the shape of the roof, and the angle of the slope. If you choose a covering type Jazz, Trio, an underlay carpet is required. If the roof slope is 12-18 °, the lining is installed along the entire perimeter of the roof. Installation should be done from below, overlaps are at least 150-200 mm, joints must be sealed. The upper edge is additionally secured with galvanized nails. If the slope angle is from 18°, a lining is needed in places of kinks, at the points where the pediment line adjoins the wall panels.
- Pediment strip needed for arranging side cuts. The additional element already has the desired shape, is mounted on the lining or waterproofing flooring and secured with nails at intervals of 150 mm.

Advice! When starting to lay out shingles, it is better to first mark the slope. Mesh markings will help place the roofing material, taking into account alignment and joints. It’s easier and more even to make markings with regular paint cord.
- The first strip of shingles, as a rule, ridge-cornice or ordinary row with trimmed petals. The sheet is laid out on the edge of the slope so that one edge of the shingle touches the gable strip. The lower edge of the shingle should lie on the drip edge with a distance of 150 mm from the fold of the additional element. Fastening in the corners with a gap from the edge of 20-30 mm.
Advice! Often sheets in bundles have some differences in background color. To ensure that the laid shingles are not very different, you should open several packs in advance and lay out the elements alternately.
- How to lay ordinary soft tiles? The first shingle does not reach the edge of the starting strip 10 mm; the sheet is fixed with nails (except for the adhesive base). The number of fasteners for a slope of 12-45 ° steepness per sheet is 4 pieces, and at the junction points of two sheets, nails are driven so that the head “covers” the edges of both shingles. If the slope angle is greater than 45°, fasteners are driven into each sheet.
After the installation of the tiles along the slopes with your own hands is completed, all that remains is to design the valley and gables. Flexible roofing has a lot of advantages, one of them is the quick arrangement of the most difficult areas. The roof in the valley area is arranged as follows:
- Mark the area where nails cannot be driven in (300 mm from the midpoint of the valley), mark the boundaries of the additional gutter - this is approximately 5-15 cm in both directions.
- Now drive the fasteners of ordinary tiles as close as possible to the line beyond which fasteners are no longer allowed.
- Trim the shingles along the gutter installation line.
- To prevent water from leaking under the edge of the material, the corners of the material are trimmed (4-5 cm each), the loose edge is attached to bitumen mastic.
Laying roofing material along the gables is not difficult: the side shingles are cut with a distance of 10 mm to the ribs. Trim the upper corner, like the valley elements: diagonally 4-5 cm. Place the edges of the tiles on bitumen mastic and fix them with nails.
Installation of bitumen shingles on a ridge has its own characteristics: a gap is cut along the ridge element, not reaching the ribs of 300 mm. The installation of shingles is carried out before the start of the slot, after which the additional element (ridge profile) is mounted. A long skate may require several profiles, this is normal. Fastening with nails, laying is carried out end-to-end, the mating points are coated with bitumen.
Important! On the ridge, a downwind installation is carried out; the flexible tiles are laid out towards the wind, with an overlap of at least 30-50 mm.
Installing a soft roof is not difficult, especially if you follow the technological details of the process and make an accurate preliminary calculation. The work is carried out on a dry, sunny day without wind or intense heat. If you need clarification, watch a video from professionals: do-it-yourself flexible tile installation.
As roofing covering Any moisture-proof materials can be used. But it is also important that they are resistant to temperature changes, ultraviolet radiation and mechanical damage. Has all these characteristics soft bitumen shingles.
In the process of work, the following scheme for constructing a roof made of soft roofing is used. First, the rafters are installed and a vapor barrier is laid, then a layer of insulation is placed, it is waterproofed, and finally the roof covering is laid directly.


soft roof - diagram
Preparatory steps: installation of rafters and insulation

To install a soft roof with your own hands, you must first prepare basis. First, a reliable rafter structure is installed. For it, take a beam with a section of 15x5 cm. Rafters placed at a distance of approximately sixty centimeters. The configuration of the roof depends on how they are located. The advantage of soft tiles is the ability to install them on roofs with any slope and other features. After installing the rafter system, all wooden parts must be treated with antiseptic compounds.

High-quality installation of a roof made of soft roofing requires mandatory use vapor barriers. The material is laid parallel to the cornices, from above, starting from the ridge, and moving down.


 Installation of soft roof instructions. Photo
Individual strips are laid with an overlap of ten or fifteen centimeters. The joints are insulated using foil adhesive tape. Attach the vapor barrier to the rafters with a construction stapler. 
A mandatory step is insulation soft roof. Slabs are used as insulation mineral wool. They are placed on the outside in two layers, having previously completed the rough sheathing of the rafters from the attic side.
The first layer is laid in the space between the rafters. The insulation is laid perpendicular to the eaves line. The thickness of the first layer of mineral wool is about fifteen centimeters, which corresponds to the size of the rafters.
 installation of soft roofing. Photo
In order for the insulation of a soft roof to be as effective as possible, a second layer of mineral wool is required. To lay it, counter beams are attached at a distance of sixty centimeters from each other. The timber is taken with a section of 5x5 centimeters. It is positioned in such a way that the second layer of mineral wool is laid parallel to the cornice. Such insulation of a soft roof covers almost all cold bridges.

The insulation is covered vapor diffuse membrane. It releases steam from the material, but prevents moisture from penetrating into it. The membrane is laid parallel to the cornice and secured with a construction stapler. At the joints, overlaps of ten centimeters or a little more are made, and then they are glued with self-adhesive tape.


Installation of soft roof step by step instructions. Photo


Laying a soft roof with your own hands
If you consider the design of a soft roof roof, you can pay attention to the presence ventilation gap between the vapor removal membrane and the base of the roof. Just five centimeters is enough for air to circulate freely.
Another layer of counter beam, which is already located parallel to the rafters, helps to create a ventilation layer. This type of soft roof structure is the most optimal.
Elements with a cross-section of 5x5 cm are used as counter beams, positioned at a distance of 30 cm. The bars are not laid end to end, but have gaps of about five centimeters. 
Direct installation of a soft roof with your own hands is carried out as follows.
The counter beam is fixed to the sheathing OSB boards, which are moisture resistant. It is necessary to leave gaps of approximately four millimeters between individual sheets. Differences in height should not exceed two millimeters.


During the installation of a soft roof, be sure to take care of the installation drainage system. Immediately after attaching the OSB boards, you should install hooks that will hold the gutter. Then the gutter and all other parts of the drain are installed, including the funnel and pipe.

 roof soft roof installation. Photo


soft roof with your own hands. Photo
Next, installing a soft roof with your own hands involves laying it on the surface wood board waterproofing material. It is placed with overlapping seams. Longitudinal overlaps must be at least ten centimeters, and transverse overlaps - twenty. All seams are additionally sealed. To do this, they are treated with bitumen mastic.


To install flexible tiles, mark the roof. Then the material is laid and fixed with rough nails with a galvanized surface. Begin installation of flexible tiles from the eaves. It is laid in rows, rising towards the ridge.


The next stage of installation of a soft roof is laying ridge elements. To ensure that individual elements of flexible tiles lie tightly and are not lifted by the wind, they are fixed using bituminous materials.


Installation of flexible tiles is being completed closing the joints and their careful isolation. It is imperative to cover with slats the junction of the roof to the pipe, walls or other elements. Also, upon completion of the installation of the soft roof, all additional work is carried out. Such as installing skylights, snow guards, soffits on cornice suspensions and other things.


Installation of soft roof video instructions
Video installation of soft roofing
Photo of a roof with a soft roof
The relative ease of installation of flexible tiles is not the only advantage of such a roofing covering. It should also be noted the variety of appearance.
The gray-blue roof of the house perfectly emphasizes the brick color of its walls. The shape of individual tile elements is hexagonal, which creates an interesting pattern and visual effect. The roof covering looks like scales. The unevenness of color enlivens the surface and makes it voluminous.

Soft roof photo
Light brown roofing is discreetly neutral. It does not draw attention to itself, but emphasizes the beauty of the building itself and the roof of a complex shape with many planes. The tile elements are square, which echoes the stone wall we see on the right side. 
Soft roof photo
The dark brown material with rectangular elements looks severe, but it makes the complex roof more attractive. The dark color sets off the light walls of the house and is supported by other brown elements present on the facade of the house. 
Soft roof photo
The roof is covered with soft hexagonal tiles. The presence of color transitions and lighter spots makes the roof surface visually more interesting. It is quite dark and therefore does not blend in with the rest of the building. 
The simplicity of the form of these flexible tiles is balanced by an interesting combination of matte and textured surfaces. A roof with such a coating will look strict, but at the same time elegant. It will decorate any home with the appropriate color scheme. 