Making fishing tackle with your own hands, as well as fishing itself, is an exciting process. Professional fishermen improve their skills by creating high-quality gear that increases the catch tenfold. In this case, a variety of techniques are used. All available fishing tools will always be individual and unique, since do-it-yourself fishing gear is a purely creative process.
Materials required for work
- Wood (planks or bars). You can cut wobblers or poppers from it.
- Metal plates - suitable for the petals of rotating spinners.
- Various wires for creating fastenings and rings for our baits.
Frequently used tools
- hammer;
- saw;
- sandpaper;
- file;
- primer;
- paints;
Making wobblers
To make a wobbler with your own hands, use hardwood 5 cm long in the form of an oval, narrowed on one side.
- To begin with, we obtain a workpiece by sawing off a 1.5 cm block from the main board.
- On the block we draw the outline of the future wobbler fish with a pencil, after which all excess is gradually cut off with a knife.
- In the front part, as shown in the figure, we first mark it with a pencil, then cut out a cavity for the future blade.
- The belly is also sawn through the entire length of the wobbler, where we will insert a fastening made of wire, as shown in the figure.
1. It is advisable to use stainless steel wire. 2. If you do not want to use rings to attach tees, take care of inserting them before twisting the wire into the rings.
- We insert the wire fastening, filling it with epoxy glue.
- The wobbler is coated with waterproof varnish, and after drying, tees are hung on it.
- To select the level of buoyancy, lead weights are used, attached to the holes of the abdomen between two loops: nasal and abdominal. Then the wobbler can be sanded and varnished so that its body does not absorb water.
- Using thin and soft aluminum from drink cans, a blade is created that is glued into the wobbler.
Manufacturing of oscillating spinners (oscillators)
Oscillating spoons or spinner spoons can also be made with your own hands.

For their manufacture use:
- a cross-shaped hammer with balls at the ends and a metal handle;
- wooden boards with a spoon-shaped recess;
- rubberized steel shaft for “rolling” part of the product;
- metal ball;
- drill and drill bits;
- hacksaw for metal;
- steel stylus.
How to make a vibrator petal:
- Create the desired fixture template on cardboard.
- Draw a contour using a stylus on a sheet of metal with a given thickness of 1.5 mm.
- Then the sheet is clamped and the template is cut out with a hacksaw.
- The workpiece is fixed in the recess of the board, beaten with a hammer, and rolled to strengthen one of the sides of the spoon.
- Correct with a hammer.
- Uneven edges are removed and holes are created for factory-type rings.
Spinner spinners

Wire. You need a spinner frame based on rigid stainless steel wire with a length of at least 100 mm. Diameter – 0.8 mm. The bent shape of the wire is straightened using pliers, slings and clamps.
Petal. As a petal, you can use aluminum from 0.33 liter cans. You can even cut the petal with scissors; aluminum is very soft. Holes for inserting the petal onto the main wire are made with a thick needle and pliers.
Assembly of the structure
- A ring is created at one end of the wire by bending the end of the wire with pliers.
- Then the bead is put on.
- Then the petal.
- Then another bead.
If you want to make your spoon heavier for fishing at depth, use a longer wire and insert a sinker with a hole between steps 4 and 5.
5. A tee is inserted and a ring is created in which this same tee will be. Or you can use small rings, for example, to change a tee to a fly.
Homemade castmaster
 Castmaster is made independently based on a metal hollow tube with a cross-section of 16 mm (for example, a spout from a faucet mixer) and lead. The available tools include a hacksaw, a drill, a drill (D 2.5 or 3 mm), a flat file, a vice and a caliper, including the original castmaster model.
The vice is clamped into the pipe, the workpiece is sawed off, the cut angle is made as in the original castmaster and measurements are taken. Holes are drilled exactly in the middle at the ends of the workpiece, and the inside is tinned so that the lead does not fly out during fishing. The holes are sealed with masking tape, after which the workpiece is placed on a flat surface to dry, the remaining cracks are covered with molten tin using an electric soldering iron. If necessary, sandpaper is used and lead is drilled through the holes on the metal tube.
Balancer for winter fishing or vertical fishing
A homemade balancer is a three-dimensional bait in the shape of a real fish. It is created on the basis of alloys and low-melting metal. The hooks are placed in the head or tail of the fish, pointing the sharp end upward. The back and belly have two loops. One for attaching to a fishing line, the other for a tee.
Foam rubber in the shape of a fish
 Homemade foam fish bait of domestic know-how. Household sponges of various colors are required. Before processing, moisten and squeeze. Using a blade, the required block of a certain shape is cut - in the form of a fish 3-8 cm in size. Then they are painted with waterproof markers, or not painted; now in stores you can buy sponges for every taste and color.
The jig head is attached without the intervention of glue. And if you want to fix a tee in the fish, you need to make a small cut, insert the tee and seal it with waterproof glue.
Making jigs with your own hands
Homemade jigs are made using casting (lead, lead-tin alloys), soldering (tin and lead alloys), and the instrumental method (tungsten). The latter method cannot be used at home.
You need a form that can be made from plaster poured into matchboxes, and put a jig in the center. After the plaster has dried, remove the jig, clean off any uneven surfaces and cut channels for supplying tin to the hollow area for the future jig.
It must be remembered that lead is a toxic alloy and it is better to smelt it outdoors, or in a special mask, so as not to inhale the fumes.
Homemade sinkers
Sinkers are cast in a similar way to a jig. A lead pouring mold is required.
 It is made from a large sinker into which a ring with a small cut is soldered, as shown in the figure. This cut will allow you to insert the line of your tackle without breaking the tackle. And it is advisable to use a strong fishing line for unhooking, you can use a braided cord or nylon thread.
Electronic bite alarms
To create a homemade electronic bite alarm, you need an electronic and bite alarm (in the form of a bright plastic barrel with a latch) alarms, which have a mount on the rod and a bicycle spoke. A knitting needle is attached to the signaling roller, and a barrel is attached to it on the other side. This structure is attached to the rod stand.
Artificial baits (baits)
For fishing with a float rod, artificial baits simulating worms and maggots are sometimes used. These baits need to smell appropriate, so take care to wet the bait with a very small amount of scent. For example: garlic drops, anise, vanilla.
When there are no baits for fishing, professional fishermen use artificial baits:
- wet and dry flies based on wool, feathers, colored threads;
- bugs based on cork or foam;
- "goat beard"
Let's sum it up
When making fishing tackle, you can use any available means. And there can be a great many variations of baits and equipment. It is not at all necessary to do as others do and as described in the manuals. The main thing is to understand what the final product is, and then come up with an alternative solution for making a similar bait.
For a professional fisherman, making fishing tackle with your own hands is an activity that brings the same pleasure as fishing. By creating new gear, feeders, baits and other devices, a fisherman can increase the fish catch several times. For making tackle at home, improvised means and tools are excellent.
Making fishing tackle is a fascinating activity.
If a fisherman makes fishing devices with his own hands, he must use the following materials and tools in his creativity:- Wood. From wood, a fisherman may need planks and bars. The wood is excellent for wobblers and poppers.
- Metal plates. Petals for spinners can be made from this material.
- Wire. Can be used as mounts and rings for baits.
- Hammer.
- Saw.
- Sandpaper.
- File.
- Materials for covering tackle and other devices (varnish, paint).
To make a fishing device with your own hands, it is enough to have available tools and materials.
Helicopter tackle is a popular winter tackle.
The helicopter structure consists of the following elements:- Hard spinner.
- Long leash.
- Short leash with hooks.
- Retaining ring.
- Sliding sinker.
- Main line.
- Fixing cambric.
- Reel, necessary for attaching all the gear.
- Bite alarm.
Making fishing gear is very simple. Helicopter gear is made from tin. Thin tin cans are perfect.
The diameter of the pinwheel reaches five centimeters and it is attached to a leash, the length of which is one and a half meters, and the diameter is 0.22-0.25 millimeters.
Four short leashes of 15 centimeters each, 0.15-0.2 millimeters wide, are mounted to the long leash. Fastening can be done using a swivel. Place hooks on leashes. The leashes are attached at the same distance from each other.
The leashes are attached to the main line with a diameter of up to 0.45 millimeters with a locking ring. A flat weight weighing up to 80 grams is mounted on the fishing line.
Place a cambric up to four centimeters long and up to half a centimeter in diameter just above the load. The cambric fixes the fishing line on the whip, which notifies the fisherman about a bite.
Willow branches are placed under the whip, which can be collected on the river along the shore.
Before fishing with a helicopter, the fisherman must drill a hole in the direction of the current at an angle.
- a pre-bent pinwheel is passed into the hole. It is necessary to bend it so that it plays better in the water and has resistance to fast flow;
- the bait is placed on the hooks, and the assembled tackle is lowered completely into the water;
- after reaching the bottom load, the cambric should be pulled and secured at the end of the whip, which should be located at the hole;
- the excess fishing line is wound on the reel. It should be next to the whip.
Having made a helicopter with his own hands, a fisherman will be able to fish constantly in winter and catch big fish.

To make a wobbler yourself, you should take wood from deciduous trees. The optimal length of oval wood is five centimeters.
We assemble the wobbler with our own hands:- A one and a half centimeter block should be cut from the wood.
- Draw a wobbler fish on the resulting block.
- Trim the excess wood along the contour with a knife.
- Make a mark with a pencil in the front part of the future wobbler, and then cut out a cavity to create a blade. Cut the belly along the length of the bait. A fastener made of stainless wire will be inserted into this place.
- Insert wire in the form of rings into the intended place and fill with epoxy glue.
- Apply varnish to the finished wobbler. Once the varnish has dried, hang treble hooks on the workpiece.
- Adjustment of the level of buoyancy must be done using lead weights, which are attached to the holes in the abdomen between the nasal and abdominal loops.
- Sand the bait and re-varnish it with a waterproof effect.
- Next, prepare a blade from aluminum cans, which should be glued into the wobbler.
By following the instructions for making a wobbler, you can get an excellent specimen, which will later be used to equip a fishing rod.
DIY mandula
How to assemble a mandula? You can make a mandula from polyurethane foam. The material is obtained from various rugs and women's slippers. Mandula is great for pike perch fishing.
For the mandula you will need multi-colored polyurethane foam, double or triple hooks, wire 0.5-0.7 mm wide, a cotton swab, red wool, pliers, pliers, wire cutters, an awl, highly water-resistant glue, and a knife.
- cut polyurethane foam into cubes;
- stack the cubes on top of each other and coat the layers with glue;
- burn the center of the structure with a hot awl;
- the structure should be made cone-shaped using a knife. The awl should remain in the plates;
- a cotton swab is mounted in one of the cones;
- Take the pliers and make a loop at the end of the wire. The other end is attached to the hook;
- the prepared cone is placed on the hook;
- A fly is tied from red wool with glue. While the product is drying, a polyurethane foam plate is put on the second hook to make it more buoyant;
- all structures must be assembled together by twisting wire.
It is possible to make a mandula from polyurethane foam. With such equipment it is excellent to catch a predator.

Such baits are also called spoons. To make a spinner, you will need a cross-shaped hammer with balls at the end, a wooden board with a recess in the middle, a rubberized steel shaft, a metal ball, a drill, a hacksaw, and a steel stylus.
Stages of creating an oscillator petal:- Make a petal template on cardboard.
- Make a contour on a one and a half millimeter sheet of metal using a stylus according to the template.
- Clamp the sheet and cut out the petal according to the template with a hacksaw.
- Fix the workpiece in the recess of the board.
- Remove uneven areas along the edges and make holes for the rings.
Manual vibrators are made of metal and wood. The simple design will allow you to catch excellent fish.
Making a spinner spoon
The spinner frame is made of stainless steel wire. Its length must be at least one hundred millimeters and its diameter 0.8 millimeters.
Manufacturing stages:- The curvature of the wire is removed with pliers, slings or chawls.
- The petal is made from 0.33 liter aluminum cans. Due to the softness of aluminum, it can be cut with scissors.
- Make holes on the wire with a thick needle to secure the petals.
- Assembly. One end of the wire is twisted into a ring with pliers. Then a bead and a petal are put on. The structure is secured with another bead.
You can increase the weight of the spinner by choosing a long wire, as well as using a sinker with a hole.
It is better to make a spinner out of wire. It is subsequently weighted with a sinker.

To make a castmaster you will need an empty metal pipe with a cross-section of sixteen millimeters and lead.
The tools you will need are a hacksaw, a drill, a drill up to three millimeters, a file, a vice, a caliper, and a soldering iron.
Let's assemble the castmaster ourselves:- the pipe is clamped into a jaw and the workpiece is sawed off. The cutting angle must correspond to the original castmaster and measurement angle;
- make holes in the centers of both ends of the workpiece;
- tin the workpiece from the inside so that the lead does not fall out;
- seal the holes with masking tape and let it dry;
- Close the remaining holes with molten tin. To carry out this stage you will need a soldering iron;
- process with sandpaper and drill lead through the holes in the pipe.
A castmaster is made from a small hollow tube. You should work with lead carefully, as it emits fumes that are harmful to health.
DIY balancer
Such a balancer may be needed when fishing in winter. It looks like a voluminous bait that looks like a fish.
Manufacturing stages:- It is created from light metal alloys.
- The hooks are attached to the head or tail of the workpiece, the sharp end should point upward.
- Two loops are attached to the back and belly of the bait. The first is necessary for the fishing line, and the second for the threesome.
A balancer is a piece of equipment that looks like a fish and is used in winter. Homemade balancers guarantee a good catch.

Foam rubber is prepared in the form of fish from foam rubber sponges of different colors.
Manufacturing stages:- Before starting work, you should wet and squeeze out the sponge;
- then a fish measuring 3-8 centimeters is cut out;
- can be attached to jigs without glue;
- If you want to attach a treble hook to the bait, you need to make a cut, and then insert the hook and secure it with water-repellent glue.
To make your own accessories, you may also need a dishwashing sponge. It is used to make foam fish that can attract a large school of fish.
Jigs at home
For jigs you will need lead or lead-tin alloys and gypsum. You should prepare the jig in the fresh air or wearing a mask, as lead is toxic.
Manufacturing stages:- Create a plaster mold. Pour plaster into a matchbox and place a jig in the middle.
- After the plaster has dried, the jig is removed. The mold is cleaned and channels are created for pouring tin.
The jig is the simplest bait that is very easy to make yourself. It is necessary to prepare plaster and mold.
DIY bite alarms
To create an electronic signaling device, you will need a bicycle spoke, an electronic and bite signaling device with a rod mount.
Manufacturing stages:- Attach the spoke to the signal roller.
- On the other side, a barrel is secured.
- The resulting alarm is mounted on the rod stand.
You can also make bite alarms yourself. The basis is a bicycle spoke and a commercial signaling device.
To catch fish with a float rod, artificial baits are required that imitate crustaceans, worms, and maggots.
For good fishing, the bait must have an attractive smell to the fish.

- anise;
- vanilla;
- garlic.
As bait, you can use wet and dry flies made from wool, feathers, cork, polystyrene foam, and colored threads.
To prepare fishing tackle at home, it is enough to use available materials: wooden blocks, polystyrene foam, wool, feathers, threads, and so on. Before making homemade products, you should understand what it will look like in the future and what kind of fish can be caught with it. Properly made tackle will help the angler catch a great catch.
Just give our craftsmen from the people a reason to make something. A special article is fishing tricks and homemade products. Firstly, they performed (and sometimes continue to perform) purely practical functions in an era of total shortage of fishing goods. Now you have wobblers, twisters, bloodworms, and telescopic fishing rods - all sorts of good stuff in bulk (though not always of high quality, but serious companies will ruin you). But I remember there was a time when even a standing hook or a Klin fishing line - during the day with fire. So the fishing people did their best. And I must say, he did it quite well and with high quality, and most importantly, functionally.
Attempt at classification
All fishing tricks and homemade products can probably be divided into several large categories in the context of their practical application. Firstly, these are all kinds of gear, either copying (with invariable success) foreign fabulous analogues, or real inventions, which, in turn, were copied without a twinge of conscience by Western manufacturing companies (since, naturally, none of the fishermen received a patent ). This broad group includes hooks, floats, spoons, leashes, jigs, donks and much more. Secondly, fishing tricks and homemade products are proven by experience and even invented methods and methods of fishing, feeding, types of attachments and baits. This all relates to the big topic: how exactly to fish in different places and at different times of the year.

Accessories
The third large group includes fishing accessories, invented or copied from existing samples. These are all sorts of devices for longer storage of fish during summer fishing, winter subtleties in terms of equipment on ice, used to avoid freezing, containers for storing bloodworms and other baits. All of them, with rare exceptions, are a real storehouse of folk wisdom, a book of fishing luck. So, for your attention - a small hit parade of homemade products, made from what the fishermen themselves came across.

Toothbrush poppers
Fishing tricks and homemade products sometimes amaze you with a play of imagination. Since newfangled imported things are quite expensive, it clearly makes logical sense to make them yourself. Poppers or walkers are surface baits and should not sink. A little submersion is allowed, but still, the material should float quite well on the water. Therefore, first you need to check toothbrushes for buoyancy. This can be done by collecting water in an ordinary bucket and throwing a brush into it. If it doesn’t sink, but floats on the surface, then that’s it. We carry out the work with a small grinder, reminiscent of a micro-grinder, with removable attachments. We saw off the part with the bristles. We process the edge with a sandpaper attachment. In the lower and upper parts it is necessary to make a hole for attaching the lower tee (attached using a ring with a swivel). We tint the homemade bait (in this case, you can choose red and green - bright colors). We insert the tees. A test in a water bath shows that the weight of the tees is sufficient to sink the structure. To prevent this from happening, glue a narrow strip cut from foam onto the top of the nozzle with superglue. Now the popper does not sink and floats well on the water.

Wobblers
If we are making a wobbler, then we also cut in an additional blade in front of the structure (it can be made from a plastic bottle cap by cutting out a small part). You can paint it with bright nail polish borrowed from your wife. You can also insert an additional weight for weighting. But in our case, the design turned out to be of quite the required weight, and flies far when casting. This is how simple toothbrushes can serve as the starting material for spinning baits.

Spinner for pike perch from broken tweezers
Fishing crafts are sometimes made from anything. But even from broken tweezers. The tool is of high quality (it was once), made of good stainless steel. Why not use a spinner for pike perch? As you know, these predators have a rather narrow throat, and you don’t need a wide spoon either - it’ll do just fine! So, from one leg of the tweezers we cut the workpiece to the required length. We sand it a little, giving it shape and getting rid of small burrs. Now we drill holes where the tee and fishing line will be connected using rings and swivels. This procedure is not so easy to carry out: you can even break a thin drill, since the material is quite durable. Well, it's done. We screw on the tee (preferably on the heavier side, so the spoon will stay more stable in the water column). For aesthetes: you can cut the scales with the same grinder (they already have transverse layers from the tweezers) - just make a couple of even cuts along the length, and the scaly, shiny lure for pike perch or pike perch is ready for use. Such homemade products for fishermen are practically no different from the notorious branded ones. This one turned out even better: the analogue has a tee on the less heavy side, which leads to overlaps and overturning of the spoon.
Fishing trifles in summer
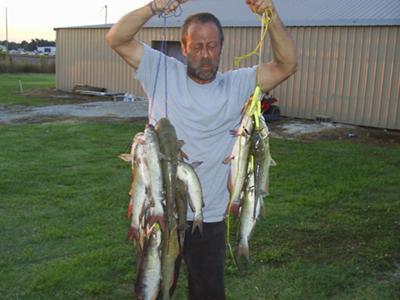
Homemade products for fishing in the warm season can be very useful for both beginners and experienced fishermen. Summer fishing has its own specifics. Great attention should be paid to preserving the catch, since in the heat the fish can spoil very quickly. And a catch caught in the morning, without proper preservation (and in the field, rarely does anyone have a freezer box - except perhaps some car enthusiasts) may simply not survive until the evening.
How to save what you catch
- After fishing and pulling the fish ashore, carefully, without squeezing the insides, release it from the hook (otherwise it will quickly fade). You should also not throw severely injured fish into a bucket with the rest of the caught ones - it can ruin the entire catch in a few hours in the heat. Wounded prey is best killed, gills removed and gutted. Next, wrap it in fresh grass (the best option is nettle) and store it in the shade, preferably where there is coolness and a breeze.
- Gutted and gill-free fish can also be salted before storing.
Live storage
If you intend to bring home live prey, you need to store it in water, in a cage or on a kukan (a kukan is well suited for underwater sea hunting, for example). And the cage should have fairly wide rings, the mesh should be made of fabric, not metal. The fish will be seriously injured when trying to escape from the metal. You need to hang it, immersing it in water, in the shade. So that the fish can swim calmly and not hit each other. In a cramped cage there is also a high risk of self-poisoning of the catch with metabolic products.

Homemade cage
More about fishing homemade products. A good branded fish tank is quite expensive - not every angler can afford such luxury. But a cage for storing catch in the summer, long and wide enough (and, importantly, foldable) can be made independently. To do this, we will need strong steel wire or ready-made rings made from it. If you need a compact device, take three rings of descending sizes. Medium is in the middle, small is at the top. You will also need a nylon mesh (the kind that was used for windows against mosquitoes before the widespread installation of metal-plastic ones). We sew a sock from the mesh according to the size of the rings. We put it on and sew it tightly to the rings with stitches. We make sure that the cage is uniform and neat. To prevent the fish from jumping out of the cage, you also need a lid. It can be made from another ring of wire with a mesh stretched over it. Little tricks for the fisherman: our homemade fishnet is attached using a strong nylon rope, which must be tied in a knot to the structure so that it does not float away with the catch, for example. And to prevent your homemade fish tank from flooding if you fish at great depths, you can put a children’s life ring on top of it, as in the photo. Please note that the cage is easy to fold and transport when moving to the fishing spot on foot.

Sensitive float
Let's make fishing tackle with our own hands. Of course, in a store or on the market there is a great variety of floats of different colors and sizes. But choosing a good one costs good money. And if you are a fan of fishing with float rods, you need to purchase a dozen floats. And many fishermen prefer to make floats with their own hands the old fashioned way. These tackles are made very well from goose feathers. Where there is a lake or pond or river, these birds are sure to graze. And sometimes they lose their feathers. So all that remains is to bend down and pick it up. You can make large floats and small ones (depending on the size of the feather). We cut off everything unnecessary, leaving only the base of the pen. The result is such a thin stick, light and quite durable. We measure the size of the product. We cut off the unnecessary from the top side (from below, in the place where the feather was attached to the bird’s skin, the structure should have its original appearance, the opposite will lead to the float getting wet). It is convenient to carry out the work with a sharp stationery knife. In principle, the main part is completed. We paint the float in bright colors so that it can be seen on the water. The easiest way to do this is with nail polish, which comes in a variety of fairly bright colors. In addition, the varnish is waterproof. We attach a mount to the cut part of the float where the fishing line will be threaded. You can go fishing. But before that, here are two or three more little tricks for successful fishing.
How to balance a float at home
Often, upon arrival at the float rods, poor balancing of the floats interferes (they are carried away by the current or they lie down for no apparent reason). But on the spot, especially in rainy or windy weather, you don’t want to do this, but you have to. Therefore, the most correct solution is to balance the floats in advance, at home. This can be done by taking a full bath of water and unpacking your gear. So, we tie the float to the fishing line (or attach it to a mount) and begin the process of selecting sinkers. The float should not lift the sinker from the bottom. But the load should not be too heavy, since small bites will not be visible. We find experimentally the golden mean (a lead weight that is too heavy can be cut well with metal scissors, and if it is too small, add another piece of lead). The float in the bathroom should stand clearly, almost vertically, without lifting the sinker from the bottom, but also without lying on its side. Now your fishing crafts are well balanced and you won’t have to do this outdoors. This is especially important in adverse weather conditions.
Fishing crafts: tube for storing floats
For removable floats - one of the most important parts of the tackle. However, some of them are quite fragile and can break when the fisherman moves from place to place. To prevent this from happening, we will make a tube for storing floats with our own hands. We take the base from Tuba, which is very durable. Even if you accidentally step on it, it will not break like plastic, and your floats will be intact. You also need a piece of loose foam about 2 cm thick. Two plugs need to be cut out of it. We make an imprint of the film reel on the foam and cut it out with a stationery knife. One plug should fit very tightly into the hole in the tube. To do this, you can glue it, or use the second one - it acts as a lid. We use a stuck paperclip as a handle for easy removal. The floats are attached from the inside with keels to the foam, securing them well. And the lid closes on the other side. And in order to prevent the cardboard from getting wet, for example, in the rain, you need to additionally wrap the structure around the circumference with tape.
Fishing crafts - a treasure trove of fishing experience
Many generations of amateur fishermen pass on their secrets to each other. And today, despite the abundance of products offered for fishing, someone still needs these fishing tricks. Of course, no one can know everything about fishing. But the above and other tips, we hope, will be useful to both beginners and more experienced fishermen. Happy fishing everyone!
Making cunning fishing equipment by hand
This is a fishing tackle for bottom fishing. You will need a cap from a 5 liter plastic bottle. Preferably green. The sinker is attached well - plate lead. The option you see is for river fishing. Therefore, two layers of lead. The notches are also there to prevent it from being carried away by the current. Thanks to the load, the tackle always falls lead down. Secure it with self-tapping screws. For a lake where there is no current, you can reduce the load.
We make two holes on 2 sides. What are they needed for? The first will hold the main line. In the version shown, a leash is inserted. Already prepared leashes, hooks on both sides. There are 4 hooks in total. He inserts leashes into the second hole.
Now you need to make four more narrow holes.
Continued at 4 minutes.
Making fishing tackle: nod
Show a quick way to make such equipment as a nod. Here . Suitable for both winter fishing and summer fishing, if you are interested in jig fishing in the summer. Special devices and tools are not needed. The simplest ones: glue, a knife, cambrics, a piece of television antenna cable. We will make the body of the nod from an ordinary plastic can of a dairy product. What kind of plastic behaves well in any weather.
First, cut open the jar. Cut out the body of the tackle. We use a ruler and a sharp knife. The narrower and longer the nod, the less carrying capacity. The wider and shorter, the higher.
We make rings from cambric with our own hands; they will be located on the top of the nod. We need a couple more of the same rings, they will put the gear on the body. Cut off a piece of TV cable. It does not have a copper core running down the center. Remove the foil and thin copper braid. There are holes here from the wire, the rod of the fishing rod is inserted into it. We place a cambric with a smaller diameter inside a piece of cable. We will also thread the fishing line here. You can adjust the length of the nod.
Next from the fifth minute
Spinner from a tube. Manufacturing process
This is not an ordinary spinner. Inside is a rattle made of a tube of smaller diameter and scraps of nails, wire, or bearing balls. The inside will be secured with the body of the spinner and filled with lead. As you know, fish are attracted to sounds, and the rattle is designed for this. There are factory wobblers with the same rattles. A spoon made from a tube, catchy. It can be used for winter and summer fishing.
So, pieces of nails are placed in the tube. Wrap the rattle in foil. Let's secure the spinners inside the body. You will need a little glue. After it has dried, we fix it closer to the middle.
To prevent lead from spilling out from below, wrap the bottom with foil. We fix it in the sand. It's convenient and safer.
To melt lead, it is convenient to use a torch. We melted it, now carefully, slowly, pour it in. We wait until the lead cools down. Finally cool the bait under running water.
We finally form the body of the spinner. You need to make cuts and drill a hole for the hook. Equip.
Continued on video from minute five.
Modern technologies have affected not only science, technology and production. They are even present in various fishing devices. How should a modern fisherman fish? We offer a short overview of modern devices for the fisherman and his fish. 
 You can sit on the shore waiting for a bite, or wander along the river in search of a fishing spot, or you can use the Deeper Smart Fishfinder fish scanner. It is a small diameter ball that you can throw on the water and find out if there are fish in that place. The device is equipped with an echo sounder and several sensors that can be used to determine the depth of the fish and the water temperature in the river. Data on the location of a school of fish is displayed on the fisherman’s smartphone via Wi-Fi or Bluetooth. Fishermen with smartphones running iOS or Android can use Deeper Smart Fishfinder.
 In order for fishing to be successful, you need to know the location of the fish, its type, and habits. But how can you look under the water without disturbing the peace of the river inhabitants? It is for such purposes that a special camera has been created, which is attached to the fishing line just above the hook. The image is transmitted to a special screen, and the fisherman can not only see everything that is happening on the water, but also photograph the fish caught or swimming by.
  Fishing enthusiasts whose home or cottage is located on the river bank may be interested in the Corian Fishing Dock. The pier is equipped with a chair, sitting on which the fisherman turns on a dim lamp underwater, the light of which attracts fish. Sitting in a comfortable chair, you can combine relaxation and fishing.
 Every kid has dreamed of a remote-controlled car or plane. Adult men also do not refuse to play with such toys. But some of them are trying to adapt them to their needs. So the RC Fishing Boat can not only float, but also transmit information about the water temperature and the presence of fish to the remote control. Moreover, it can sail several hundred meters from the shore.
  Well, for those fishing enthusiasts who, due to objective reasons, cannot go to the river bank, we can offer the Virtual Master Real device. It is a manipulator fishing rod with a display. Virtual Master Real allows you to experience the real sensations of fishing - waiting for a bite, hooking, etc. But you can’t yet use a virtual catch to prepare fish soup.