Ceiling tiles are a beautiful and inexpensive material. At the same time, it is easy to install, and the original result will please the most demanding apartment owner. By the way, the advantages don’t end there. Ceiling tiles are good because they do not “steal” the space of the apartment (its width is no more than 1 cm), but at the same time it easily hides ceiling defects and has the property of additional heat and sound insulation.
The advantages are obvious, and everything is clear with them. All that remains is to figure out how to glue it in the apartment.
How to choose a tile
When choosing ceiling tiles, it is important to take into account the characteristics of the apartment
Before going to hardware stores, it is important to decide on the size and materials of the tiles from which they are made and will be better suited for a specific city apartment.
As for the material, there are exactly two options:
- expanded polystyrene;
- Styrofoam.
Both of them are very similar in their characteristics and manufacturing method. However, the first one is somewhat more expensive, and therefore is less popular compared to polystyrene foam.
Depending on production, products are distinguished:
- injection;
- stamped;
- from extruded polystyrene foam (or from expanded polystyrene).
Of the options presented, the simplest is a stamped plate. Its thickness ranges from 0.6 to 0.8 cm. On the front side of such a tile, as a rule, there is some kind of pattern or a simple design. However, the quality of the material is far from the best, so it must be handled very carefully and installation done as carefully as possible so as not to damage the slabs.
Injection tiles are of higher quality. Its thickness ranges from 0.9 to 1.4 cm. The use of such tiles allows for a certain maneuver when renovating an apartment, because it can subsequently be painted using water-based paint.
In addition, the material of such tiles is stronger, it can be washed - it is not afraid of moisture and is suitable for bathrooms and kitchens. The injection plate is different:
- clearer drawing of the pattern;
- strong edges;
- thermal insulation.
Extruded tiles are the thinnest. Its thickness is from 2.5 to 3 mm. At the same time, it is the most durable and durable product of all available options. Often such panels are called “laminated” - because they are smoother and denser than other options. These slabs are ideal for bathrooms and toilets. Washing such a ceiling will not be difficult. At the same time, extruded tiles will please you with other aspects of care. For example, it is not afraid of strong detergents and can absorb excess moisture well.
Rectangular tiles can also be used for flow if space permits.
When choosing tiles, it is important to pay attention to:
- condition of the material (it should not have cracks or other defects);
- the edges of the tiles (they must be perfectly smooth so that they can be “seamlessly” joined to each other);
- the inside of the slabs (it is important that there are no voids there);
- reliability of the material (it should not break or crumble in your hands).
A special case is the choice of ceiling tiles for the bathroom. Most likely, you won’t be able to save money in this case. You will have to purchase the highest quality material, which will cost more. Pressed products, as well as injection ones, are contraindicated for rooms with high humidity. Such a tile may only last for two months, and then it will simply disappear, and everything will have to start all over again.
Separately, it is worth dwelling on the type of seamless tiles. Its advantage is that during installation it does not create seams that are noticeable and upsetting to apartment owners. This can be achieved by special processing of the edges of the tiles, which makes the seams (in fact, they still exist) completely invisible.
An important point in choosing tiles is determining the required amount of material. You can understand how many slabs will be needed for one separate room like this:
- measure the width and length of the room;
- multiply these numbers and get the size of the ceiling area;
- purchase tiles for a given volume - with a “margin” of approximately 20 percent of the area.
An additional “reserve” purchased in advance will be useful in case of force majeure. For example, it is very common for slabs to break during work.
The standard size of ceiling tiles is 50 by 50 cm. Thus, four tiles combined together will cover a space of 1 meter. However, if desired, you can cover the ceiling with rectangular slabs. They look good in rectangular rooms and even expand their space somewhat.
As for appearance, it all depends on the person’s taste.. However, it is preferable to make a choice in favor of classic options, which over time will not look “wild” and are unlikely to bore the owner of the apartment.
The variety of types of ceiling tiles never ceases to amaze - in stores there is an offer for every taste
Although the scope for choosing types of tiles is wide. She can:
- imitate noble wood;
- be made “marbled”;
- create the effect of an iron ceiling.
In addition, the tiles can be made in the form of textiles in completely different color options. The most daring option is tiles with patterns.
When choosing a material design, it is important to consider which skirting boards and corners will be installed in the room. With a successful combination, they can complement each other.
As for tile brands, experts recommend paying attention to products from Germany - from the companies Grelich and Ormit. Decent quality at a reasonable price is provided by the Spanish brand Dune. Among the Russian options, it is worth taking a closer look at such tile manufacturers as Solid, Martin, Format and Unix.
There is no need to worry about the safety of the material when choosing tiles. The options presented in stores are equally harmless to the health of apartment residents. All materials are protected in advance from damage by fungi and mold, and should not be subject to rotting processes.
Glue selection
The choice of adhesive for ceiling tiles in specialized stores is wide and varied. However, it is worth purchasing brands that provide the fastest setting and do not require long manipulations.
The result of the work done depends entirely on the choice of glue.
You probably have two options to choose from. The first is Moment - Liquid Nails glue, which sets quickly (3 seconds is enough), which allows you to install the slabs very quickly and not spoil them with long presses.
The second option is "Titan". It holds the slabs tightly, but has a number of features when used. So, the tiles must first be treated with the compound. Next, attach it to the ceiling, but then immediately remove it and hold it in your hands for about a minute, after which it is finally glued.
Another option for attaching slabs to the ceiling is special mastic. Many masters are increasingly making a choice in its favor. After all, it has a number of advantages over other types of glue, first of all, greater flexibility. Thanks to this, the fixed tiles do not even have to be supported. The only caveat: this method of fixing the slabs is only suitable for rooms with a flat ceiling surface. In cases with uneven surfaces, it is not suitable.
When gluing tiles, it is important to monitor the occurrence of excess glue and remove it in a timely manner.
When working in the bathroom, it is important to use adhesive with high humidity, specifically designed for such areas. In addition, he must:
- have excellent adhesion;
- be environmentally friendly;
- applies equally reliably in both thin and thick layers.
Surface preparation
The ceiling must be ready for gluing work . The reliability and durability of the work depends on how well the craftsman treats the surface.
In addition, preliminary preparation significantly influences how the ceiling will ultimately look - whether the slabs will lie evenly and whether they will not bulge.
Preliminary preparation includes:
- complete and final removal of the old finish (whitewash must be washed off with soap and water, paint must be removed with a spatula);
- temporary dismantling of the chandelier (with insulation of the remaining wires);
- applying primer to the dry ceiling in several layers.
Features of applying the primer should take into account the type of ceiling in the apartment. If it is concrete, then a special concrete contact compound is perfect for the job. A deep penetration agent will be required when preparing a gypsum ceiling.
Proper preparation of the ceiling affects the quality and reliability of the work performed
In damp rooms, the choice should be in favor of a primer with an antiseptic, which, among other things, will prevent the appearance of microorganisms.
It is also possible to glue tiles directly onto a concrete ceiling, but it is still not recommended. After all, the primer gives a much more stable grip.
The case when the slab is glued directly onto the whitewash is rather an exception. To do this, it must be in perfect condition and adhere perfectly to the ceiling. This ceiling must first be primed. However, one cannot count on the longevity of the results of gluing tiles in such conditions. This technology is permissible only in cases where the apartment is undergoing quick cosmetic repairs.
Another point in preparing the surface is making markings, according to which the tiles will be glued.
- Moreover, the master can choose one of two options that suit him most:
- straight;
With direct marking, the installation of the slabs will be carried out strictly parallel to the wall. Lines should be drawn from opposite corners of the room to the center. To make the result more accurate, you can string cords under the ceiling. The point of their intersection will be the center of the room (as a rule, it coincides with the place where the chandelier is attached). When gluing tiles, you must strictly follow these markings, especially if the geometry of the room is far from ideal.
Diagonal markings will allow you to achieve very interesting results. The tile will be attached from the center and along the formed diagonal lines. In order to accurately apply such markings, the master will again have to use cords that allow you to accurately determine the center of the ceiling.
Required tools and materials
To carry out the work you will need:
- stable ladder;
- sharp painting knife for cutting material;
- convenient jar for glue;
- a brush for applying it to the tile;
- tape measure, ruler and cords for measurements when marking markings on the ceiling;
- a bucket of soapy water - for washing the ceiling - and a scraper (for removing old wallpaper and paint).
Materials: pre-purchased tiles in the required quantity, baseboards along the edges of the walls, as well as primer (to prepare the ceiling for gluing work).
Gluing ceiling tiles: step-by-step instructions
Even those who do not have great skills in construction work can cope with the installation of tiles. It is important to prepare the tools and think in advance about the placement of the tiles on the ceiling - so that they harmoniously combine with the wallpaper, increase the space of the room and play up their design as effectively as possible.
Even before starting work, it is necessary to open the packages with tiles, and spread the material on the floor so that it rests at the temperature of the room where the pasting is planned.
In the meantime, the master can begin to apply markings to the ceiling - using diagonal or straight lines, carefully outline the entire space, identifying the places where each of the slabs will be glued. After this, you can begin the most important thing - installing the slabs.
The space of the room in which renovation is planned can be played out using ceiling tiles
An important point: you should start gluing not from the corners of the room, but from its center. The starting point, as noted above, can be a place near the chandelier.
The process is quite simple: a drop of glue is applied to the middle of the inside of the tile, as well as to its edges. Next, the tile is pressed against the ceiling - in accordance with the drawn lines.
It is not recommended to press hard on the plates - the risk of damaging the material is more than high. When gluing, it is important to press the tiles against each other as tightly as possible, to prevent gaps from appearing, and if glue protrudes somewhere, remove it immediately - before it begins to dry out. Unfortunately, it will no longer be possible to remove traces of glue without damaging the new ceiling.
As work progresses, it is inevitable that small joints will occur between some of the tiles. These places should be sealed with sealant (white acrylic is suitable; for the bathroom it should be silicone so as not to allow moisture to pass through).
The final touch should be the installation of plinths along the edges of the walls. It is also secured with glue, but for greater strength in some places it is worth using small nails. This is a temporary measure: the next day the nails are taken out, and the remaining holes are sealed with acrylic putty.
After finishing the work, you should close the room and not enter it for three to five hours so that the slabs are completely fixed and the glue is dry. It is important that there are not only drafts in the room, but even a slight breath of air. This must be ensured before work begins.
With all the advantages of ceiling tiles, they also have weaknesses. The service life of the material may not be long. First of all, this applies to inexpensive options that quickly turn yellow in the sun. In addition, ceiling tiles are highly flammable. And this makes it unsafe in terms of fires. Also, ceiling tiles are not the best option for those apartment owners who are regularly flooded by their upstairs neighbors.
However, these “disadvantages” of the material are by no means a reason to completely abandon its installation. After all, there are a lot of “pluses” too. It is only important to take into account all the nuances during the renovation, and when choosing tiles in a store, do not chase the cheapest options.
Expanded polystyrene tiles are one of the most popular types of ceiling coverings. Therefore, the question of how to glue ceiling tiles is of interest to many novice craftsmen who plan to do the finishing work with their own hands.
How to choose tiles for finishing the ceiling?
The great popularity of this decorative material is due to its following advantages:
- simple installation - anyone can handle gluing tiles;
- easy care - foam tiles can be washed with any non-abrasive product;
- the ability to hide small defects in the base;
- speed of finishing - a small base (for example, a ceiling in a bathroom) can be easily completed in a few hours;
- low cost - prices for ceiling tiles are quite low, so everyone can afford such finishing.
To successfully complete repair work, you need to answer 3 questions:
- how to choose a facing material so that it lasts for many years;
- how to glue the selected finishing option so that it does not fall off;
- how to properly glue ceiling tiles so that the ceiling is not only reliable, but also attractive.
In the domestic market, ceiling tiles are presented in a wide range. Various models differ in color and texture, production technology, geometric dimensions, quality of polystyrene foam and cost. Therefore, before gluing tiles to the ceiling, you need to choose the right finishing material.
According to the production method, ceiling tiles are divided into 3 types:
- Injection. It has low density and, accordingly, strength, which is why it costs less than other types of finishing. Its thickness is no more than 14 mm. Such tiles are produced by sintering foamed plastic, which is why they are called foam tiles.
- Stamping. It is characterized by a denser structure and mechanical strength. The thickness of the product is 6-8 mm. It is made by pressing polystyrene foam at high temperatures.
- Extruded. It is the most expensive and highest quality tile. With high density and strength, its thickness is about 3 mm, which allows you to save extra millimeters of free space during finishing. During the production process, the tiles are covered with a laminated layer, which not only improves its appearance, but also protects it from the harmful effects of moisture. This allows the material to be used in rooms with high humidity (bathroom, kitchen).

Having chosen the appropriate type of product, its color and pattern, you need to check the quality of the material and its geometric dimensions. The first step is to inspect the edges of the sheets - they should be dense and consist of small granules. The smaller the granules, the better. Then the strength of the material is checked. To do this, you need to take one element from the selected batch by the edge and shake it a little. If at the same time it does not deform or break, then its quality is good.
Each tile must have the correct geometric dimensions. For example, if it is a square, then all the edges should be the same length, and the corners should be 90°, that is, they should not be rounded or flattened. Only in this case will you be able to finish the ceiling without seams.
Choosing adhesive for ceiling tiles
When answering the question of how to glue ceiling tiles, one cannot ignore the glue, which is the connecting link between the base and the finishing material. The adhesive composition for ceiling cladding must have the following properties:
- strength and reliability;
- quick setting;
- good adhesion;
- environmental safety;
- the ability to lay down both thin and thick layers.

If everything is more or less clear with the first four points, then we need to dwell a little on the last one for clarification. Most old-style apartments do not have flat ceilings; they can have height differences of more than 15 mm. How to finish in this case? There are two ways to get out of this situation: level the ceiling before cladding or use glue, which can be applied in a thick layer. The first option is not optimal, since it requires additional financial investments from the contractor. Therefore, the best option is to apply the adhesive composition in a thick layer, thereby simultaneously leveling and finishing the ceiling base.
Gluing tiles to a flat ceiling can be done using adhesives such as liquid nails, Moment, Eco-naset or Titan. They have excellent adhesion to any coating, be it plaster, wallpaper or other material, and fast drying time, which greatly facilitates installation work.
What should I use to glue foam tiles to an uneven ceiling? In this case, the best option is ordinary putty and glue for tiles or drywall. These compounds can be applied in a layer of up to 40 mm, thereby leveling even large differences in height.
Preparatory work
Any repair process begins with preparatory work. And finishing the ceiling with tiles is no exception in this regard. Before gluing this material, you must do the following:
- choose a laying scheme;
- calculate the required number of tiles;
- prepare the ceiling for finishing.
There are different ways to place tiles on the ceiling relative to the walls, the most popular are (Fig. 1):
- in rows;
- in a checkerboard pattern (with a shift);
- diagonally.

Each installation option allows you to create a specific pattern that is best suited for a specific design idea.
To calculate the required amount of finishing material, it is necessary to make drawings on a sheet of checkered paper at the selected scale, which indicate the dimensions of the room and the layout of the tiles. It should be taken into account that the standard dimensions of ceiling tiles are 50x50 cm. You can start laying from the center of the room or from the wall opposite the window. If there is a chandelier in the center of the ceiling, then it is recommended to start finishing from there (Fig. 2).
After this, the number of intact tiles and the number of elements that will be cut are calculated from the drawing. If there are gaps near the walls, the width of which will be less than the width of the tiles (less than 25 cm), then in this case 1 element will be used to cover two rows. If the size of the gaps is more than 25 cm, then you should buy tiles at the rate of 1 piece per 1 row.

How to glue tiles so that they don't fall off over time? To do this, it is necessary to properly prepare the finishing surface. First, the ceiling is cleaned of poorly adhering old finishes and treated with a deep penetration primer. If the base has deep cracks and chips, they should additionally be repaired with putty. Before finishing, it is recommended to prime a ceiling made of chipboard or plywood with a special mixture with abrasive additives that increase the adhesion of the material.
After the primer has dried, gluing can be done.
How to beautifully cover a ceiling? First you need to correctly draw the finishing base and mark its center. To do this, take two cords that are pulled diagonally from opposite corners. The point of their intersection will be the center of the room. Then they retreat 25 cm from this point (half a tile) and draw lines along which the first element will be glued.
DIY tile gluing
- Before gluing the tiles, you need to prepare the following tools and materials:
- stepladder;
- spatula if a drywall mixture or putty will be used as glue;
- roulette;
- stationery knife;
- mounting gun;
- tiles;
- adhesive composition;

How to apply adhesive to tiles depends on what composition will be used. If gluing will be done using putty or cement mixture, then the glue is applied pointwise so as not to increase the weight of the finishing material. If you plan to use “Titanium”, liquid nails or another similar composition, then it is applied along the entire perimeter of the tile with a thickness of 20-30 mm, and a small spot is also made in the center.
After applying the glue, you need to leave the tiles alone for a few minutes so that the glue dries a little. After this, the finishing material is applied to the ceiling according to the markings and pressed with uniform force over the entire area. Before installing each subsequent element, it is applied dry to its place to see how it will lie and whether it will spoil the design. If necessary, the tiles in the last row are trimmed with a stationery knife on a hard surface. At the last stage of finishing work, the ceiling plinth is glued.
Before gluing the tiles, all windows and doors in the room must be closed to prevent drafts, because they negatively affect the strength of the adhesion.
If for some reason small cracks have formed in some places, then you should not be upset, as they can be sealed with white sealant. After the sealant has dried, it will need to be painted over.
There is nothing complicated about gluing ceiling tiles. The only thing that can cause difficulties is marking the ceiling, since it must be done as accurately as possible. If everything is done correctly, the ceiling, finished with your own hands, will look no worse than if the installation work was carried out by a repair team.
In the interior of the kitchen
Along with various options for finishing the ceiling, which require considerable investments, time and the involvement of qualified specialists, there is an equally common and well-proven method.
In a relatively short time, having selected a suitable tile for the room and prepared the ceiling for work, it is easy to understand this simple matter. Also in the article you will find information on how to stick products diagonally.
Finishing
Installing tiles on the ceiling begins with the correct selection of high-quality polystyrene products.
Choice
So:
- The geometry of the square tile must correspond to the geometric parameters, that is, all angles must be 90 degrees, and the sides, naturally, must have equal lengths. Without this, it is impossible to achieve high-quality joining - however, the cracks can be sealed with putty or acrylic sealant, but we think no one needs extra dances with a tambourine.
- The quality of the raw materials and the structure of polystyrene are assessed; the relief of the product must be uniformly clear and even.
- Homogeneous fine polystyrene grains, without voids, are an indicator of quality

- Tiles made in violation of technology are characterized by the presence of defects (irregularities, cavities, sagging or depressions) on the surface of the relief, as well as rounded or wrinkled corners, crumbling edges. It is impossible to lay and join such tiles efficiently, without gaps.
- Stickers of products with flaws are used to fill small areas along the walls and in inconspicuous places, if it is possible to cut out the defective part.
Features and types
Modern polystyrene foam tiles are a universal material for finishing ceilings in different rooms:
- It is especially popular in the living room, bedroom and office. Here this design looks very advantageous due to the visual increase in ceiling height.
- Foam products are used to decorate the ceiling in the kitchen, but a protective laminated coating is applied to it.
- When planning the decoration of a children's room, the material is selected with a special sound-absorbing layer.
- For the bathroom or toilet, smooth white or slightly corrugated tiles are used.
Such foam products are made in one of three ways, which determine its properties.

May be:
- Pressed from foam plastic. To make it, polystyrene blocks are taken and the required parts are obtained by stamping. It is different:
- low density;
- low weight;
- thickness ranging from 6 to 8 millimeters.
- Extruded(cm. ). Pressed from polystyrene strip. This type has a higher density, the surface is quite smooth and shiny, and imitates the appearance of a surface made of marble, wood and other materials.
- Injection. In this case, the raw materials are sintered in special molds without destroying the granules. Its surface acquires beautiful and clear relief patterns, the thickness of the tiles is from 9 to 14 millimeters. It is made with straight shapes around the perimeter, and after gluing to the ceiling, the seams are practically invisible.
Calculation and purchase of necessary materials

- The number of tiles for a specific room can be calculated by dividing the area of the room (length*width) by the area of one product. This manipulation is usually promptly carried out by the seller, so you can only stock up on the size of the room before purchasing.
- The most common size of ceiling tiles is 50 x50 cm. A typical factory package contains 1 sq.m. (4 pcs.), or 2 sq.m. (8 pcs.).
- Considering the possibility of manufacturing defects or defects during installation, especially if ceiling tiles are installed diagonally, depending on the area of the room and installation method, you should purchase 5-10% more material.
- It is preferable to purchase tiles from one production batch - the batch number, number of meters and date of manufacture must be indicated; instructions for this are included.
Advice: When purchasing tiles, it is logical to purchase a ceiling plinth made from the same material, similar in design, suitable in width and color in the required quantity.

In the photo - special glue
Gluing ceiling tiles also requires purchasing the optimal adhesive.
How to choose the right glue
Ceiling tiles can be glued to concrete, plaster, brick, wood, metal, plasterboard and other substrates. produced for facade adhesives, tile adhesive mixtures, liquid nails, mastics, silicone sealants, etc.

Attention. Adhesives containing organic solvents (acetone, gasoline, ethers, etc.) dissolve polystyrene.
High-tech assembly adhesives (Titanium, Moment, etc.) on a polymer base have been developed specifically for polystyrene. They combine well with any ceiling surface and securely hold the tiles.
- When selecting adhesive, first of all, you need to focus on the material from which the tile you purchased is made. Probably the most versatile composition will be “liquid nails” glue.
- The price of polymer adhesives is quite affordable.
- Ceiling tiles are glued onto a dry, clean, even, durable and primed base.
Tool
Before gluing ceiling tiles, you should stock up on everything you need:
- Tapping cord for surface marking. Sold in construction stores, the kit also includes chalk, which is poured into a container and colors the thread for marking landmarks on any surface;
- Construction knife It cuts tiles perfectly, it is better to have on hand an option with a blade width of 25 mm, it is much tougher and more convenient to use. In the kit, purchase spare blades, as they become dull during operation;
- Adjustable square- an indispensable tool if diagonal tiling is done. This device is fixed at any angle, which greatly simplifies the marking of tiles and eliminates errors during the cutting process;
- Caulking gun. It is used to apply liquid nails that will be used for gluing. The tool costs a little, but greatly simplifies and speeds up the workflow;
- Tape measure and pencil used when taking measurements and markings. You can use a long ruler, but a tape measure is more convenient;
- Since you will have to work on the ceiling, you need a ladder or a table. The height of the device should be comfortable so that you do not rest your head on the surface and do not stand with your arms outstretched.
Ceiling preparation
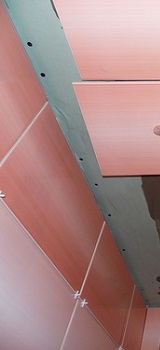
When carrying out repairs in old premises, use a rigid metal spatula to apply the ceiling base (if it is weak and peels off). There should be no peeling, loose areas, as well as crumbling seams and potholes.
- The cleaned ceiling of both the old and new premises is swept with a broom (vacuum cleaner) and treated with a primer.
- The dry, primed ceiling is inspected to identify the largest defects (displacement of floor slabs, cracks, potholes, concrete sagging and other pronounced troubles).

- All irregularities of more than 3-5 mm are leveled using liquid mixtures (read more). Ceiling tiles can hide potholes and sinks of smaller sizes.
- During installation, more careful leveling of the base is required.
- After the mixtures have hardened, the repaired areas must be primed again. Wooden, plywood, plasterboard and other ceilings are also subject to primer treatment.
- The primed ceiling base provides more reliable interaction with any adhesives.
Before gluing the tiles to the ceiling, its location is determined.
Ceiling markings

How can you position
In old-style rooms it is very rare to find a room with regular geometric shapes, so in such rooms it is more rational to use the diagonal gluing method, in which the tile gluing starts from the center of the ceiling or from the installation point of the central chandelier.
How to tile diagonally? It's quite simple!

- The first step is the center of the room. This point is located at the intersection of two construction cords stretched from diagonally opposite corners.
Advice! There are often cases when the center of the ceiling and the location of the main chandelier do not coincide. In this case, you should be guided by the lamp, although exceptions are possible.
- Next, we decide what we will have in the center - a solid tile or a butt joint. The first option without cutting the tiles is only possible with the chandelier removed.
- Next, draw two lines strictly perpendicular to the walls and each other, drawn through the center of the ceiling. They are the ones who will guide us at the beginning of our work.

How to glue diagonally
- In the installation option from a chandelier, the corners of the four tiles are cut off for fastening and power supply of the lighting fixture. At the next stage of work, this place is covered with a decorative overlay of the chandelier.

How to properly glue ceiling tiles - make the cutout so that it is hidden under the decorative overlay of the chandelier
In fact, the main difference between diagonal installation is the trimming of all the outer elements, while the next option allows you to install intact tiles against at least two walls.
Faster and easier installation of slabs - parallel to the walls. It is produced from the wall, which is the most noticeable in the room. This installation method is practical and convenient in small spaces.
Installation

How to stick it correctly
If installation is carried out in winter, then the tiles should lie in room conditions for at least two hours.
So:
- Before gluing tiles to the ceiling, you should carefully read the instructions for using the adhesive composition. The gluing processes for adhesives from different manufacturers may vary slightly.
- Some manufacturers of adhesive compositions recommend allowing the adhesive to partially swell for a few minutes after applying the composition to the surface, and only then aligning the parts with the ceiling. Technologies from other adhesive manufacturers do not require this time.
- Recommended for each individual type of polystyrene tiles, the adhesive composition is applied to the tiles and ceiling dotted, dotted or completely. Some types of tiles have special areas on the mounting side for applying glue.
- Using a napkin or foam sponge, the tile with applied adhesive is pressed tightly along the entire perimeter to the ceiling so that there are no traces of pressing on the front surface.
- Exposed adhesive is removed immediately with a dry and clean cloth.
Sequence of gluing
The first tile is fixed exactly according to the markings, in the center of the ceiling or the location of the chandelier. Following the markings, subsequent products are mounted tightly to the first plate.

Perfectly fits into country style
To comply with the technology, during the installation process it is necessary to control the alignment of the sides and ensure compliance with the pattern, if any.
On the installation side of some types of tiles there are special markings in the form of arrows. When installing such tiles, the arrows should have the same direction, as in the video.
So:
- To avoid displacement before the glue polymerizes, it is convenient to temporarily fix adjacent ones with each other using masking (paper) tape.
- Rows of slabs adjacent to walls are, in most cases, trimmed. In such cases, measurements are first taken on the ceiling using a tape measure and transferred to the tiles with a pencil. After cutting with a construction knife, the desired fragment is tried on at the designated location and fixed with glue.
- At the next stage of painting work, a plinth is installed at the junction of the ceiling and walls. It is possible to attach the plinth with the same glue used to glue the ceiling tiles, but it is more effective to use a special adhesive putty that can hide all the gaps between the plinth and the relief.

Installation of skirting boards
- The joints between the plates are filled, if necessary, with white acrylic sealants. The use of silicone sealant is not recommended.
Care is carried out using a vacuum cleaner with a soft nozzle, grease traces are removed with alcohol, and other dirt is wiped off with an office washing eraser. It is undesirable for some types of products to get water.
Knowing how to glue ceiling tiles, you can do all the work with your own hands quite efficiently. You should first familiarize yourself with the work of professionals using a thematic video.
Among the numerous options for ceiling finishes, gluing foam tiles is distinguished by its simplicity and speed of implementation. The decorative qualities of the finished coating can be assessed as average, which is suitable for most apartments.
Types of material
Ceiling tiles are available for sale in several varieties. The differences relate not only to the pattern or texture, but also to such material characteristics as density, resistance to mechanical stress, thickness, colorability, etc.

Products are classified according to manufacturing method:
- Extruded. It has a smooth, non-grainy surface. Good density of the material allows you to reduce the thickness of individual elements to 2-3 mm. Extruded tiles, in addition to the traditional white color, can be decorated in various shades. Imitations of natural materials such as marble or wood look especially beautiful. Painting of elements is carried out in factory conditions: if you try to do it yourself, the paint begins to “roll off”. Foamed polystyrene is used as the manufacturing material. Due to their light weight, products of this type are easy to install and care for. The price for extruded products is quite high.
- Foam or stamped. It has a looser structure with clearly visible grains. Due to the presence of pores on the surface, it becomes dirty quite quickly. In order to create an additional barrier to dirt, paint with acrylic dispersion is used. Stamped plates have a thickness of 6-12 mm. To apply a pattern to a foam surface, a pressing method is used. The fragility of products must be taken into account before gluing ceiling tiles. Considering possible losses, when purchasing material it is recommended to make a reserve of at least 10%. Stamped ceiling panels are considered the cheapest.
- Injection. During manufacturing, polystyrene foam is baked in special matrices. This type of material is distinguished by a well-defined pattern. The cost of injection products is average. It's easy to work with.

For a beginner who has no experience in construction work, it is better to choose extruded polystyrene products for gluing the ceiling with foam tiles. Next in terms of quality are injection panels. In last place are stamped tiles.
The following can be said about the appearance: all ceiling tiles most often look like 50x50 cm squares. Rectangular elements are less common. Based on the type of joining, products are divided into seamless and with seams. As for the decorative design of the elements, they can be geometric, floral, without a pattern, with a variety of textures.
How to calculate the required amount of material
Before covering the ceiling with tiles, it is necessary to accurately determine the required amount of material. This is a simple task, given the fixed dimensions and square configuration of the elements. A simple calculation shows that to cover 1 m2 of flooring you will need 4 tiles. Knowing the total area of the ceiling, you can determine the amount of finishing material by simply multiplying the area by 4.
For example, you can calculate how many ceiling tiles are needed for a room measuring 3.2 x 2.8 m. Multiplying the width and length, we get an area indicator of 8.96 m 2. You need to round up: it comes out to 9 m2. Next, determine the number of ceiling elements - 4 pcs x 9 m2 = 36 pcs. It is recommended to always take a little more material to account for trimming and unplanned losses. The specific number of spare elements depends on the installation scheme, but usually it is 10-20% of the total quantity.

To achieve the external aesthetics of foam ceilings, you need to pay attention not only to the external design. Another important point is the geometry of the products. All elements must be the same size, thickness and even 90 degree angles. The drawing should have good clarity, without any layers on the side ends. When purchasing pressed slabs, it is recommended to choose models with the smallest grains possible.
Glue selection
The following agents are used as a fixing agent for gluing ceiling tiles:
- Glue. We are talking about such compositions as “Titan”, “Naset”, “Moment” or liquid nails. The holding properties of these compounds are very good. The speed of gluing is limited by the need to maintain a pause of 10-15 seconds after laying each element. The Moment is “grabbed” a little faster.”
- Adhesive mastics for ceiling tiles. They have a pasty consistency and are packaged in small plastic buckets. These compositions are more convenient: they are odorless and ensure instant adhesion of the smeared element. As a result, the process of finishing the ceiling is carried out without any hitches.
- Gypsum putty. This version of the installation material is usually used in cases where the surface to be finished contains noticeable defects (for example, differences at the joints between ceiling tiles). If the irregularities are small (up to 5 mm), finishing putty is used; if they are significant, starting material is used.

It should be understood that it is impossible to smooth out too large differences with ceiling tiles. In such cases, it is better to fully level the ceiling, or use hanging systems (plasterboard, tension, Armstrong).
Preparatory activities
The durability of the finish largely depends on the quality of the procedure, how to prepare the ceiling for gluing tiles. Before covering the ceiling with ceiling tiles, the surface of the ceiling must be completely cleaned of the previous finish - wallpaper, whitewash, paint, putty, etc. To make it stick better, pre-wet the entire surface with water. In cases where the old paint or putty adheres firmly, it can be left. It is also necessary to knock down all protruding areas using a pick or hatchet.

All cavities found during the preparation of the ceiling for tiles are sealed with starting putty. To fill the seams between individual floor slabs, use a special composition “Perfix” or tile adhesive. The cleaned surface must be impregnated with a primer: it washes away any remaining dust and helps improve the adhesion of the base. It is recommended to treat concrete slabs with “concrete contact”, gypsum bases with any deep penetration impregnation. At this stage, there is a pause in the work to allow the primer to dry completely.
Layout diagram
There are two ways of gluing ceiling tiles - regular and diagonal. Diagonal placement is more beautiful, but requires more material. The fact is that the remaining trimmings cannot be used anywhere. However, the finish obtained in this way does not have pronounced seams.
It is most convenient to start gluing from the chandelier. This makes it possible to fit it organically into the skin: the holder is placed at the intersection of 4 elements that only need a little trimming. If the room has lighting without a main central chandelier, gluing begins from one of the walls of the room. It is recommended to choose the one opposite the front door. This will make it possible to place the last cut row above the head of the person entering the room, which will somewhat hide the discrepancy in size.

Gluing a chandelier will require preliminary marking. The easiest way is with a square room: the center is determined, and work begins from there. This is done using a painting cord stretched between opposite corners. The intersection point of the broken lines will be the place where the first slab is laid. If a parallel placement scheme is used, two guides are also driven through the center to opposite walls.
Two other marking lines connect the installation start point with the nearest walls. Taking this parameter as a guide, a drawing of squares is made. To obtain guides for gluing squares, you need to draw diagonal lines. It is along them that the side of the first row will be aligned. If you position the first strip of tile as correctly as possible, further finishing will not encounter any obstacles.
Gluing technique
The main advantage of foam tiles is the speed of their installation, without the use of special lathing or frames. Unlike a conventional ceiling screed, this type of finishing can be completed in one working day. Smooth bases can be covered with a special glue, applying it in a thin layer.
If there are individual differences on the base, then ordinary mounting adhesive will not help here: the tiles simply will not stick to the surface of uneven areas. There is not always time and energy to carry out labor-intensive leveling activities. Moreover, ceiling tiles are often used when carrying out cosmetic repairs in rented apartments or at various social facilities. Therefore, it is not very wise to invest large resources in finishing.

Putty or drywall adhesive usually helps to stick ceiling tiles onto an uneven ceiling. These solutions have good adhesive characteristics. When starting to implement the procedure of how to properly glue ceiling tiles, you need to check all purchased products for the same color and size. Sagging and defects found on the edges are cut off using a stationery knife.
Installation on a flat base
The procedure for how to properly glue foam ceiling tiles onto a flat surface:
- Glue is spread on the tile in a thin strip around the perimeter and diagonally. There is no need to spread it too close to the edge.
- The part is laid according to the markings.
- The attached tile must be suspended for a while until the glue sets.
- Install the next panel in the same way. It must be attached to the side of the first element. If there is a drawing, it is combined. When docking, it is important to maintain precision and accuracy, avoiding the formation of differences.
- The same algorithm is repeated when working with other parts.
- If there is a need for adjustment, tile cutting is carried out on a stable table.

The whole procedure of gluing tiles to the ceiling is very quick and simple. The main thing is to achieve precise joining and immediately wipe off any glue that comes out at the seams. To make the joints as tight as possible, it is recommended to use a wooden plank when moving the next tile. If you do this by hand, dents may remain on the surface of the squares.
Gluing foam tiles on a crooked ceiling
Curved surfaces cannot be shaped in the usual way. As a rule, in such cases, plasterboard glue or putty helps to glue the ceiling tiles. It is prepared in such a way that a paste-like mixture is obtained. To apply it to the ceiling, you will need a notched trowel to create grooves. The volume of solution applied depends on the degree of curvature, but it is better to use as small a layer as possible. It is recommended to apply no more than 1 m2 of ceiling at a time (for gluing 4 tiles).

This will make it possible to avoid premature setting of the solution: leveling the elements in this case will not encounter any particular difficulties. Plates are mounted on top of the spread mortar: they quickly stick and can be easily moved. After aligning the sides of the laid fragments, they are leveled on a plane using a rule or a building level. To do this, you need to press the square in the right place.
Having sealed the first area, smear the second, proceeding in the same way. When orienting the next slabs along the plane, you need to take the first section as a basis. If complete horizontality cannot be achieved, then you need to at least avoid sudden changes. If possible, it is better to prevent rapid growth of the adhesive layer: if its thickness exceeds 3-5 mm, there is a real threat of the structure’s finishing falling. If adhesive gets on the surface of the tile, it should be immediately wiped with a soft sponge. Upon completion of the procedure for gluing tiles to the ceiling, they go through the seams separately, filling them with the same putty.
Tiling is one of the most popular ways to finish a ceiling. It is economical and provides the room with an excellent appearance. At the same time, gluing tiles is not difficult, and you can cope with the task on your own, without resorting to the services of repairmen. The main thing is to choose the right type of finishing material, study all the nuances of finishing the ceiling and do all the work without unnecessary haste.
Types of tiles
First of all, you need to take into account that each of the finishing tile options requires its own approach.

Table. Types of ceiling tiles.
| Material | Advantages and disadvantages | Features of gluing |
|---|---|---|
| Foam tiles are the most popular of all types of ceiling tiles. There are several main types of it - stamped, cast, extruded; in addition, this type of finishing material generally has a wide variety of manufacturing options. From them, everyone can choose something that fits perfectly into the interior. | Gluing foam tiles is a simple process that does not take much time. On the shelves of any hardware store there are many adhesives that are suitable for this. The main thing is not to use glue with a solvent, which will corrode the foam. In order to fix the polystyrene foam tile, just grease it with glue and apply it to the ceiling surface for just a few seconds. |
| Acrylic is one of the relatively new materials that continues to gain popularity in a variety of areas, including in the production of finishing materials. Such tiles expand the space; they visually enlarge the room. | Acrylic tiles are also a lightweight finishing material, so there are no big problems with them. To glue it, it is enough to purchase an adhesive that holds the plastic well and grabs the surface of the ceiling. |
| This material needs no introduction, just as everyone is well aware of its properties. Wood is environmentally friendly and looks very attractive, and after special treatment it can last a very long time. It can be successfully used to decorate a wooden house or to create a designer textured interior in the same city apartment. | In order to extend the life of the tile, before installation it must be impregnated with a special composition to protect it from moisture and mold. |
| Ceramic tiles are very strong and durable, but their main advantage is that they are highly resistant to moisture. Therefore, ceramics are ideal for finishing the ceiling in the bathroom. Ceramic tiles can also be used to decorate a toilet, which is also most often covered with tiles. | With ceramic tiles the situation is more complicated than with foam or acrylic tiles. This material must be fixed with great care. The technology is the same as when covering walls with tiles: first you need to level the surface - for this you can use cement, rotband and putty. Then you need to outline the surface of the ceiling and finish it using a special adhesive for ceramic tiles. |
| This tile looks very impressive. It is also very durable, environmentally friendly and fire resistant. You should only use it to decorate the ceiling in an apartment if you are creating an exclusive and expensive interior (high cost). | Metal tiles are usually not glued, but mounted on a metal frame. This suspended ceiling is very durable and will serve faithfully for many years. |


Uneven ceiling: solutions to the problem
So, often those who want to decorate the ceiling with tiles are faced with a problem - if the ceiling is uneven, it will not be possible to stick it on so easily. But this issue can be solved if you know how to approach it. The simplest option is glue the tiles directly onto an uneven surface. As noted above, you can do exactly this with expanded polystyrene if the ceiling defects are not too large and the tiles can be positioned in such a way that they are fixed securely enough.
It is important to consider two points:
- you need to choose the right tile size taking into account the size of the ceiling unevenness;
- You should also carefully consider the choice of pattern - panels with a large relief image will be the best choice, since thanks to it, unevenness on the ceiling surface will not be noticeable.
Attaching the panels directly to an uneven ceiling is a simple, quick-fix option; it won’t take much time, and the result will look quite good.
Many people choose it because of its simplicity and complete the ceiling repair very quickly. At the same time, they have every chance to be satisfied with the result, because few of the apartment residents or guests will look closely at the ceiling. At the same time, a room with a ceiling decorated in this way will look great - of course, if everything is in perfect order with the floor and walls. Unlike the ceiling, they are constantly in front of your eyes, so it makes sense to pay attention to them first. It takes a lot of time and money to make high-quality repairs to the ceiling and walls, so you can save on the ceiling and even if it is uneven, stick tiles directly on it.
Prices for ceiling tiles
ceiling tiles

However, if you want to get a really high-quality result, You cannot glue tiles directly onto an uneven ceiling.. This applies primarily to tiles made of heavy materials - ceramics and metal, which will not adhere to such a surface. However, it is better to mount even light polystyrene foam tiles only on a flat surface. There are two main options to solve the problem: completely level the ceiling or install a special metal or foam frame on it, to which the tile will be attached.
Video - How to quickly glue foam tiles
Leveling the ceiling with putty
In order to level the ceiling using putty, you will need:
- putty knife;
- lighthouses;
- rule;
- grater.
The procedure itself can be carried out in 8 simple steps.

Then you can proceed directly to laying the tiles. Before doing this, it is enough to wait 3-4 days, but in order to be guaranteed to get a first-class result, it is better to start working in a week. In this case, the cement and putty will definitely adhere well, and even ceramic tiles or metal tiles will not be able to damage them.
Prices for putty
putty
Foam frame for gluing tiles to uneven ceilings
This simple method is suitable for rooms where the ceiling plane is generally flat, but there are small bulges on it. For example, in the case when the ceiling consists of several separate blocks, the joints between which are sealed with a compound in order to hide the cracks, while it protrudes from the plane of the ceiling. In this case, it will be impossible to glue the tiles over these joints.
In such a situation it is necessary:
- take sheets of foam plastic of suitable thickness and cut strips from it;
- stick them to the ceiling at a distance corresponding to the size of the tile (it will need to be glued in such a way that one panel is glued to two pieces of foam at once);
- In places where there are uneven spots on the ceiling, you need to make indentations on the foam strips with a knife.

At this point the frame will be ready, and immediately after that you can start gluing the tiles. When choosing the width of the strips, you need to take into account the sizes of the panels with which you are going to finish the surface, the same as when choosing the distance between them.
This method is less reliable than leveling the ceiling with putty, but its important advantage is its simplicity. It won’t take much time to create a foam frame, and you won’t have to wait a week - all the work can be done in an hour. Of course, if you are doing this for the first time, you will probably work slower. How much time it will take depends on the area of the room and how many irregularities there are on the ceiling and how exactly they are located.
In this case, you will not have to wait for the cement and putty to set, and the ceiling repair can be completed as quickly as possible. Moreover, it must be kept in mind that foam frame is only suitable for light tiles- for example, polystyrene foam. Ceramics or metal cannot be attached to it.
How to attach PVC panels to the ceiling?
On our website you will find detailed instructions for! You should also be interested in ?
Gluing ceiling tiles
After the ceiling is leveled, the process of gluing the tiles occurs in a standard manner. Let's look at its main stages using the example of finishing with foam panels.
Prices for foam tiles
foam tiles

The first step is to decide on the layout of the panels.
- Parallel to the wall: This is a simple gluing option, it is suitable if the walls in the room are smooth. In order to finish the ceiling, you must first glue a row of tiles along the wall, and then lay the next rows one after another.
- Pasting diagonally: This original finish looks very beautiful. In order to finish the ceiling in this way, you must first make markings. You need to pull two ropes between the corners of the room diagonally and thus find the center of the room. Then you need to draw lines along these ropes and after that you can start gluing.
- Diamond: in this case, it is necessary to measure several squares from the center of the ceiling and draw diagonal lines from each. The corner of the finishing tile should be placed in the center of the ceiling surface, and its sides along the lines.

Once the tile arrangement method has been chosen, you can begin to work.
- The first step is to make markings on the ceiling.
- Then you need to apply glue to the first tile along the perimeter, as well as crosswise along the diagonals, and press the panel at the desired point on the ceiling for a few seconds.
- After this, you need to glue the remaining tiles in the same way;
- When all the panels are fixed to the ceiling, you can putty the seams; another option is to fill the gaps with silicone sealant.
- The final stage is the installation of ceiling plinths.

It is worth keeping in mind another option - you can not glue the tiles, but fix them on a metal frame. This finishing method is also very reliable, and assembly of the structure itself will take less time than completely leveling the surface. For an uneven ceiling, this option may be preferable.
Prices for ceiling skirting boards
ceiling plinth
Some points may seem incomprehensible only if you are faced with the need to hang tiles for the first time. The main thing is to approach the matter thoroughly, choose high-quality finishing materials and take your time during the work process. Try it - and you will definitely succeed!
Video - Gluing ceiling tiles